NOTE: This page contains information on standalone SoapUI Pro that has been replaced with ReadyAPI. To try REST discovery, feel free to download a ReadyAPI trial from our website.
This article will go over our new “API Discovery” feature. This functionality allows ReadyAPI to quickly setup and generate tests in scenarios where your web services already have a front end integration. Here are the instructions on how to configure “API Discovery” functionality.
If you do not have an existing project, create a new project:
- Go to: File > New Generic Project
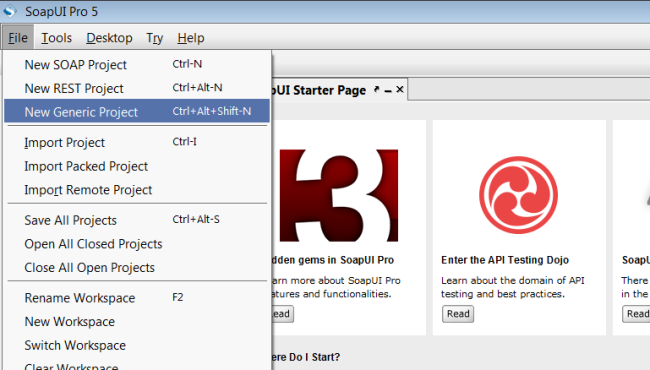
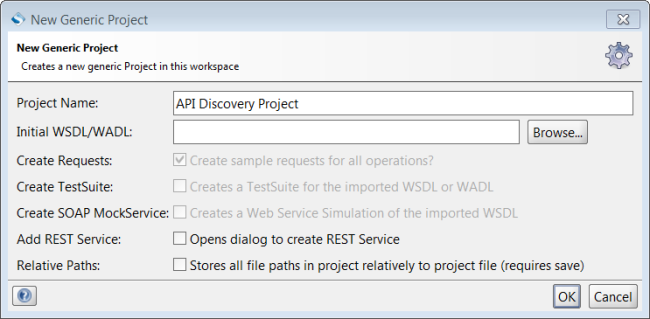
- Provide project name (e.g. “API Discovery Project”) and click OK
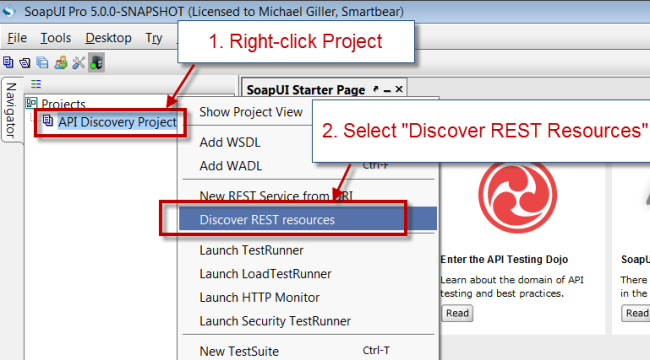
Now, you can right-click on your created or existing project and select “Discover REST Resources”
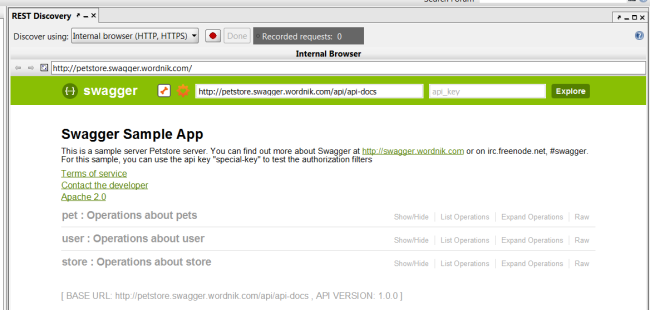
This will launch the “REST Discovery” window. Let’s quickly look at the window components:

-
“Discover using” dropdown – This provides the option for how you would like to record your traffic for API Discovery
-
Internal Browser: Allows users to browse the web and record traffic as you are browsing. This lets you record both HTTP and HTTPS traffic
-
Proxy (HTTP): Allows users to setup ReadyAPI as a listener for all throughput traffic. That functionality can only record HTTP traffic, but this can be used in the following situations:
-
Configure your mobile device to capture HTTP traffic and create test cases
-
Run API tests from another application to easily port test cases into ReadyAPI
-
Capture any other traffic (e.g. server-to-server communication) that ReadyAPI can capture and reuse
-
Record button – This will allow you to control which traffic you would record in ReadyAPI. For example, you can stop the recording, browse to the desired web page, then start recording traffic to be captured in your ReadyAPI tests
-
Done button – Once you finished capturing all your traffic, you can click “Done” proceed to next step and generate test cases
-
Recorded requests counter – This will give you a real-time count of your recorded tests. Keep an eye on this counter to make sure that traffic is actually been generated and that ReadyAPI is recording
-
Browser buttons – include “Go Back” ( ), “Go Forward” (
 ), and “Reload page” (
 )
)
-
Address bar – enter the URL directly to the page you want to browse to
So now, I would recommend unclicking the record button and browsing to the page that would then make your API calls. Personally, I find this functionality works really well with Swagger specification where you can make callouts to RESTful APIs. So, in our example, let’s browse to: http://petstore.swagger.wordnik.com/
So now I can browse to a specific operation. We will first add a pet and then retrieve it.
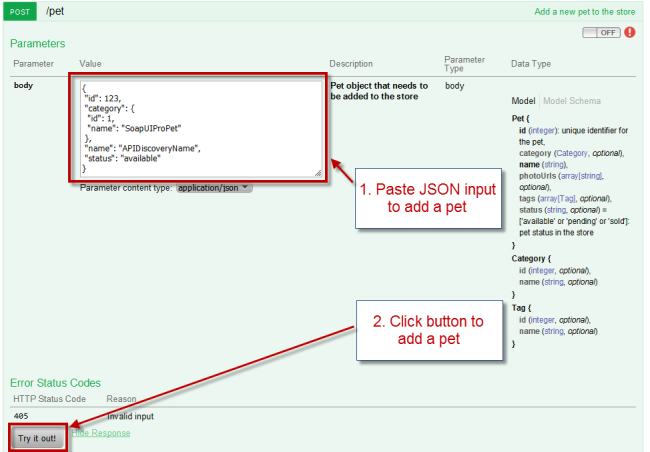
Choose “pet : Operations about pets” and then click on  operation. Paste the following JSON and then add a pet:
Input:
{

"id": 123,

"category": {

"id": 1,

"name": "SoapUIProPet"

},

"name": "APIDiscoveryName",

"status": "available"

}

\
\
Now you have created a new pet. Note that the “Recorded Request” incremented: 
Next, let’s click on  to retrieve the pet we just created.
Fill in the parameter petID as “123” to retrieve a pet and click “Try it out!”:
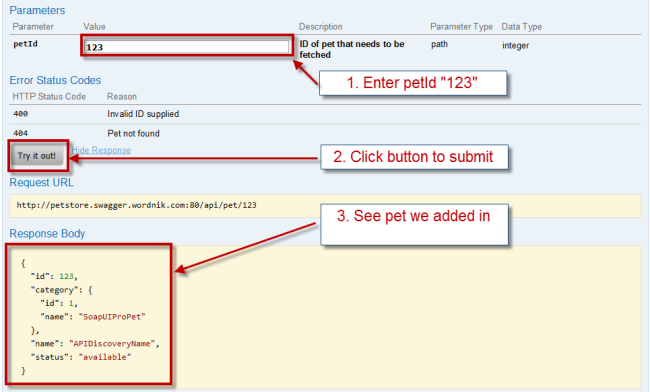
After retrieving the pet, note that “Recorded Request” incremented again: 
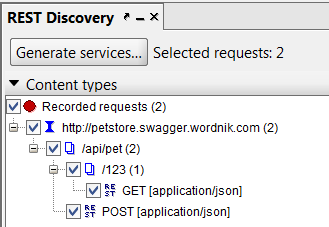
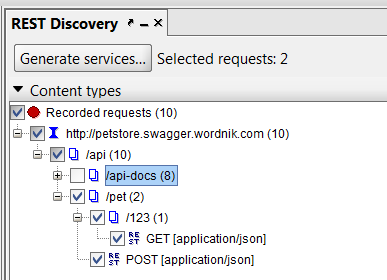
Now let’s click “Done” to process the captured data. This will bring you to a screen where you can filter captured traffic and specify which calls you would want to use to create your tests. So, if you followed all the steps above, you should have a nicely laid out description of your calls that look like this:
But to demonstrate this more, here’s an example where I recorded Googling for swagger example, loading Swagger page, and only then following the steps:
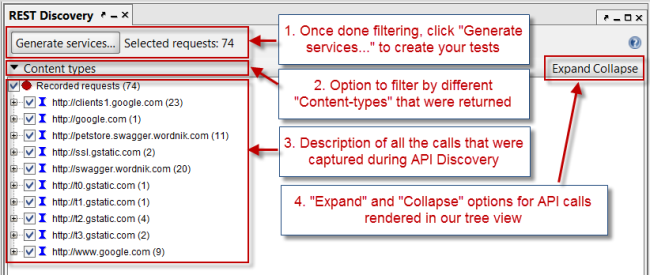
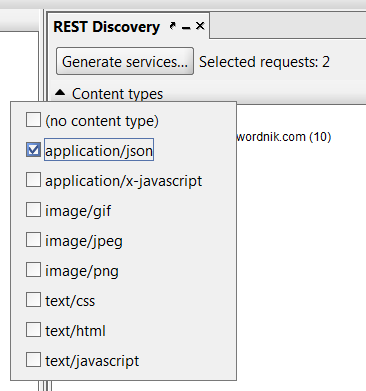
So what I can do is filter the traffic by Content type only for JSON traffic:
Then I can leave checked only the traffic for resources where I submitted calls:
Now we can click on “Generate services…” button, which will bring up the following window:
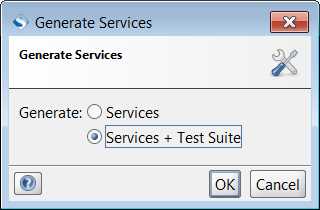
So these options are asking you whether you want to Generate:
- Services: Only create the “Interfaces” for REST APIs. RESTful Interfaces in ReadyAPI project are denoted by this icon -
 , and represent the definition and description of a RESTful web service. These interfaces are then used to create test steps that structure calls based in Interface description
- Services + Test Suite: Generates “Interfaces” and test steps in the order that the action was taken in the internal browser
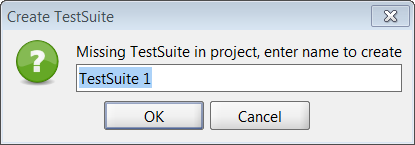
In our scenario let’s select “Services + Test Suite” option and click “OK”. Then you will either have a dropdown for creating the steps in existing test case. More likely though, you will have the prompts to create a new TestSuite:
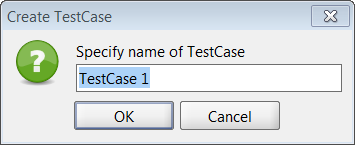
Followed by a prompt to create a new TestCase:
Then, everything should be created correctly and you’ll see this notification:
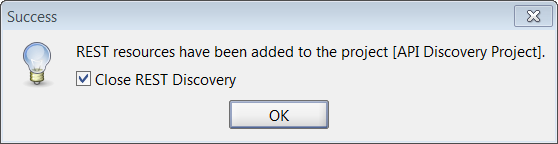
So click OK, and now you will have a project that includes the description of the calls and the steps in the test case:
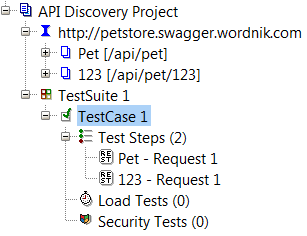
Now you can start adding assertions to your REST test steps and making the values in the steps dynamic with point and click testing functionality.