Beginners Guider to API Testing
Introduction
Hi there and welcome to SoapUI, the world’s most popular API testing tool. This eBook will attempt to get you started with testing your APIs using both SoapUI and SoapUI Pro; creating test cases, managing data, and executing them in your pipeline. APIs and web services continue to skyrocket in use - connecting application functions or data, integrating different systems, or finding new ways to businesses to monetize. By the end of this eBook, you should have a few new pieces of knowledge under your belt: What an API is, how to run a test against one, how to create assertions, and much, much more.
Why SoapUI?
First, we’d like to start off with the simple question of why SoapUI? Well, because 9 million+ developers have chosen it of course! But really - SoapUI Open Source has become the defacto standard for testing APIs in today’s service-oriented world because of its powerful, yet easy to use feature set. It pushed the adoption of API testing from a side-project to the mainstream - now being the main objective of many QA and development professionals.
Why SoapUI Pro?
SoapUI Pro is the paid version of SoapUI Open source, being used by thousands of Fortune 500 and startups to test their REST and SOAP APIs in a continuous fashion. It has allowed users of any technical skill-level to quickly create complex functional, regression, load, or security tests in just minutes - driving real data and scenarios into their testing suites. There are a number of advantages of SoapUI Pro over SoapUI Open Source that we’ll cover during this eBook, but for a quick synopsis you can compare the differences here.
The Basics of APIs
What is an API?
Okay, so we’ve been talking a lot about them already, but we wanted to everyone to be on the same page and quickly cover what exactly an API. An API, or Application Programming Interface, is a software intermediary that lets two or more applications exchange functions or data, essentially allowing software to “talk” to each other.
While many people associate APIs with web services, the definition is broad enough to include many other types of messaging including technologies that SoapUI supports: SOAP, REST, XML, JSON, MQTT, JMS, JDBC, or AMF
What’s a web service you may ask? A web service is a service available on a network that will allow other systems to communicate it using a standard or defined protocol. The “web” portion denotes that it will use HTTP/S to communicate. We’ll use API and web service interchangeably in the eBook but we do want to call out two specific web service standards: REST and SOAP.
REST APIs
REST stands for Representational State Transfer and is an architectural style that has become increasingly popular in scalable web applications. A “REST-ful” web service generally infers much less emphasis on strict formatting, and typically uses JSON (JavaScript Object Notation) formatted data in message bodies instead of XML, though much in a RESTful web service is left up to the designers to decide.
SOAP APIs
A SOAP API is defined as a receiver of an XML document and is also expected to respond with an XML document. All parameters that the receiver needs to be able to respond to should be a part of the XML document sent. SOAP APIs have fallen out of popularity lately due to their difficulty to integrate across organizations.
Functional API Testing
While SoapUI includes basic functional, load, and security testing, as well as mocking - this eBook will primarily focus on functional testing. Functional testing involves verifying the behavior of a system matches expected usability and functionality requirements.
An API works by using a series of requests and parameters to invoke a response, usually data, from another system or database. SoapUI works by sending requests and parameters against a system, and then verifying whether the response received is correct.
Pro Solution:
In SoapUI Pro, once a functional test case is created - it can be reused as a load or security test without need to do additional work. Try it free.
Challenges of API Testing
No Graphical User Interface (GUI)
APIs are primarily intended for computer-to-computer communication. Computers don’t need a user interface. This is a challenge if you’re a tester who is accustomed to testing applications designed for end-users, with a graphical interface you can click, drag, and in general manipulate an application or data visually.
Synchronous and Asynchronous Dependencies
APIs often rely on other APIs or back-end systems to function correctly, on time, in a sequenced fashion. If any of these steps or systems are out of place, assertions fail. These systems or data are often unavailable for testing due to cost, not being fully built, or other reasons.
Test Data Management
API testing verifies the business logic of an application layer, which often has millions of permutations and use cases. It can be difficult to propagate scenarios that sufficiently test API boundaries.
Request & Response
As stated before, APIs work on a request and response relationship. SOAP and REST APIs have different standards for their request and response calls that you’ll need to familiarize yourself with to be a successful API tester!
SOAP-based APIs use XML as a communication protocol. It must provide an XML descriptor (like a WSDL), that in machine terms, clearly defines all types of request elements the SOAP API will accept, and all types of response elements it will send back. This means that you, as a tester, must be able to read, understand, create, and update XML documents to be able to test a SOAP API.
With REST-based services, the request can be much simpler, for the most part only involving sending a URL (or URI) to the service. This request has a few standard aspects to it. First it has a unique base URL, a versioning folder, a method, a query, and a parameter. The responses returned are usually in JSON or XML format. These are, again, not formatted to be consumed by human beings, but instead our best read using tools like SoapUI Pro.
Pro Solution:
SoapUI Pro will assist you by creating requests and viewing the responses, visualizing both ends of the communication. Try it free.
Exploring An API
A common use case for SoapUI is “discovering” or “exploring” an unknown API. Oftentimes, RESTful services do not have descriptive definitions outlining their expected behaviors. Testers will have to poke and prod the API’s endpoint to explore correct behaviors in order to create assertions. Developers will also use this method when developing an application or service around an unknown, third-party API.
A tool is best used in this manner to explore an API, often times allowing for quick configuration of request queries and parameters. SoapUI is best tool on the market when it comes to exploring and managing your APIs endpoints. That’s where the UI comes in “Soap/UI/” - it’s like a UI for your APIs!
Pro Solution:
SoapUI Pro can quickly create synthetic data like passwords, emails, and addresses on the fly. Or easily connect a database or import a file. Try it free.
Getting Started
Running your first API test in SoapUI is easy. For first-time users, the process looks something like this:
- Set up SoapUI.
- Get started with your first project.
- Add a test suite.
- Add a test case.
- Add an assertion.
- Run a test suite.
Let’s begin!
Installation
SoapUI is a desktop executable available on all three major operating systems - including Windows, OSx, and Linux.
First, download SoapUI open source. You can also download a free 14 day trial of SoapUI Pro.
Your First Project
The web service we will use for this tutorial will be the GoogleMaps API - this API will return information from different cities around the world. It has a few moving parts, so it will be a good starting point for our testing journey.
You’ll need to sign up for an API key which can be found here: GoogleMaps API
Once you follow the steps to get your API key, it can be added to the end of the resource as a “key” parameter.

Add a Test Suite
In the top navigation menu, click the REST icon
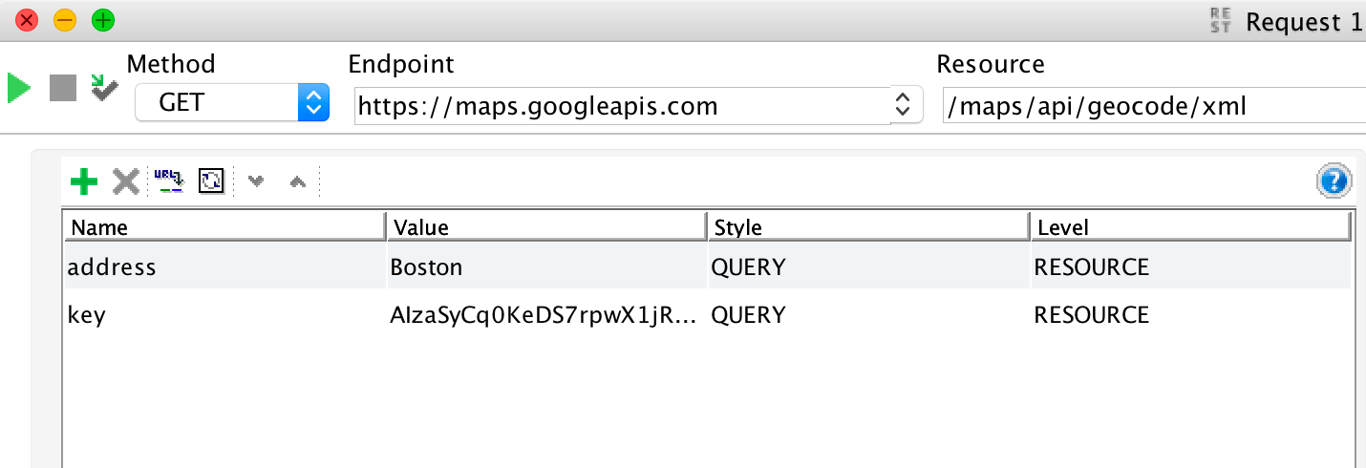
Enter in the following API endpoint from GoogleMaps
https://maps.googleapis.com/maps/api/geocode/xml?address=Boston&key={APIKey}
You should now see the request information on the left:
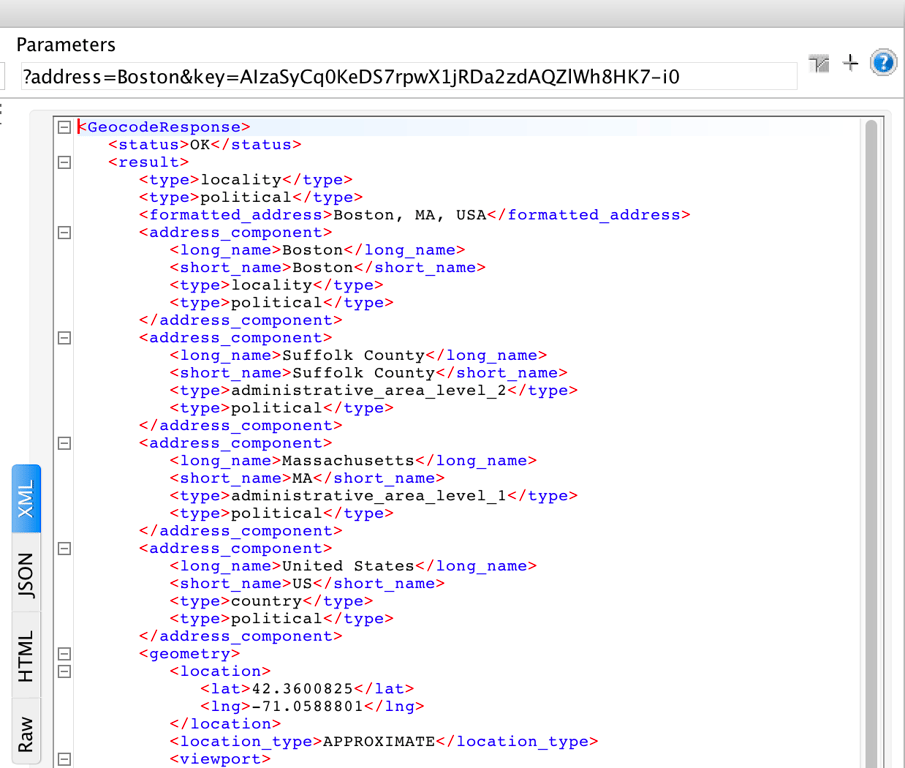
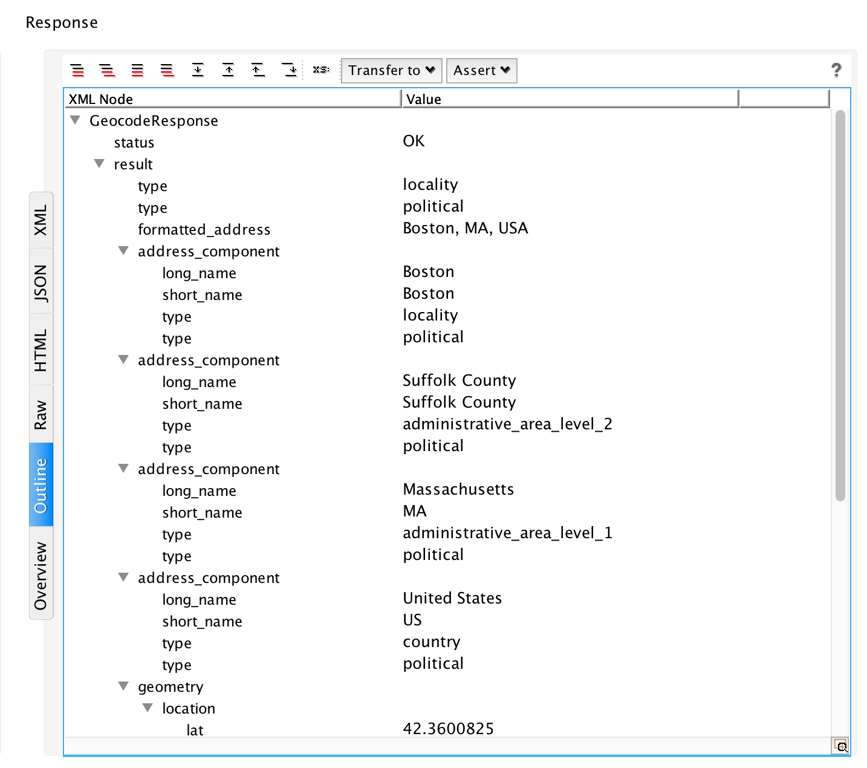
To get the response, we’ll click the green Play button. Our response is now displayed in XML format on the right.
Add an Assertion
To add an assertion, we’ll have to first create a test case in SoapUI Open Source. To do that right click the Request in the left-hand menu and click “Add To TestCase”. (fig.1)
Step, but we should be presented with a screen that looks very similar to Request Response view we had before, except for a few small changes – mainly the addition of an Assertion tab.
To add our assertion, we need to click the green + icon in the bottom left Assertion Window pane. There are a few different types of assertions we can make, but we’ll be using a simple “Contains” assertion. Click Add. (fig.2)
Now, we’ll need to enter in the text we want to verify. Our first assertion will be
FIGURE 1:
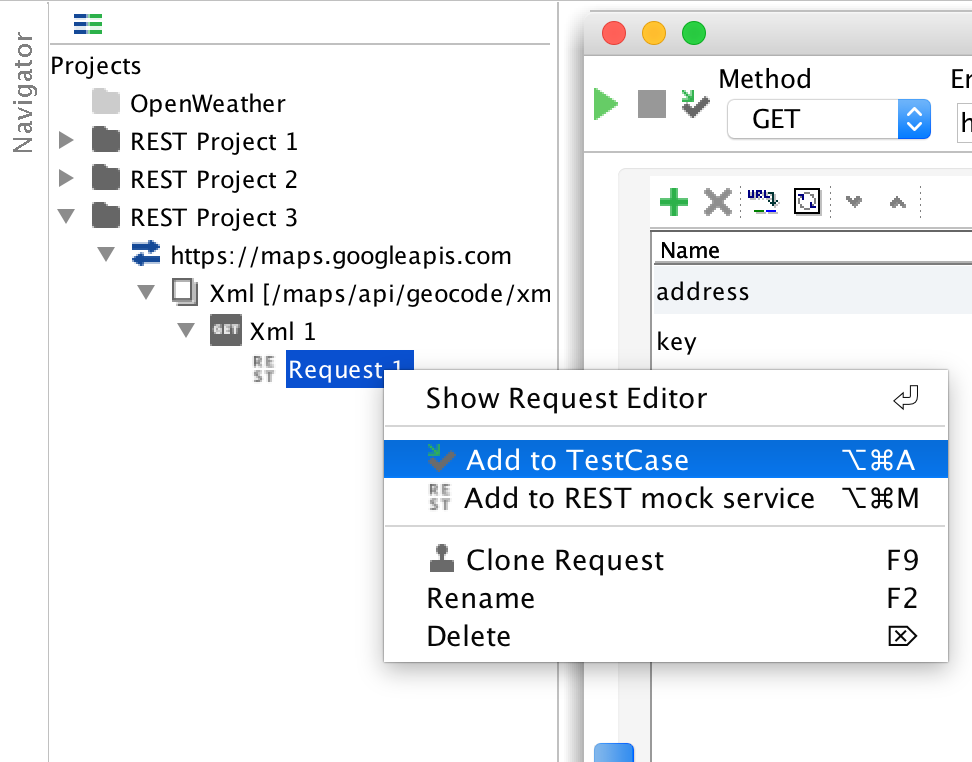
FIGURE 2: 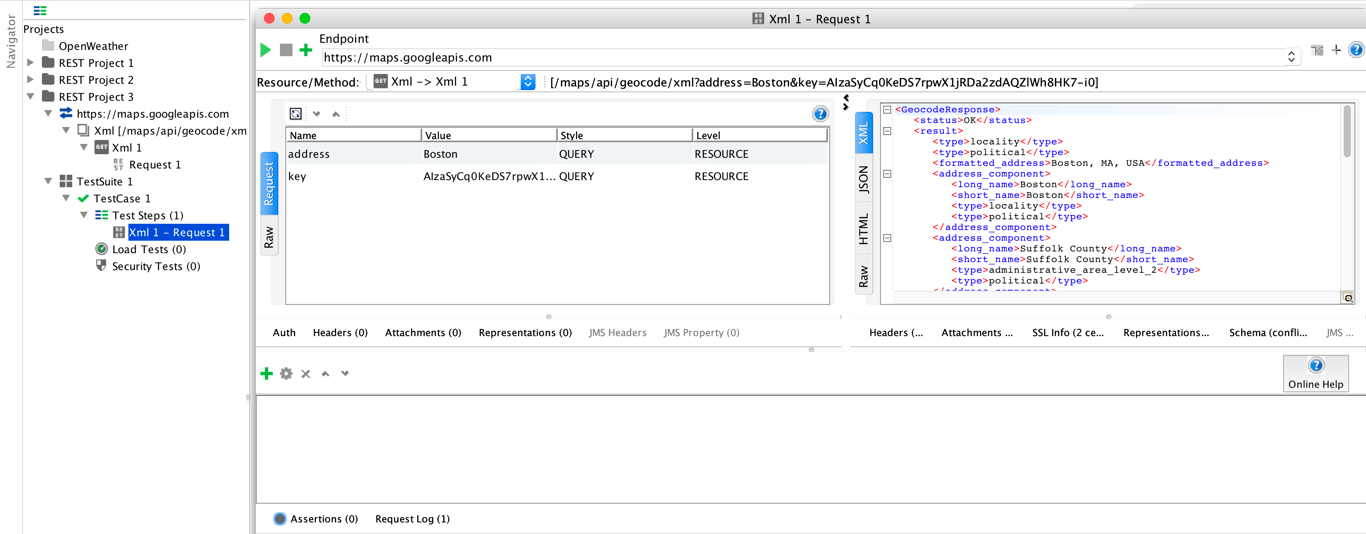
SoapUI Pro
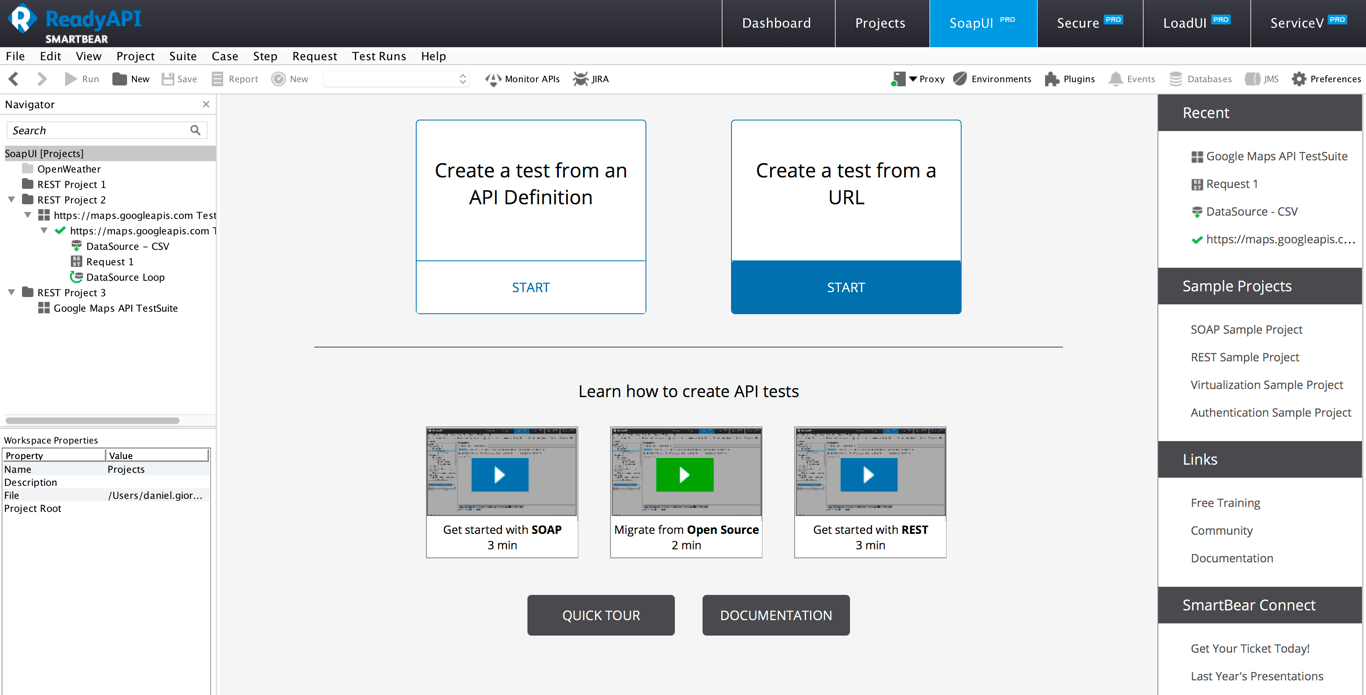
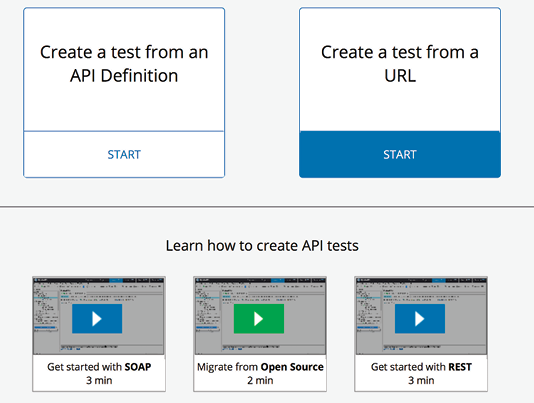
In SoapUI Pro, select New in the main navigation portion in the top left - the icon should be a folder. Once clicked, you’ll be presented with this screen:
There are three ways to create a Test Case in a project:
- URL - Enter an Endpoint to start testing with
- API Definition - Import a API Definition file like OAS/Swagger or WSDL
- REST Discovery - Record live traffic from an API
In this example we’ll use a URL from the Geocode API.
Enter the URL into the first entry, and the default method should be set to GET. Once that is entered, click OK. You should now have a REST Project in your side menu panel.
If you click on the folder to expand, you should see we have created not only a Project, but also a TestSuite and a TestCase, as well as a Request.
In the TestSuite item, we can see the results of individual test cases that are inside the test suite. This makes reporting and spotting errors a simple glance.
In the TestCase item, we can see the different TestSteps inside a test case, data that may be used, and step-by-step debugging options. In our example we only have one Request so let’s check it out.
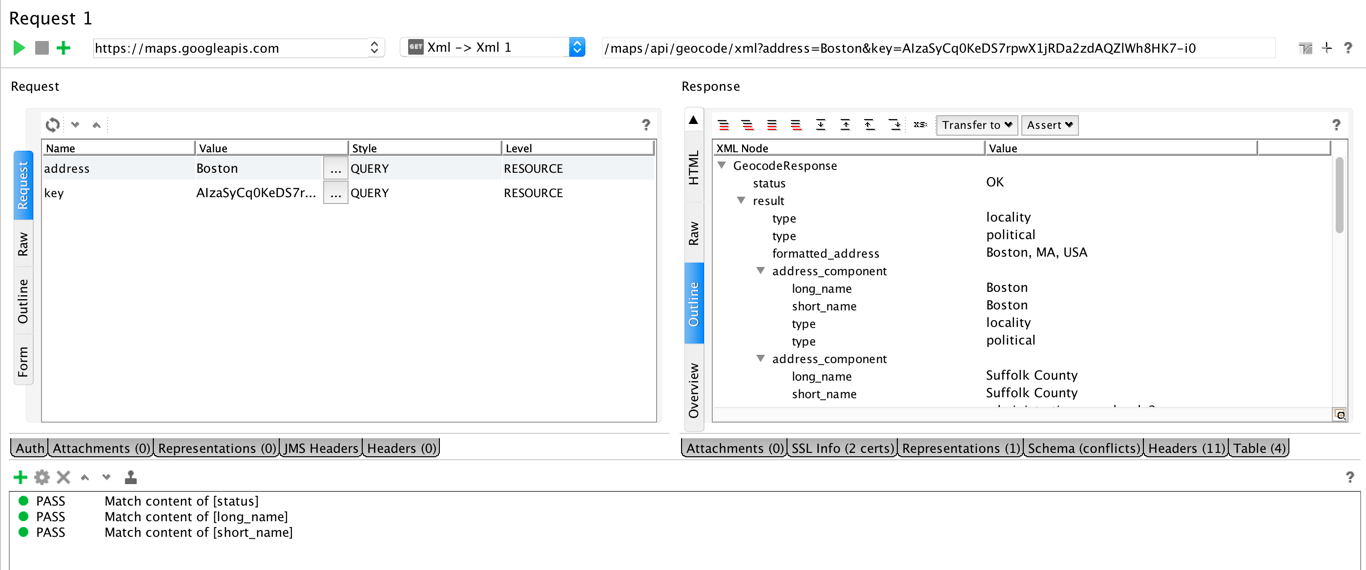
When you click on Request 1, you should be seeing this:


When you click on Request 1, you should be seeing this:
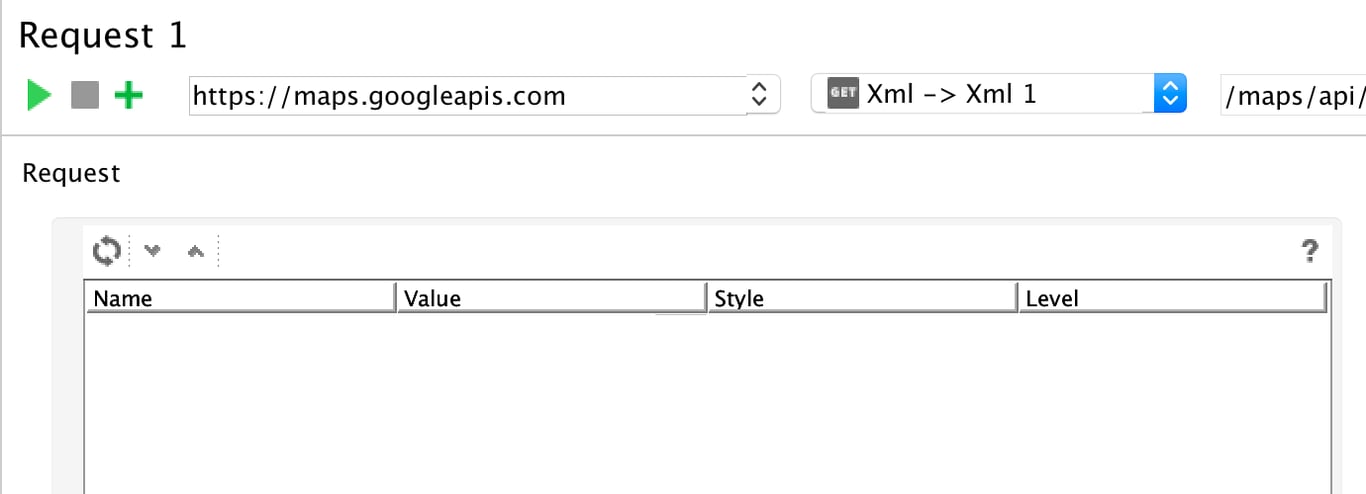
For this tutorial, the first thing we should do is click the green Run arrow in the top left.
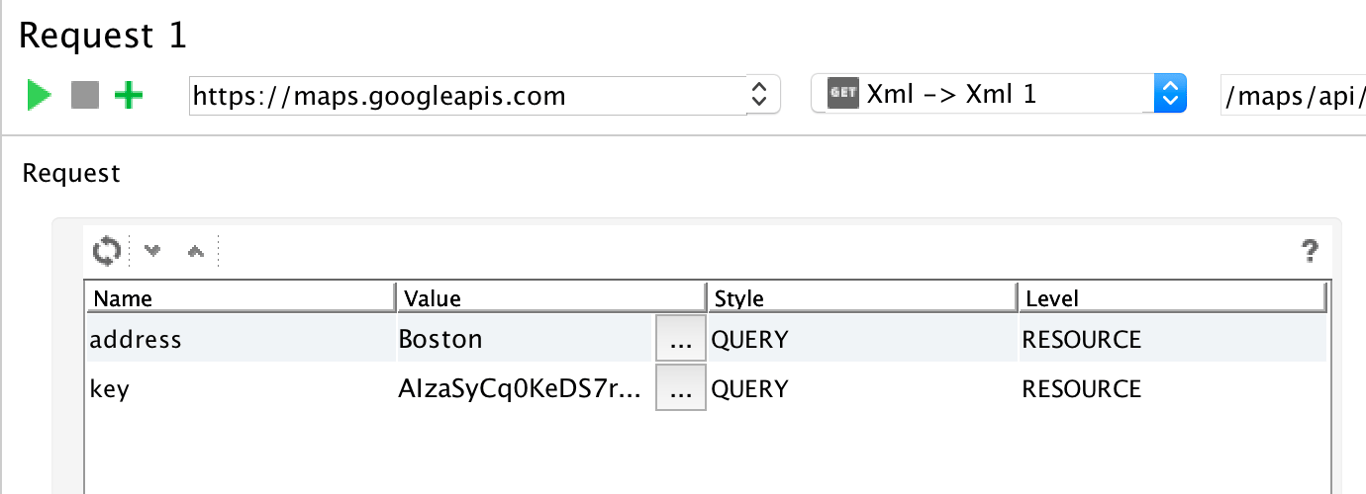
On the left-hand side labeled Request, you can see our parameters - in this example we have the “address”, Boston, and “key”, which is our GoogleMaps API key. We can add, edit, and remove parameters in this pane.
On the right-hand side, we have our Response - in this example, a detailed geographical description of Boston, Massachusetts and some of its key data points - like its formal address, the county it’s in, and the postal code of the state.
The Response pane’s view or format can be changed on the left hand mini-sidebar between Overview, Outline, Raw, HTML, JSON, and XML.
Creating And Running A Test
To create an assertion, it’s as simple as a few clicks. On the Response pane, make sure the Outline view is selected. We’ll make three different assertions in our test case.
Right click the value “OK” in the status parameter.
Select “Add Assertion” then “for Content”. This will bring up a window where we can select what the we want to the response value to match or contain. Click Save and we’ll have done with our first assertion!
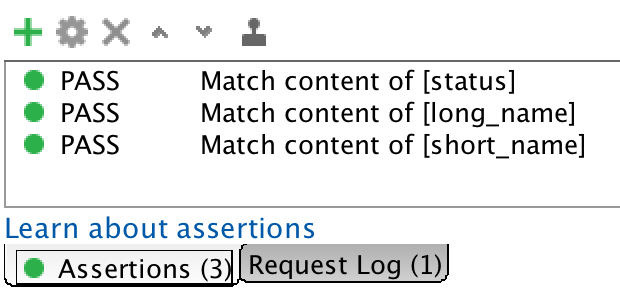
Repeat the above steps, making sure that the first “long_name” in the XML node is equal to “Boston” and that the third “short_name” in the XML node is equal to “MA”. (fig. 3)
FIGURE 3:
We should have three Assertions now that you can find in the tab at the bottom. To run our tests, we can just click the green play button again in the top left. We’ve now run our first API tests in SoapUI Pro.
Advanced Test Creation
Creating tests is mostly about adding proper assertions to a test case. We have our test step that will verify the City and State of our API string. The verification we added earlier is pretty simple. There are more complex test assertions we can make with SoapUI Pro.
Other verifications we can add are verifying if a response is received fast enough and thus answer the question if the service we are testing is following a given service level agreement, or SLA.
To add those, open up the Assertions panel in the bottom navigation and click the green + button.
We now have access to a few different options for advanced assertions. Let’s go through a few:
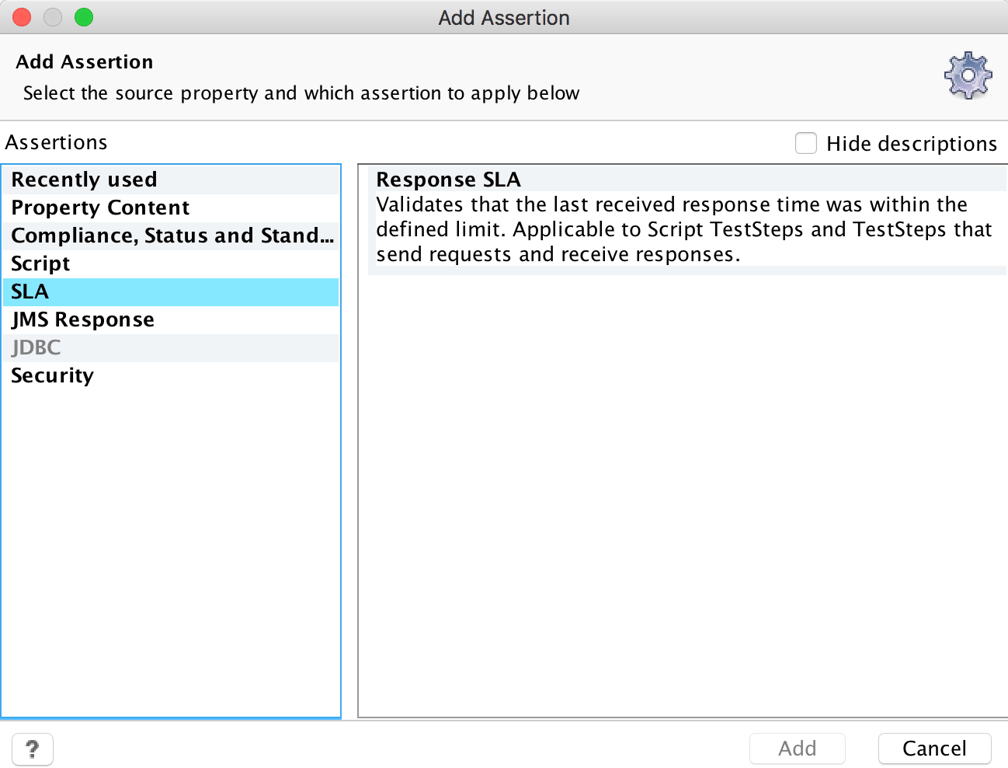
Verifying Response Time
A common use case for SoapUI is “discovering” or “exploring” an unknown API. Oftentimes, RESTful services do not have descriptive definitions outlining their expected behaviors. Testers will have to poke and prod the API’s endpoint to explore correct behaviors in order to create assertions. Developers will also use this method when developing an application or service around an unknown, third-party API.
An SLA assertion validates that the response was received within a definite time limit. Click Add here, then enter in 200ms. This is a normal response time for a well performing API.
Verifying Schema Compliance
The Schema Compliance assertions check whether the last request or response follows the associated WSDL or WADL schema definition. This schema can be taken from the service definition or inferred.
Click the green + in the Assertions menu. In the dialog, select the Compliance, Status and Standards category on the left, choose Schema Compliance on the right, then click Add.
There are several different types of schema we can compare – JSON, SOAP, WADL, Swagger.
Data Driven Testing
Remember how we talked about one of the challenges of API testing was test data management? Well, that’s because of the simple transaction of data that occurs between an API - the data that comes back from an API needs to be checked for accuracy and consistency to the data that was used as input. Once all of our endpoints are covered with a basic test case, the only way to increase our test coverage is to drive different data points throughout requests and parameters.
Verifying that an API is functioning correctly using different test data is an important aspect of testing because many bugs are not elicited by a system using one single static “happy path” set of conditions.
Many times, data-driven testing involves building out a dataset in an excel sheet, then uploading it to a tool or script to run through all the possible scenarios. SoapUI Open Source is able to drive data through tests in this way, using the Groovy scripting language. We’ll show you a few different ways you can do this without scripting in SoapUI Pro.
Creating A Data Source
To first set up data-driven testing, we’ll need some data to drive through our tests. SoapUI Pro supports several ways to source your data:
- Data Connection - connect to a data source and use SQL to extract your test data
- Data Generator - generate data directly from the test suite without having to create an external set of data
- Directory - read a set of files from a directory and use their content as test data
- Excel - read an Excel sheet and use its content as test data
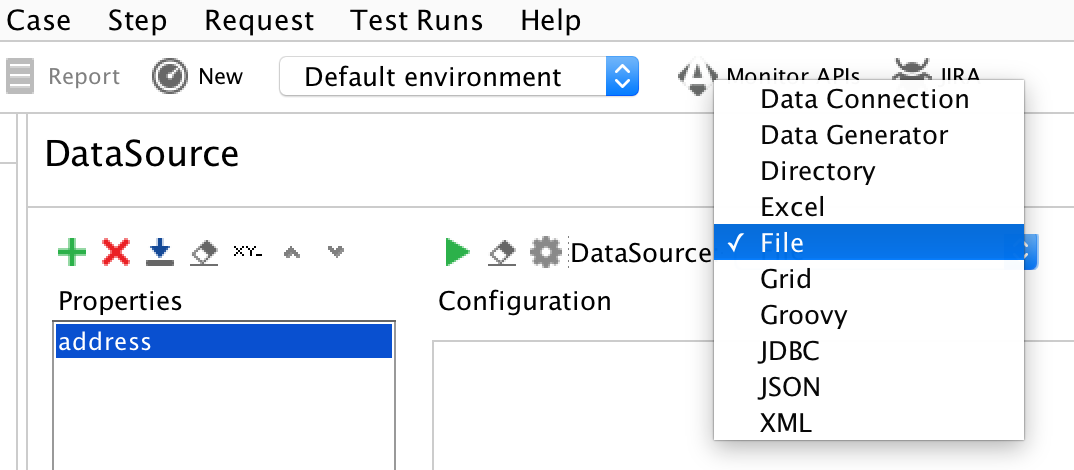
- File - read a separated file and use as test data
- Grid - define a grid in SoapUI Pro that will hold test data
- Groovy - create a Groovy script that generates test data
- JDBC - a data source and use SQL to extract the test data
- JSON - read test data from a previous test step using a JSONpath expression
- XML - read test data from a previous test step using an XPath expressions
In this tutorial we will cover two scenarios: uploading a CSV file and also using a response from an API call to loop data.
First, let’s get a list of 10 US cities. Here is the list we’ll be using:
-
New York
-
Los Angeles
-
San Francisco
-
Chicago
-
Miami
Now let’s hop back into ReadyAPI and add our data. We’ll be using the same Test Case as our previous examples, so open up the left-hand menu to Request 1. Right click Request 1 and click “Insert Step” then “DataSource”.
-
Houston
-
Phoenix
-
Denver
-
Boston
-
Memphis
Next, we’ll be prompted to select the Request parameter that we want to drive with data. Select only the “address” parameter, as the “key” value to remain unchanged during each call. Click Add.
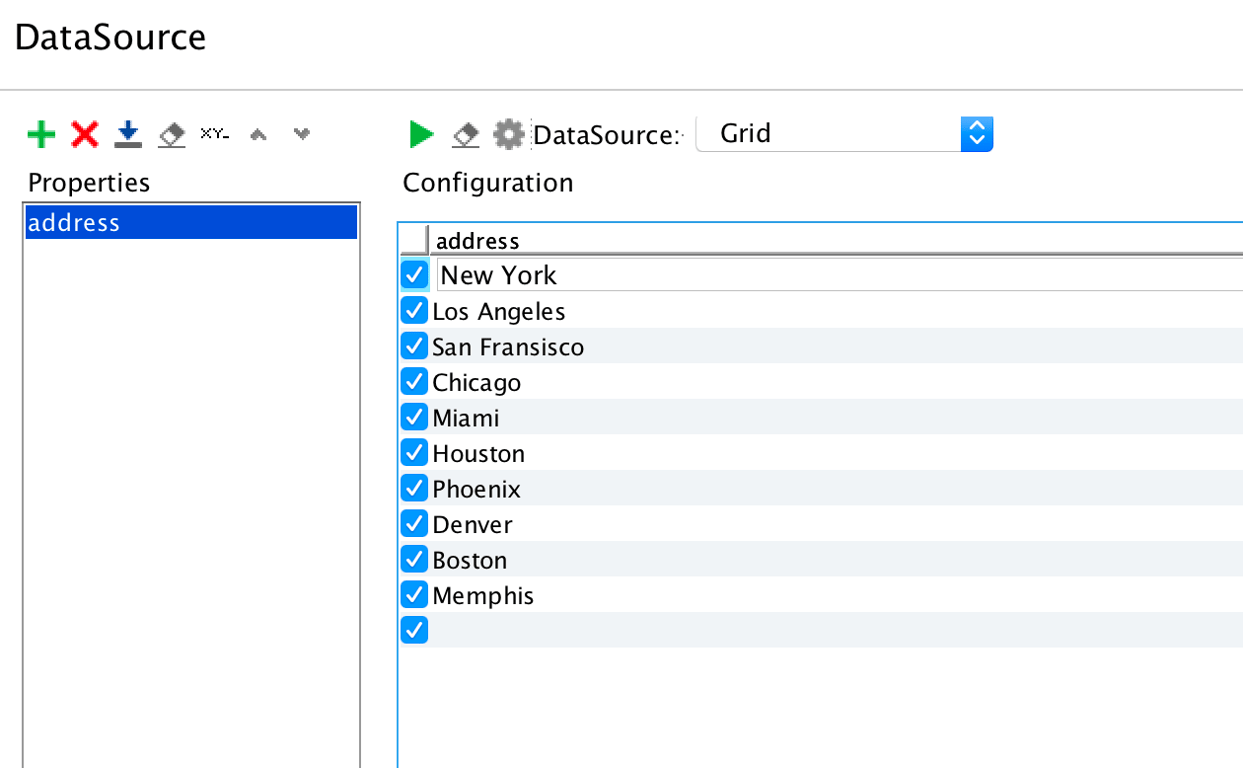
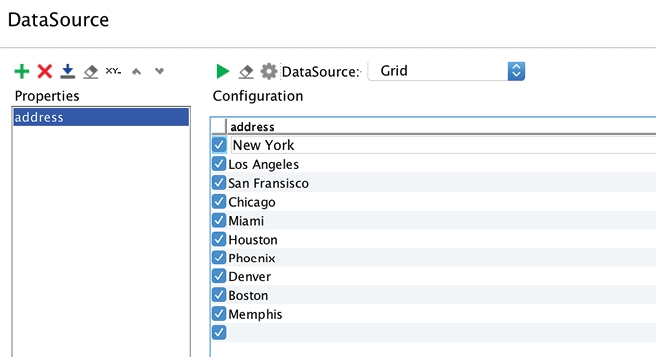
Now on the left-hand menu, you should see a “DataSource” above Request 1 and a “DataSource Loop” below it. Click “DataSource” to bring up the panel where we’ll add our data. Make sure the DataSource is set to “Grid” and start adding our cities.
Once we’ve added all our data, click the green Play button to run our data through the test.
Oh no, there are some test failures!
It looks like our test assertions are failing because they are still testing only the Boston response - not the other cities we’ve added. We’ll learn how to add data-driven parameters to our test assertions in the next section.
Creating Data-Driven Test Parameters
Create a text file with a group of ten cities. Save that file
as city-data.txt.
Here is the list we’ll be using:
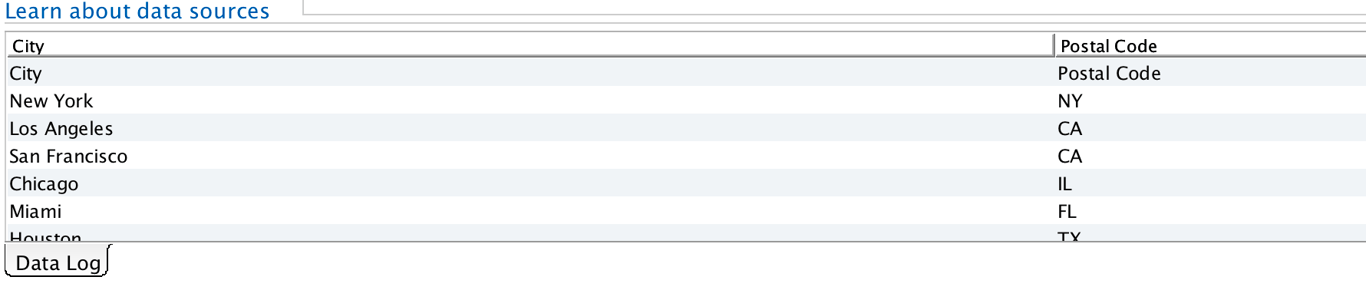
City; Postal Code
New York; NY Houston; TX
Los Angeles; CA Phoenix; AZ
San Francisco; CA Denver; CO
Chicago; IL Boston; MA
Miami; FL Memphis; TN
Select Browse, and add the city-data.csv file to ReadyAPI. When asked if you want to import properties, select Yes. Next, select clear previous properties. Don’t forget our separator is “;”!
Alright, now we should have our two properties:
City and Postal Code.
Let’s head back to Request One and add our new properties into test case and assertions. Our new value in the address parameter will now be ${DataSource#City}.
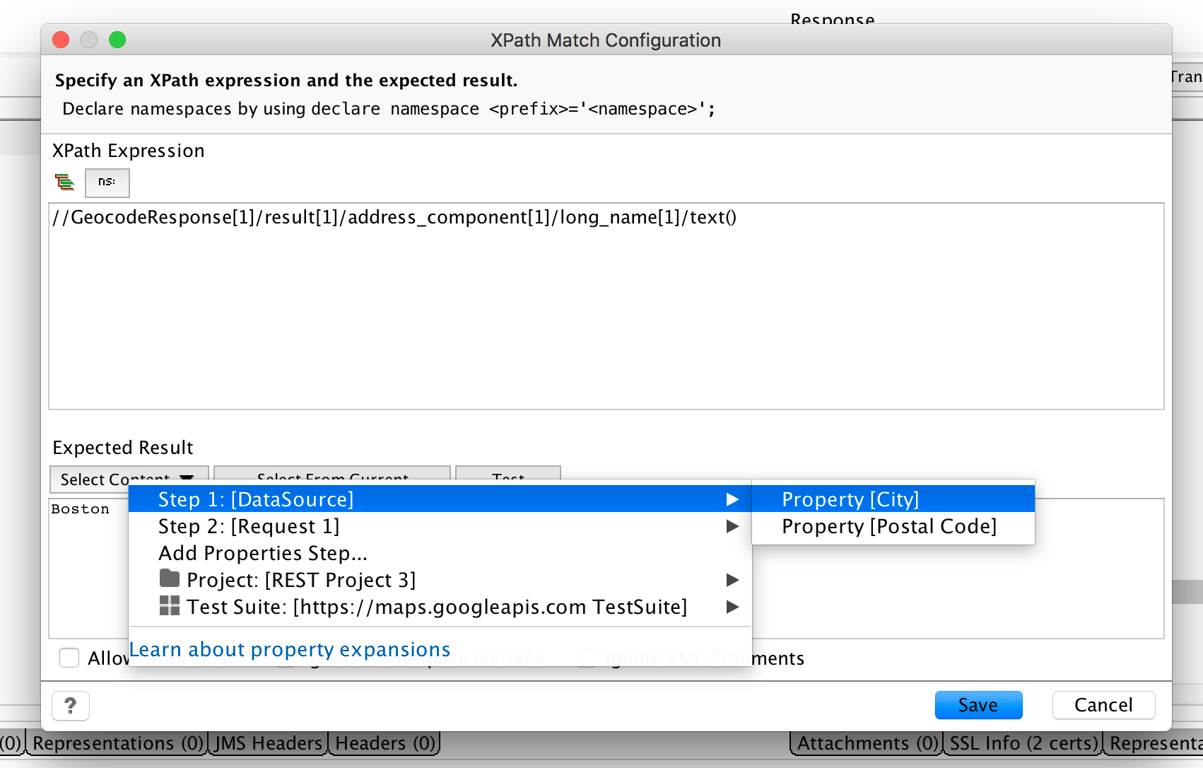
Now let’s change our the assertion data – double-click the first failed assertion “Match content of [long_name]”.
In the Expected Result pane, select Select Content, then find our DataSource and choose Property [City]
Do the same for the second failed assertion, but add in the Property [City].
Once done, click the green Play icon to set up the data. We should see it print out in the bottom panel.
Now let’s run this data in our assertions. Click the green Play button and we should see our results!
Automation in a Pipeline
Automated testing can be the necessary process in your delivery pipeline that can ensure quality is kept, even while rapidly deploying. Organization’s want to move as fast as possible to bring new features and products to market - and employing an Agile or DevOps process requires test automation to be possible inside a CI/CD workflow. Test automation can have a number of benefits on your testing:
- Execute At Any Time
- Increase Test Coverage
- Reusability Of Tests
- Faster Feedback
Luckily, SoapUI Pro can easily be used for test automation. SoapUI Pro integrates with many popular CI/CD servers like Jenkins, Bamboo, TeamCity, TFS, and more. Many of the tools mentioned above we have a native integration for, usually in the form of a plug-in. Besides a native integration, SoapUI Pro integrates with all other infrastructure simply using a command-line prompt; this could be a batch script in Windows, a shell script in Unix, or it could be Maven project in a Java build environment.
Command Line
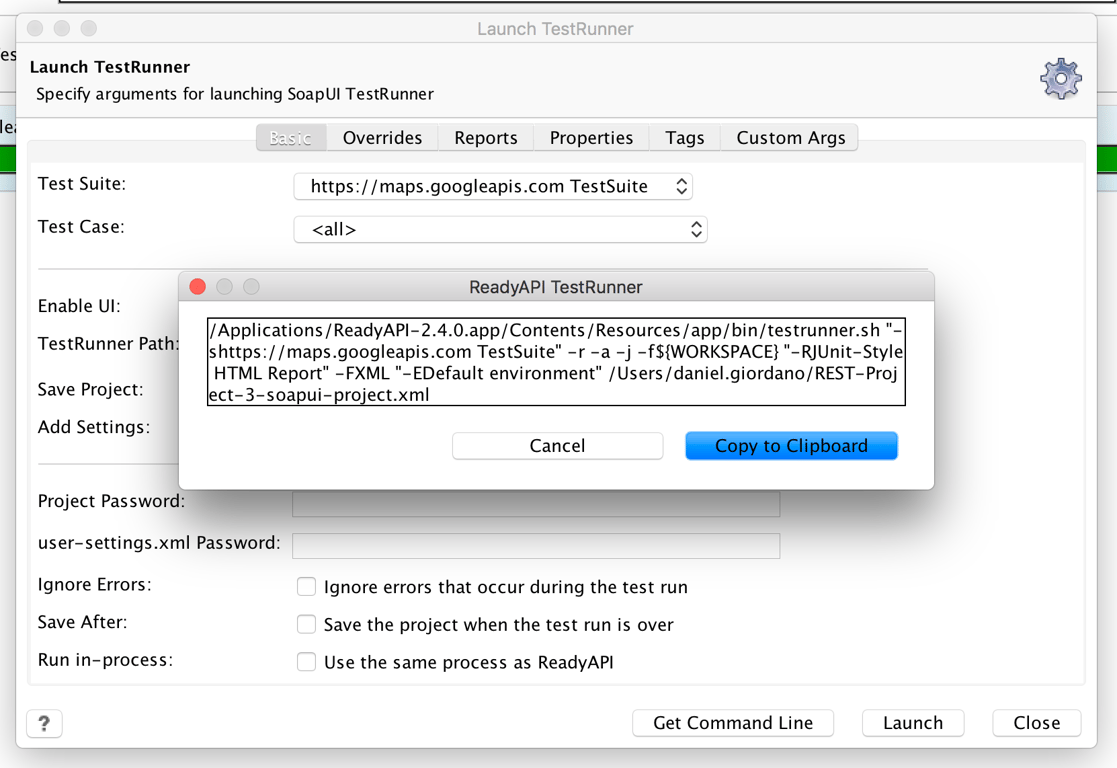
Running your SoapUI Pro tests from the command line is very simple. On the left hand menu, right click the TestSuite, and select Launch TestRunner.
Here, you can fill in particular settings of your test run, like reporting style or project passwords. You don’t need to enter anything in here, so we can go ahead and hit Get Command Line. This will bring up a string of text with project and runner file location and a few other snippets.
Click Copy to Clipboard, then open up a terminal window. Paste it in and click enter for your tests to start running!
You can copy this text to your clipboard or click the Copy to Clipboard button.
Jenkins
Jenkins is the butler of modern software, a framework for executing tasks during a delivery pipeline, and the most popular infrastructure for teams that have adopted continuous integration.
You can add ReadyAPI tests to Jenkins in two different ways, via a command line execution script or our native Jenkins plugin you can find at the Jenkins plugin store.
Command Line
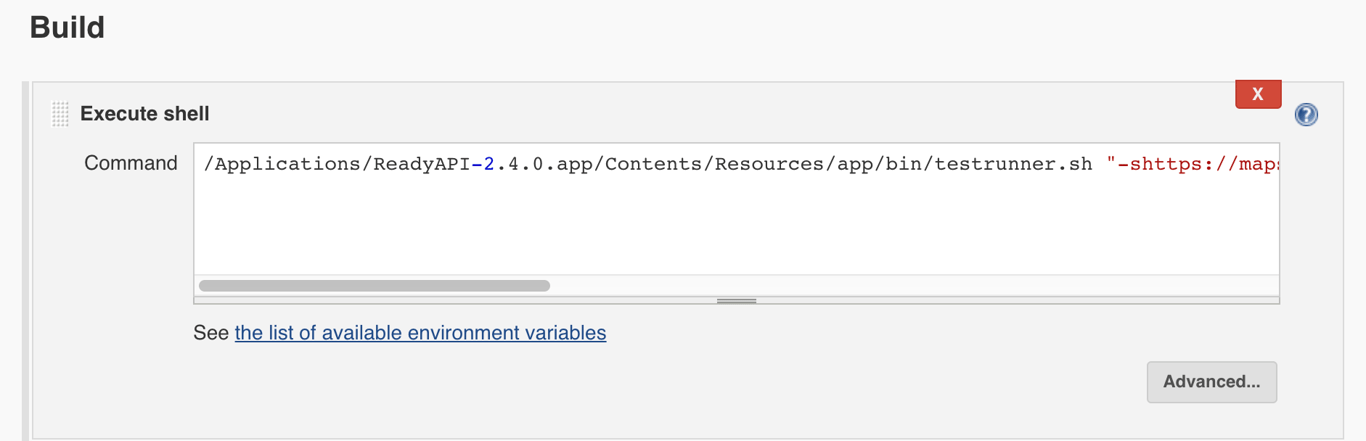
To add ReadyAPI to our Jenkins build, we’ll scroll down to the Build section, click Add build step, and then select “Execute shell”.
Here you’ll add the same snippet in the above section, so head to TestRunner and copy the line to your clipboard. Paste it into the “Command” entry in the Build step.
Once pasted, click Save on the bottom left. We’re all set - now we can build our project and see the results!
You can head back to the Projects page and click Build!
Native Plugin
If you haven’t done so, you’ll need to download the SoapUI Pro Jenkins plugin from the plugin store to continue: https://plugins.jenkins.io/soapui-pro-functional-testing
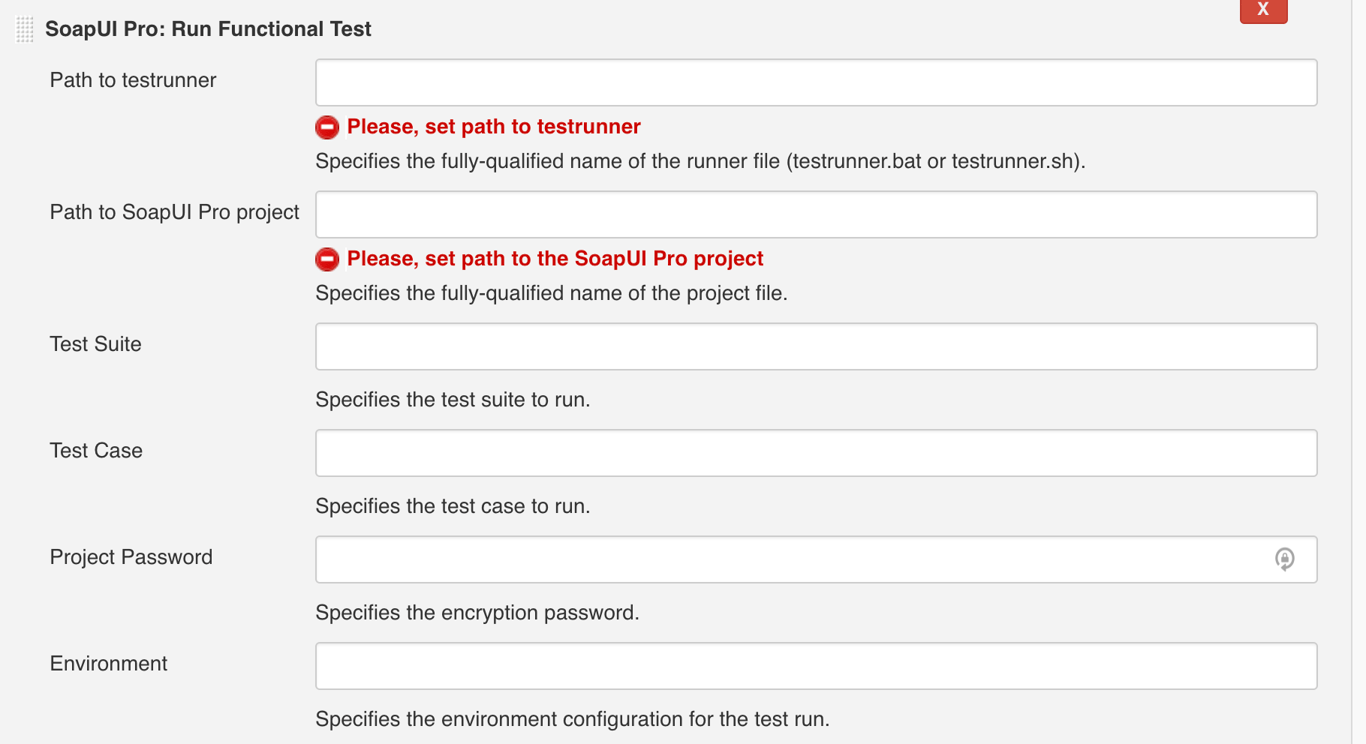
Just like in the command line step, let’s open up the Add build step in the Build section. Instead of selecting “Execute shell”, find and select “SoapUI Pro: Run Functional Test”.
Jenkins will now give you a menu for the SoapUI Pro plugin, so let’s start filling in the information we need.
Head back into ReadyAPI, and we’ll need to grab two file paths.
My example looks like this:
Path to testrunner: /Applications/ReadyAPI-2.4.0.app/Contents/Resources/app/bin/testrunner.sh
Path to SoapUI Pro project: /Users/daniel.giordano/Documents/REST-Project-2-readyapi-project.xml
We’ll leave the other options blank for now, as these first two fields are required.
Jenkins now knows where our TestRunner file is and our Project file, so we are all set to Save at this point.
Now, back on the Project Dashboard, you can click Build Now to start the project!
Changing Environments
Modern software delivery looks a lot like an assembly line - parts get added over time as the system goes through a series of tests and checks before rolling out to production. Many times, those series of tests and checks need to be conducted in different environments like staging, acceptance, or even production.
SoapUI Pro has the ability to insert variables around your endpoints and their environments, ensuring that you’ll be able to run your tests on different environments without having to rewrite your tests.
To create your first environment:
- Open the Environments editor.
- Click Add Environment.
- Name The Environment
- Click Ok
To edit your first environment, click the gears icon to open up the settings tab. From there, you’ll be able to edit your RESTful or SOAP API endpoint URLs. You’ll be able to add and edit the following options:
Organizing Your Work
How you organize your work is obviously not something that should be dictated by a tool. At the same time, SoapUI Pro makes it easy to organize and manage hundreds of tests and endpoints. SoapUI Pro will allow you to organize your work using Workspaces. It will give you a choice on how to save your project so it can be shared with other testers. Let’s start with Workspaces and then discuss version control and sharing.
Workspaces
SoapUI Pro uses Workspaces where you do all your work. A Workspace contains all your current projects. This means that you can work on more than one project in the same SoapUI Pro session. When you want to change to another project either add it to the current workspace or switch to another workspace.
Workspaces can be shared by a team. Sharing Workspaces will force everyone to work with the same set of projects all the time. This may not suit how you work.
Version Control
Storing your projects in a version control system, like Github or Bitbucket, is considered a best practice. It will enable you to go back to a known version and make it easier to share files with other testers.
| Option | Description |
|---|---|
| Name | The Service Name |
| Endpoint | The Endpoint’s URL |
| Auth Profile | The Authorization’s Profile |
| Proxy Host | The Proxy’s Address |
| Proxy Port | The Proxy’s Port |
| Proxy Username | The username for the proxy |
| Proxy Password | The password for the proxy |
Why
A shared resource on a file system is a fragile way to share your work. People can overwrite files that another person is working on and changes can easily get lost. File history is hard to keep track of. Tracking who made which changes to the project is not possible. Therefore, sharing files through a version control system is often used in development projects.
The tests you have created with SoapUI Pro have a significant value and should be protected as much as possible. Storing them in a version control system is therefore something you’ll want to do.
What should be stored then?
Your workspace may or may not be relevant to other testers. The workspace reflects how you personally group different projects. Sharing them with the other testers is something you need to discuss and then decide upon. You should store your project files. They are the most important outcome from your testing work.
SoapUI Pro saves the project as a composite. This means that each part of the project will be saved in separate files instead of saving the entire project in the same file. This is a useful feature to help team members cooperate while testing by allowing more than one person to work on the same project. Cooperating and sharing are the keys to scalability.
Debugging
Writing a test perfectly the first time is difficult. Debugging and testing are common activities that you usually will spend some time doing until the test you are creating is perfect, or at least good enough.
A general problem-solving technique to debug anything is half-interval search . You remove half of the steps and check to see if the problem you are trying to locate is present. If it isn’t, then you know that your problem is in the other half. Dividing the steps into smaller and smaller parts will eventually, often quite soon, tell you exactly where the problem is.
The Test Debugger
SoapUI Pro has this functionality built in, and it can really help cut time down during debugging. With Test Debugging, you can easily follow your test flows step by step and improve the quality of your tests.
If you suspect errors in your tests or the services you’re testing, Test Debugging will help you diagnose it. With the debugging support, you can execute your Test Steps one by one. Alternatively, you can add breakpoints and then run the test to those set breakpoints and view the current value of the SoapUI NG properties.
The Test Debugging Interface simplifies following Test Flow, Variables, Properties, Requests, Context, and much more, making test creation and improvement more streamlined.
- Select “TestCase Debugging” in the test case editor to the right.
- Double click on the “Project” in the Navigator.
- The steps are now listed and can be executed by clicking on the small, green arrow above the test step list. Doing so now will execute them in a sequence. You must add breakpoints to be able to step through them.
- Add breakpoints. Click just to the left, in the column named BP, of each test step. That will toggle a breakpoint on or off. Set breakpoints on all steps.
- Run the tests and notice that the execution stops at each breakpoint.
- The current step is indicated with a small, green arrow, just to the right of the step name.
- Click on the solid green arrow to run one step at a time.
Debugging a simple case like this may not be very interesting, but it prepares you for more complicated cases.
Reporting
Reporting the status of your test runs is important. A test report is often required before you are allowed to deploy an API into production. There is no built-in support in SoapUI to generate reports from a test execution. This is only available in SoapUI Pro and part of the ReadyAPI platform.
Creating a Test Report
A test report is created based on a test suite execution.
This means that we just start by running a test suite before a
report can be generated.
Execute the test suite “GoogleMaps”.
Click on the “report” button in the toolbar to generate a report.
It’s the last icon below the test suite name.
Select a format TestSuite Report is the format you’d use if you want to visually inspect the data. The other types are intended for computers.
- Click “OK.” A preview of the report shows up.
- Save it by clicking on the floppy icon to the far left.
A “save” dialog box shows up where you can define the name for the report as well as the format. SoapUI Pro has many formats for it’s pretty report including:
- RTF – Rich Text Format
- PDF – Portable Document Format
- RTF – Rich Text Format
- ODT – Open Office
- HTML
- Single sheet XLS – Excel
- Multiple sheets XLS – Excel
- CSV – Comma-separated file for import to Excel
- XML
Conclusion
You should now be able to test your REST or SOAP APIs with both SoapUI open source and SoapUI Pro. If you need further help, our documentation is full of great examples and technical help, and for SoapUI Pro, there is SmartBear’s award winning customer success team.
Helpful SoapUI Resources