NOTE: This page contains information on ReadyAPI, part of the ReadyAPI suite of applications.
To try enhanced functional testing, with data-driven capabilities, download a trial of ReadyAPI.
Why use ReadyAPI for Functional Testing?
While the Open Source version can be seen as the Swiss Army knife for testing, ReadyAPI is the tool with the sharpest edge. Applied to the functional testing area, ReadyAPI focus on enhancing efficiency and usability. With Point and Click Testing, you can drag and drop instead of manually writing the code. The Form Editor creates a form from your request, further eliminating the need for you to spend time on repetitive coding. These functions make, in combination with the Outline Editor who simplifies and exposes the XML structure, your testing more fun and less time consuming. If creativity, flow and speed are important to you as a tester, ReadyAPI is too.
Get Started with Functional Testing | Download ReadyAPI
Watch the video tutorial:
The step-by-step guide:
1. Create a test from a request
Note: To learn how to add an API, see Getting Started with SOAP and WSDL and Getting Started with REST Testing.
1. Expand the web service in the project tree and select the request:

In ReadyAPI, the request editor comes up to the right. ReadyAPI has an Outline Editor that simplifies the hierarchical structure of the XML, both in requests and responses, and at the same time is customizable.

Learn more about The Form Editor and The Outline Editor.
If you are using SoapUI Open Source, you have to enter your data manually in the code editor as shown below. To benefit fully from this tutorial you should use the Pro version. You can download the Pro Trial version for free here, giving you 2 weeks access.
2. In the request editor, select Add This Request to TestCase. ReadyAPI will display a dialog where you can specify the desired options for a new test step and give it a descriptive name. This may be especially usefull when doing manual testing or if you want non-technical staff to enter a request.

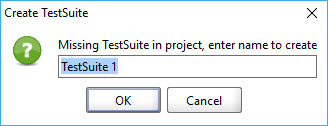
3. Adding a request to a test case will open the Create TestSuite dialog box. Enter a name for your test suite and click OK.
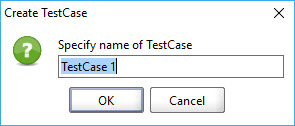
4. After clicking OK, you will be asked to create a test case. In the Create TestCase dialog, enter a name for your test case and click OK.
5. Next, the dialog box Add Request to TestCase will appear. The dialog has different options for SOAP and REST services. Click OK.

6. SoapUI will now generate a test suite and test case for you while the request will be added as a test request. A test case editor will also open with your new test request. Below, you can see the SOAP Request and REST Request test steps that appear in the interface:

The next step is to validate the response in your test by adding an assertion.
2. Add an Assertion to the test
Now that we've created and run our first test, we are going to add a validation of the response. In SoapUI, this is called adding an assertion. ReadyAPI contains several functions that enhances automation for those who spends their days (and nights) testing and are in need of extensive assertions.
Examples of assertions that is possible in SoapUI are:
- Schema Compliance
- Simple Contains
- Simple Not Contains
- SOAP Fault
- Not SOAP Fault
- SOAP Response
- Response SLA
- XPath Match
- XQuery Match
- Script Assertion
- WS-Security Status
- WS-Addressing Response Assertion
- WS-Addressing Request Assertion
1. Close all the windows you opened in SoupUI before starting. Double-click your SOAP Request or REST Request test step as shown below. This will open the appropriate request editor.

2. In the request editor, Click the Add an Assertion to Test Request button.

3. In the subsequent Add Assertion dialog, select SLA > Response SLA.

4. In the Configure Response SLA Assertion dialog box, write 500 and click OK. This will validate that the response of the SLA is under 500 (This is measured in milliseconds, 500 should be half of a second).

5. Now that you've added the assertion, you are going to run the request to validate the response. If all assertions are successful, the test step icon turn green as shown below:

Tip: You can see how many assertions you have in a test by looking at the assertions tab. The number of assertions is written on the tab "Assertions (2)".
6. You can also validate the response by adding an XPath Match assertion.

7. In ReadyAPI, you can open the Select XPath dialog, where you can select nodes to assert. SoapUI will create a matching XPath expression that will refer to the selected node.

8. ReadyAPI automatically populates the expected result to match what's in the response. But of course, you can change this to what's relevant for you.

Learn more about XPath Match Assertion.
9. Now let's try and enter the dNum as a request, and execute the test:

10. You will now see that all assertion are passed.
Now that you know what an assertion is and how you add one to the test, it is time for the final exam of this guide - to run the actual test.
3. Run a Test
There are several different places in SoapUI where you can run the test. You can do it in a test step level, which is what we have done in this guide.
You can also try running the test case from the TestCase Editor:

Also, you can run a test suite from the TestSuite Editor:
