1. Adding REST Services, Resources and Methods
A REST Service contains any number of resources available on their corresponding path. Resources themselves can have as many levels of child resources as desired; a child resources path will be the concatenation of all its parents’ path with its own.
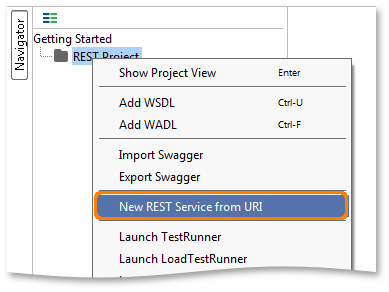
Start by creating a new REST Service in your project. Right-click your project in the Navigator and select New REST Service from URI:
Specify the following Google Map API URL in the New REST Service dialog: (http://maps.googleapis.com/maps/api/geocode/xml?address=Rio&sensor=false)
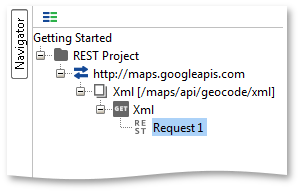
It automatically populates the created service with the desired resource and method. Now, we get the following in the navigator tree:
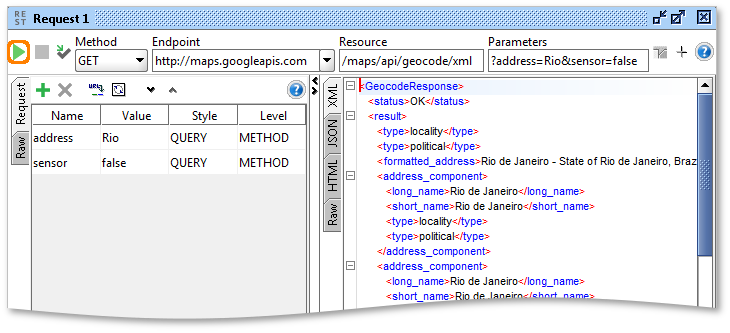
And the “Request 1” request window has been opened for you, submit the request with the top left green arrow and you will get:
Before digging in to the REST Request editor we need to back up a bit and look at the objects generated when you add the REST service. Let’s start by double-clicking the created Search resource, which will open the following window:
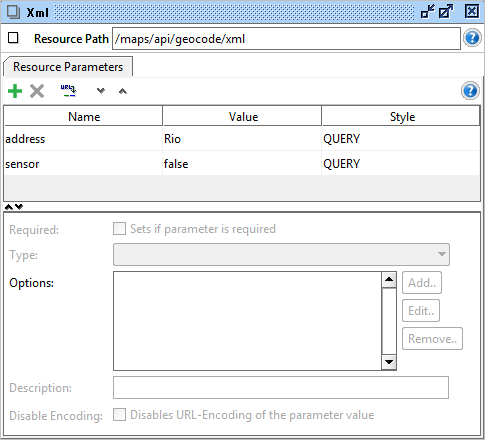
In the toolbar you can see and change the path that the resource is mapped to. Under it is a “Resource Parameters” tab in which we can see the “address” and “sensor” parameters extracted during the resource-creation process. Since these are defined at the Resource level, the parameters will be available for all child resources, methods and requests below the resource in the hierarchy. Use the toolbar at the top to manage parameters, selecting a parameter enables the fields at the bottom of the window which allow you to enter detailed information for the parameter.
This data can be specified for several purposes:
- For correct parameter definitions in the generated WADL (see below)
- For presenting a nicer input Form in the Form editor for REST Requests (see below)
- For custom encoding handling when setting a parameter value (the “Disable Encoding” setting)
Let’s set the parameter to be required and add a nice description (as shown above), this will give a nicer WADL in the end (as you’ll see below).
Next in the REST Service hierarchy is the GET Method we defined for the resource (which is highlighted in the screenshot above). You can define any number of methods for a resource with the “New Method” option on the resource popup menu, which opens the same dialog we saw above when creating the initial method. Double-clicking the method opens its editor window:
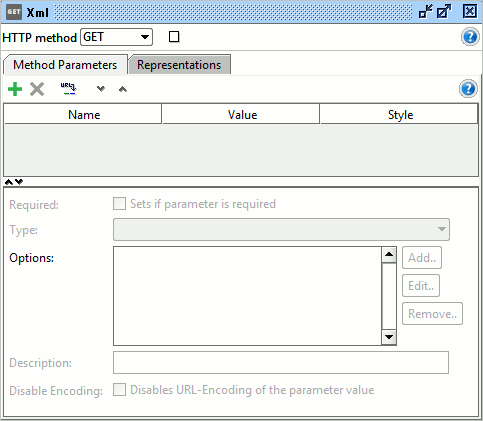
The toolbar at the top allows you to change the HTTP Method to use (GET, POST, PUT, DELETE, OPTIONS, TRACE, PATCH, PROPFIND, LOCK, UNLOCK, COPY and PURGE are supported) and the “Method Parameters” tab is similar to the “Resource Parameters” tab we saw above; parameters defined here are available for all requests created for the method. Since we defined our parameters at the Resource level this table is empty and the corresponding detail fields at the bottom are disabled.
Specific for the Method window is the “Representations” tab:
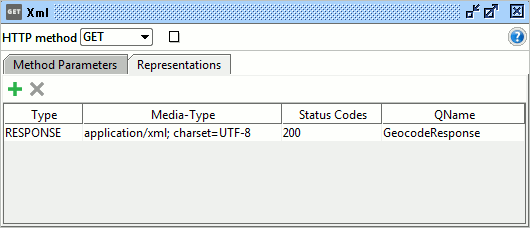
Here you can see the representations defined for the method, in our case soapUI automatically generated a representation for the response we received when submitting our first request, and it will continue to add new representations for each unique response content-type and status-code received. Using the toolbar buttons you can add and remove representations as desired.
Tip: The defined Representations for a Method are also visible in the corresponding Representations tabs available in the REST Request/Response editors described below.
2. Generated WADLs
When defining a REST Service “manually” as we have done above, soapUI automatically generates a corresponding WADL for us. If you now double-click the original REST Service we defined for Twitter and select the WADL-Content tab, you will get the following:
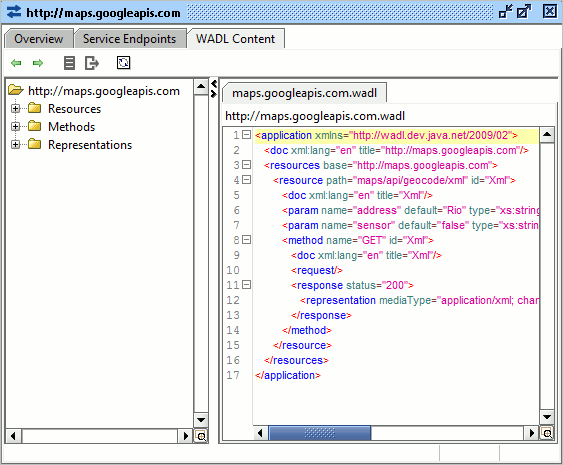
Voila! A nicely defined and formatted WADL for the Twitter search API! Just as for a REST Service originating from a WADL we can now generate both code and documentation for the service as shown above.
One thing that is missing here is the XML Schema for the response messages returned by Google API, and later on we’ll have a look at the Schema Inference functionality in soapUI that can generate this for you as well, based on the actual messages received from the service during testing.
Next Steps
REST Testing Tutorial
SOAP vs. REST 101: Understand the Differences
Working With REST Services
Working With REST Requests
Mocking REST Services