This page provides information on REST requests in SoapUI Open Source. For information on working with SOAP requests and WSDL specifications, see Working With WSDLs.
What Are REST Requests?
REST is a simple concept because it follows the HTTP 1.1 language that the entire Web understands. Everything in the RESTful architecture is about resources. You specify a resource in the URL of your request. For example, in the following URL –
http://mypetsore.com/pet/124
– the /pet/124 part is a resource located on the mypetstore.com server.
The action that you are going to do on with a resource is set by the method (verb) written in upper case at the request start line. For example, the following request start line –
GET http://mypetstore.com/pets/124 HTTP 1.1
– means you are going to receive information on a pet with the id 124.
Here are a few more examples for the Swagger Petstore sample API:
-
POST …/pet/{petId}/uploadImage – Uploads a new image of the pet specified by its id.
-
PUT …/pet/{petId} – Updates information on the specified pet on the server.
-
DELETE …/pet/{petId} – Removes information on the specified pet from the service.
The most frequently used methods are GET, POST, UPDATE, PUT and DELETE. Other methods, like HEAD or PATCH, are also possible but not used as often. For more information on REST methods, see Understanding REST & SOAP Request Methods.
The resource URL, headers and body (which is called payload) can include additional request parameters and data.
REST API Formats
The resource names, their hierarchy and parameters, supported methods, payload formats are not strictly defined. Technically, they should match the HTTP protocol, but the actual format to be used is yours. For instance, some servers use the PUT method for the update requests, while some others use PATCH or UPDATE. Some APIs use JSON format for payloads, while some others use XML, or support both. To provide consumers of our API with information on available resources, methods, parameters and data formats, you may want to create your API specification.
SoapUI Open Source supports the WADL and Swagger formats of RESTful API specifications. ReadyAPI also supports WADL and Swagger formats and introduces support for OpenAPI 3.0 and RAML.
How to Make REST Requests
To make an arbitrary REST request and view the response, use the Endpoint Explorer dialog.
To ensure your API works properly, create functional tests that send requests to your API resources and validate responses. To learn more about it, see the REST Getting Started Tutorial.
If you’d like a more detailed guide to working with RESTful APIs, download our e-book: REST 101: The Beginner's Guide to Using and Testing RESTful APIs.
View REST requests in SoapUI editors
SoapUI parses the REST messages for you, and makes it very easy to view and edit the request and response headers as well as the JSON and XML payloads.
To view request contents in SoapUI, simply double-click the request in the Navigator panel on the left:

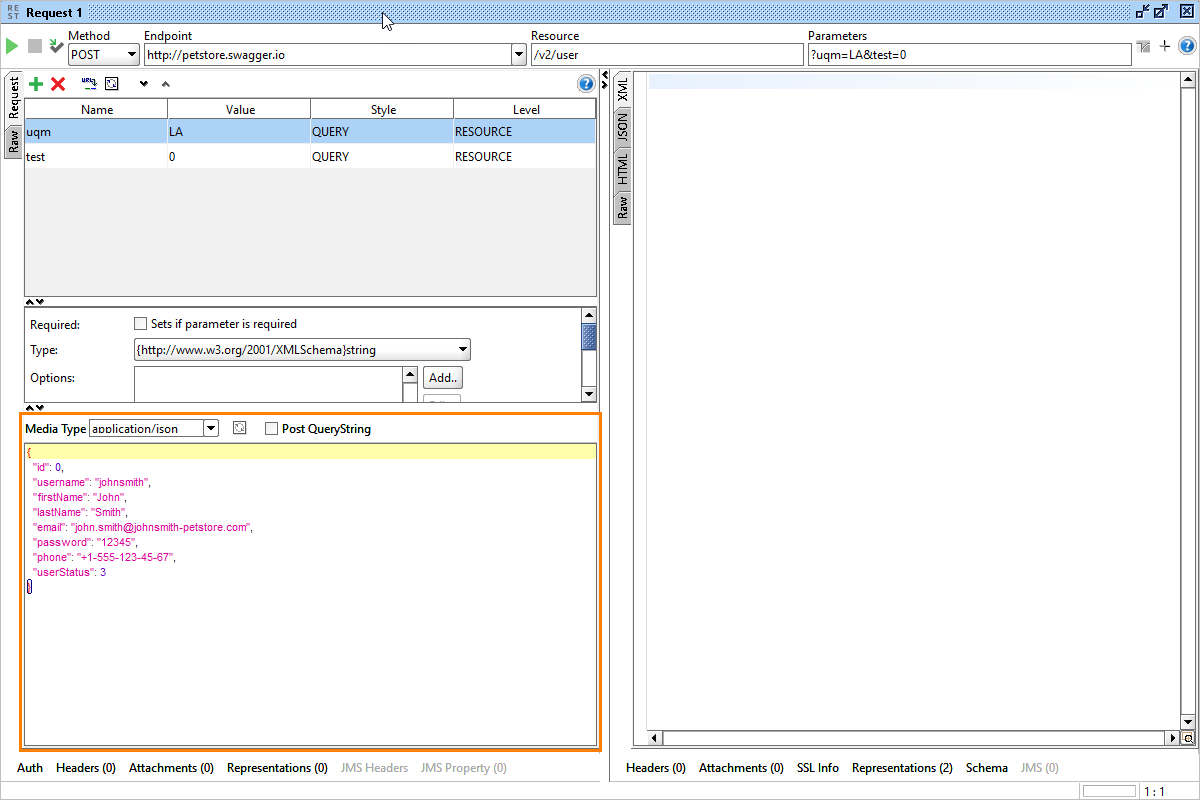
The editor toolbar displays the request method (verb), endpoint and resources names, and query parameters. The left part of the editor displays the request contents, the right part displays response data.
Request View
This view displays a table of the request parameters that are specified in the resource path, query string or headers. You can add and delete parameters, change their values and names in the table:
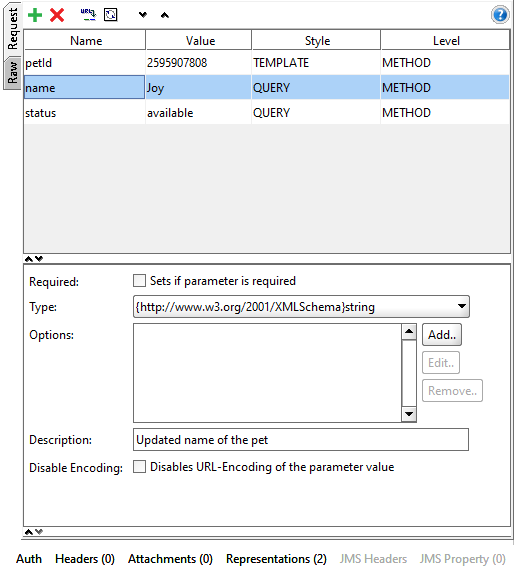
The Style attribute indicates the parameter type (where it is transferred to the server in the request URL or headers). For more information on this, see Understanding REST Parameters.
Level specifies whether the parameter is added to the resource or to requests only. If the parameter is added a resource, all the methods and requests below the resource node in the Navigator will get this parameter.
If a request uses the POST, PUT or another method that sends data to the server, SoapUI will display an editor for the message body contents:
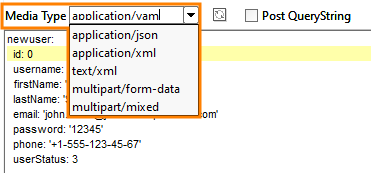
The Media Type box provides a number of standard media types for the request body, but you are free to enter any other value instead:
If the request has an XML schema definition, you can click the  Recreate button to generate a new payload according to the schema.
For information on how to insert the payload contents from a file, see below.
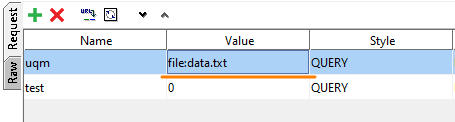
If you want to simulate the submit of an HTML Form using the multipart/form-data content-type you can specify individual parameter values to be read from a file by setting their value to file: which will insert the file into the outgoing request:
Outline View (available in ReadyAPI only)
This view makes it easier to work with payloads that have complex JSON or XML data structures. It shows a tree-view over the message body (only applicable for POST and PUT requests). For example, the following structure in the message body will result in the following Outline view:

Form View (available in ReadyAPI only)
Provides a nicer and more convenient input form for both request parameters and message body data:
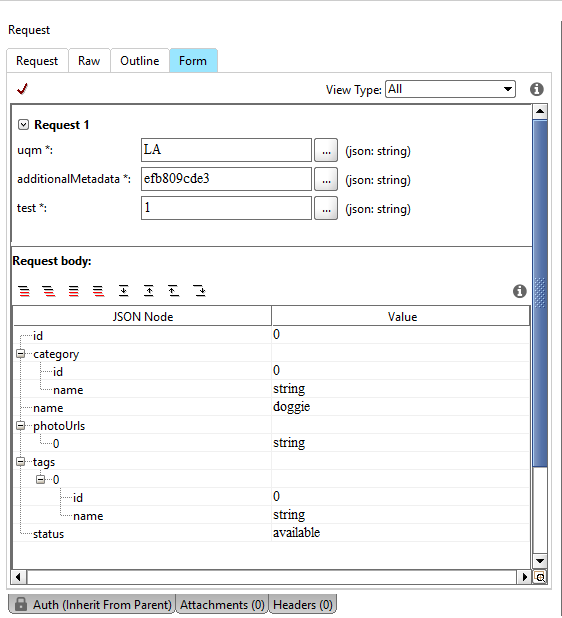
The ellipsis button opens a menu that helps you quickly insert project, test suite or test case properties into request parameters.
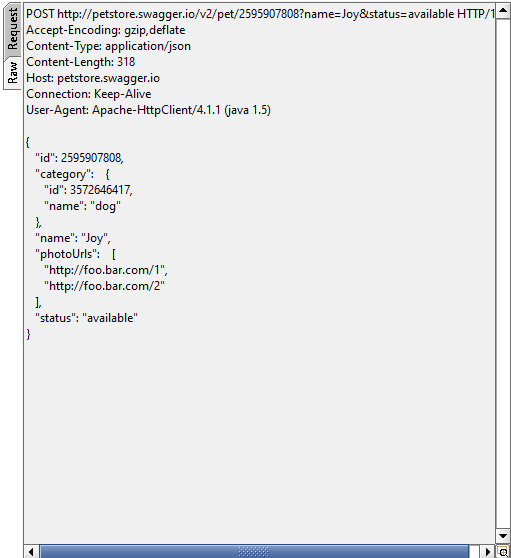
RAW View
This tab displays the raw data of the last simulated request, something like this –
Request Editor Tabs
Auth
Contains authentication settings for a request:

SoapUI supports the following authentication types:
| Authentication Type |
SoapUI Open Source |
ReadyAPI |
| Basic |
 |
|
| NTLM |
|
|
| SPNEGO/Kerberos |
|
|
| OAuth 1.0 |
|
|
| OAuth 2.0 |
|
|
| OAuth 2.0 (Azure) |
|
|
| Digest |
|
|
For more information on authentication settings, please see ReadyAPI documentation.
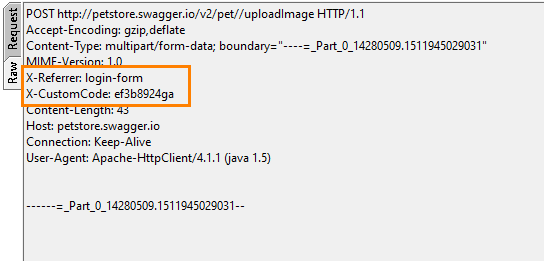
Headers
Displays a list of custom headers to be added to the request. Use the toolbar items to add new custom headers or delete existing ones. For example, the following items in the tab –

– will result in the following simulated request:
Attachments
Contains files to be attached to the simulated request as MIME attachments. If you want to include the content of a file as a request parameter when simulating an HTML multipart/form-data request, then specify that parameter value as file:file-name. For example:
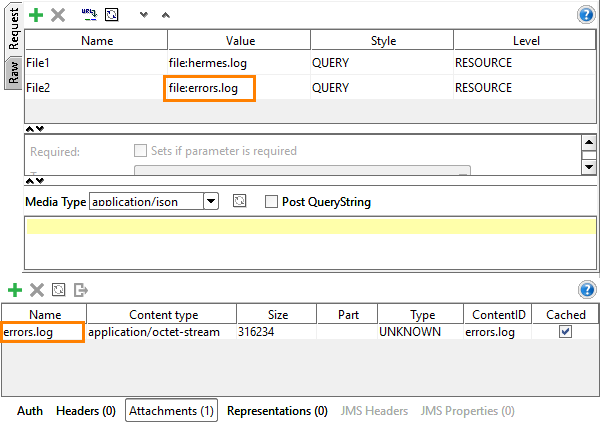
On the image above, you can see the request that has two parameters both specifying file. The first just refers to a file in the file system (hermes.log), and the second refers to an attachment (error.log). If you set the Media Type to multipart/form-data and select the Post QueryString check box in the payload section, SoapUI will send the simulated request as if it were a HTML Form with corresponding file input fields.
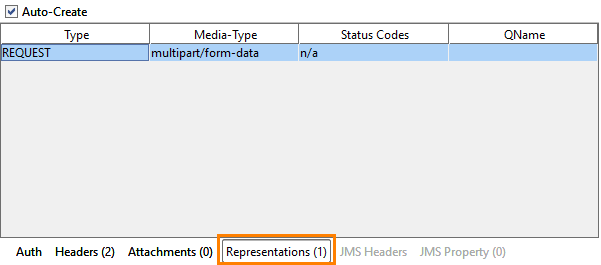
Representations
Shows request representations defined for the underlying REST method:
SoupUI Open Source
- Basic unit reporting.
- Advanced reporting.
- Native CI/CD integrations to automate test reporting.
SoupUI Pro
- Basic unit reporting.
- Advanced reporting.
- Native CI/CD integrations to automate test reporting.
Response Views
The response editor contains several views for visualizing different types of responses:
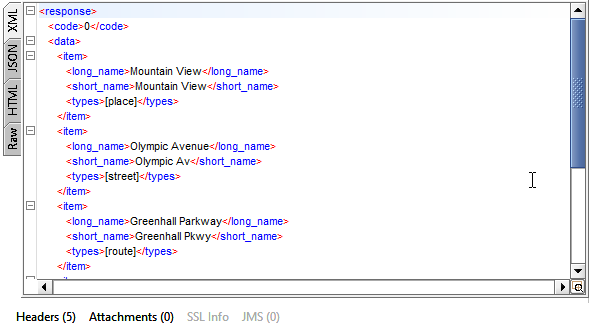
XML
Shows the current response in XML format. SoapUI will attempt to convert HTML responses to XML so they can be used in Property Transfer test steps and scripts just like any other response messages in your functional tests.
JSON
Displays a formatted JSON response (if applicable): 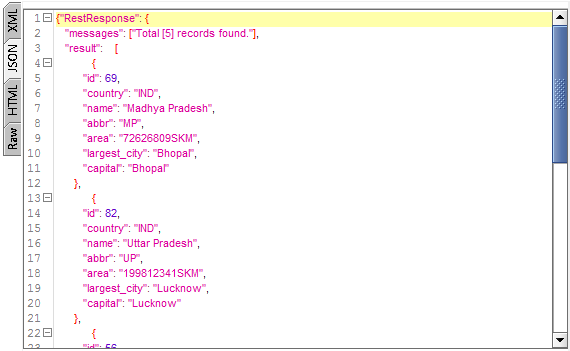
HTML
Renders a web page, if the response contains HTML data:
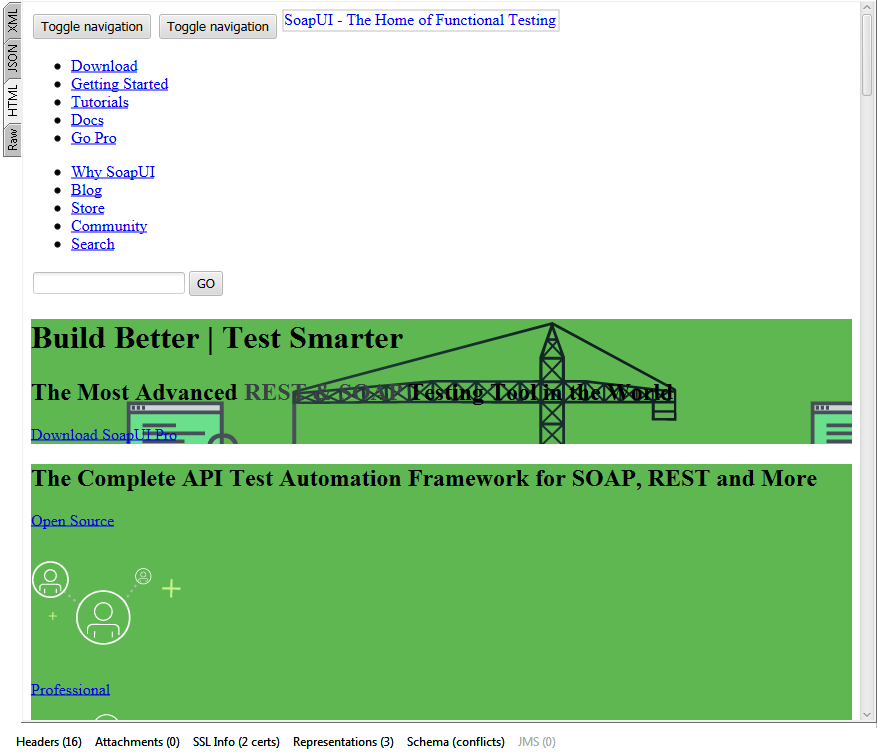
To display the HTML data, SoapUI uses a Browser component. On some platforms, this component can be disabled, and you will get the “Browser Component Disabled” message.
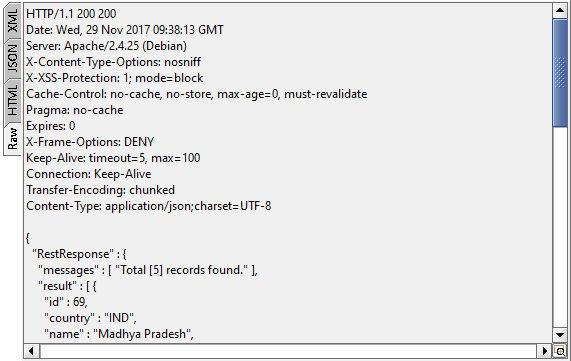
Raw
Shows the raw bytes of the response. For an HTML page, this view contains the following:
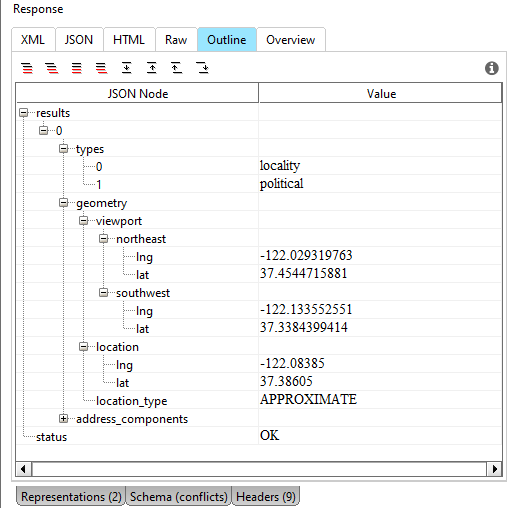
Outline (available in ReadyAPI)
A tree-like structure of JSON or XML response data:
Overview (available in ReadyAPI)
One more easy-to-read view of the JSON and XML payload:
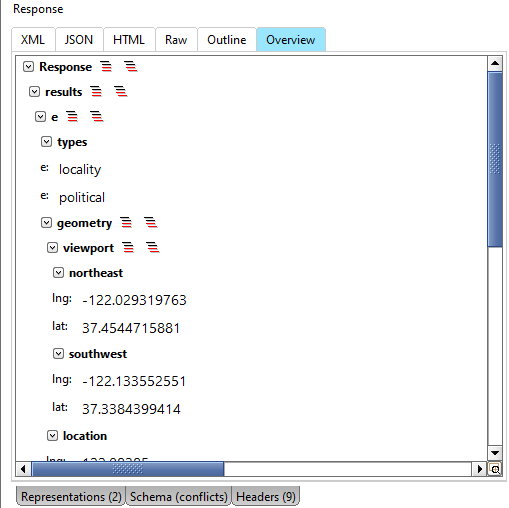
URLs are opened in the system browser.
Headers
Displays response headers:

Attachments
Contains all MIME attachments returned by the response.
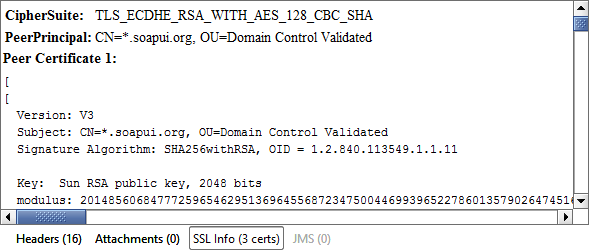
SSL-Info
If a request was send over an SSL connection (that is, to an https://… resource), this view will show detailed information on the security certificates and certificate chain of the target server:
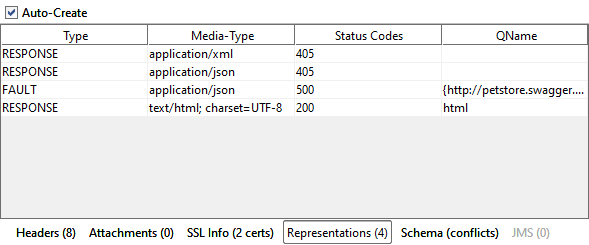
Representations
Shows the currently defined response representations for the simulated request:
Schema
You use this page to generate XML schema from the returned response. For more information on this, see Schema Inference in ReadyAPI documentation:
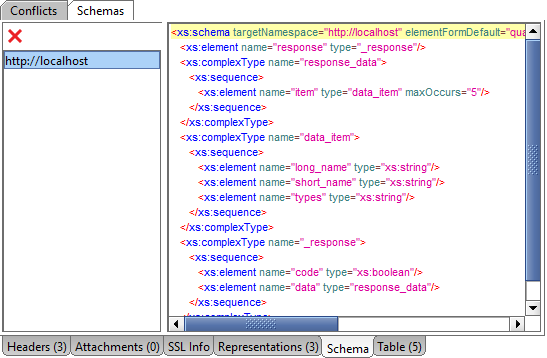
Table (available in ReadyAPI)
Displays child elements of the currently selected element in the XML or JSON view as a table:
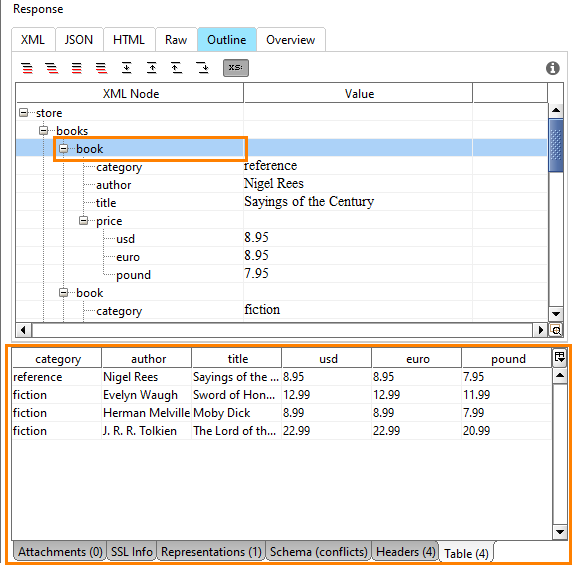
On the image above, the books element contains a series of child book elements of the same structure. ReadyAPI displays these elements as a table to make it easier to view and analyze them.
Next Steps
REST Cheat Sheet
REST Testing Tutorial
SOAP vs. REST 101: Understand the Differences
REST Resources and Methods
Mocking REST Services