This page walks you through how to model REST Services with SoapUI. If you’re looking for examples or more information on WADLs and REST Services, please visit our SOAP vs REST 101 page.
How to model REST webservices in SoapUI
SoapUI Open Source works with RESTful web services on the base of their definitions: WADL or Swagger. You can explore the service definitions, create and execute individual test requests, and create functional test cases and test suites.
Start by creating a new project. Click REST Project on the toolbar or select File > New REST Project from the main menu. Enter the project WADL in the dialogue box. To select the WADL file from hard drive, click Import WADL:
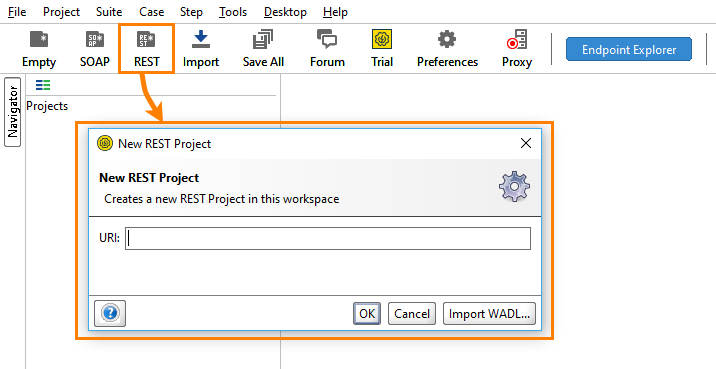
In the dialog, you enter file name or URL of WADL definition of your RESTful web service.
If you do not have a WADL file to try, use the sample WADL definition file that comes with SoapUI: <your-user-folder>/SoapUI-Tutorials/WSDL-WADL/sample-service.wadl.
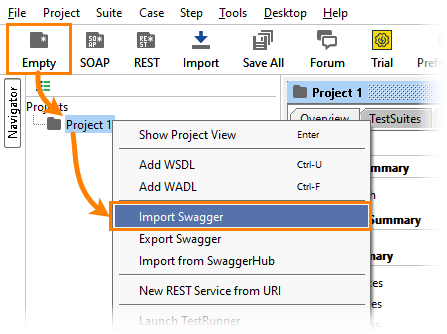
If you use a Swagger web service, create an empty project and import Swagger specification:
SoapUI Open Source supports Swagger definitions ver. 1.x and 2.0. The next generation tool – ReadyAPI – introduces support for OpenAPI Specification ver. 3.0. It also supports REST discovery. That is, it can record requests and responses between your computer and the tested web service and get information on the service’s resources and methods from the recorded traffic. This eliminates the need for REST service specification at all.
SoapUI displays the web service specification in the Navigator panel on the left of the SoapUI window:
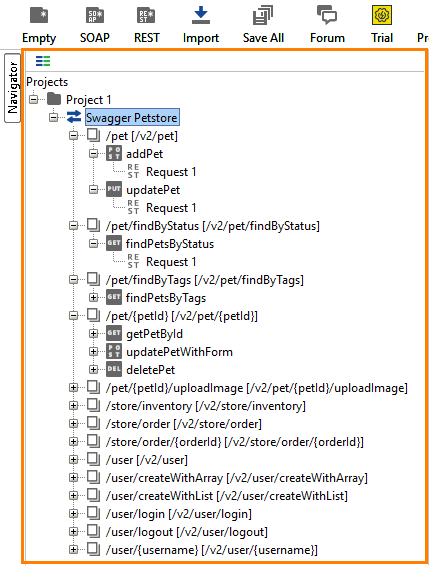
Here you can see items of the REST service project:
- The project (Project1)
- The REST service (My Sample IOT API)
- Resource nodes (/connectors, /devices, /lighting/dimmers/{deviceId}/{value}, and so on)
- Method definitions (getDevices, setDimmer)
- A default request generated by SoapUI for a method (Request 1)
- And so on.
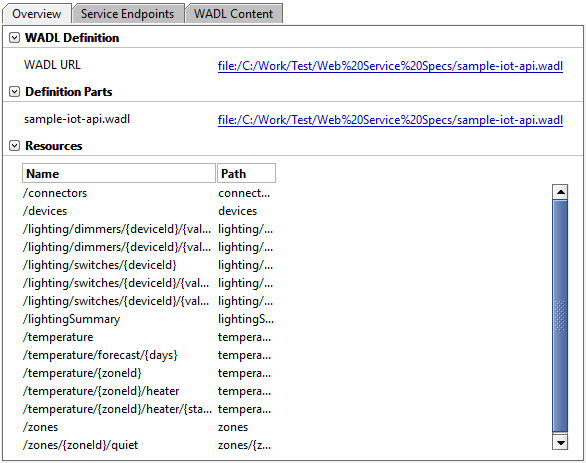
To open the service editor, double-click the service node. The Overview tab shows basic data about the service:
On the Service Endpoints tab, you can see the endpoints specified in the web service definition. Here you can also define any number of alternative endpoints, between which you can easily switch in the request editors:

To view the service definition, switch to the WADL Content tab:
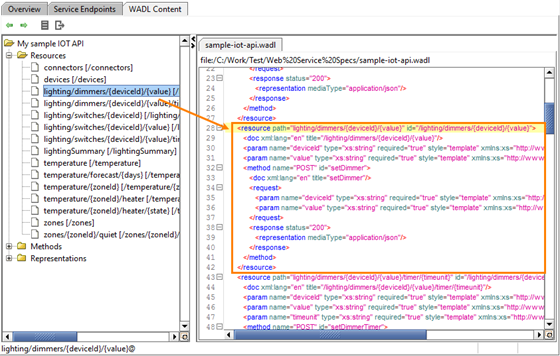
On the left, you can see a tree-like structure of your web service specification. On the right, you can see the definition of the selected resource or method.
If you add a Swagger specification, SoapUI Open Source automatically converts it to WADL and work with your service as if it had a WADL definition. Unlike SoapUI Open Source, ReadyAPI does not convert them to WADL internally. It servers the Swagger specification contents. It also introduces new test steps and assertions, and helps you easily create virtual services emulating the work of your REST APIs. If you have not seen ReadyAPI yet, feel free to download a trial version from our website.
No one knows APIs better than SmartBear. Find out what our Pro version of SoapUI can do to improve your testing.
Next Steps
REST Testing Tutorial
SOAP vs. REST 101: Understand the Differences
REST Resources and Methods
Working With REST Requests
Mocking REST Services