NOTE: This page contains information on standalone SoapUI Pro that has been replaced with ReadyAPI. To try enhanced reporting functionality, feel free to download a ReadyAPI trial from our website.
ReadyAPI provides three types of reports which can be generated from inside the UI at Project, TestSuite, TestCase and LoadTest level:
- Printable Reports - Can be printed or saved as PDF, HTML, RTF, Excel, etc and are fully customizable on both global and project level, allowing you to create and customize any kind of report you may require.
- Data Export - Allows export of underlying report-data in XML and csv format. This is useful if you want to import report data into other tools for custom reporting or integrations.
- HTML Reports - Give a simplified overview of functional test results in HTML format (not available at LoadTest level).
You can easily include any desired data in generated reports since you can export custom data in both Printable and Data Export Reports via the SubReport DataSink. Furthermore, all reports can be created both from within the tool (as described below) and from the Command Line.
Before we dive into the details let's have a quick look at how we can create all these reports for the Sample Project included with ReadyAPI.
Creating your first report
Follow these steps to create the default printable TestSuite report:
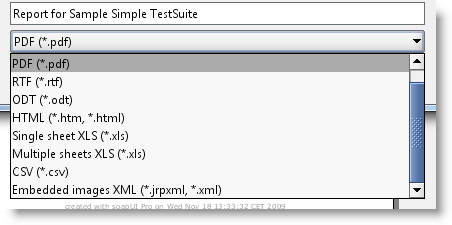
The toolbar in the export window lets you navigate the report as well as print it. You can also export it to several formats by clicking the Save button
Press the "Create Report" button and select only the Coverage option; and generate the report.
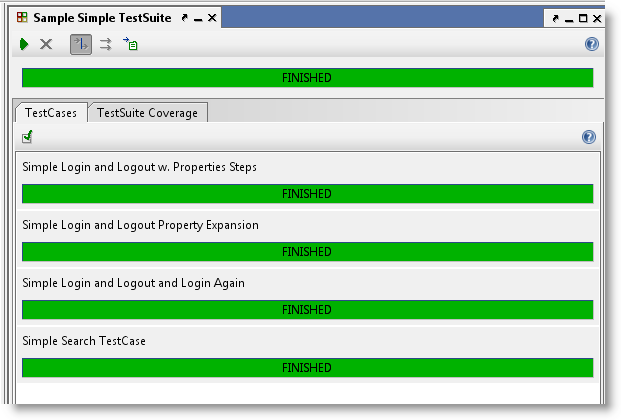
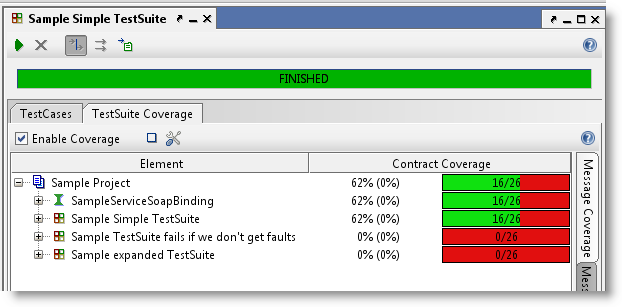
- Open the included Sample Project, start its MockService and open the Sample Simple TestSuite. Run it with the Run button in the toolbar, which should give you the following:
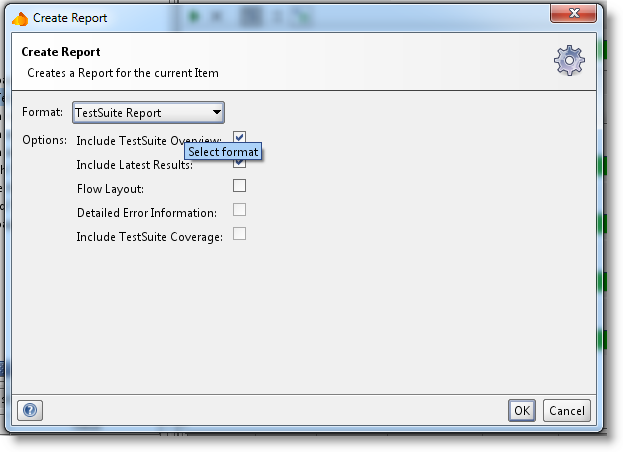
- Click the Create Report button
 in the toolbar when the tests have finished. This gives you the following dialog allowing you to select the desired format and set corresponding options:
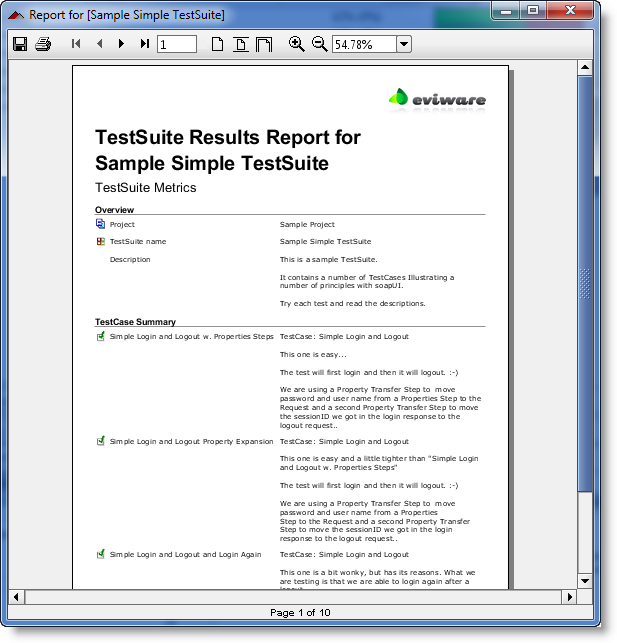
- Click the OK button to generate the report. ReadyAPI will generate and display our report as follows:
-
The options available in the Create Report dialog are specific to the actual report and will only be enabled if the corresponding data is available. For example in the report in our example we had neither errors nor coverage data, so both these options were disabled.
-
Let's rerun the tests with Coverage; switch to the TestSuite Coverage tab, enable coverage with the corresponding checkbox and rerun the testsuite;