NOTE: This page contains information on standalone SoapUI Pro that has been replaced with ReadyAPI.
To try the new functionality, feel free to download a ReadyAPI trial.
The SubReport DataSink provides an easy way to collect custom data during the execution of a TestCase or LoadTest. You can export the collected data using either the Data Export functionality or the Printable Reports (where the data is provided as a subreport dataset). Let's create a simple demo of this and show how both scenarios work for you.
1. Creating the DataSink
Creating the DataSink is straight forward; add a DataSink TestStep to a TestCase and select it to be of type SubReport. After that, add the names of all values you want to collect for each "row" in the DataSink. In our example we will start from the ReadyAPI Data Source tutorial project and save the status of each request together with the different input and output parameters.
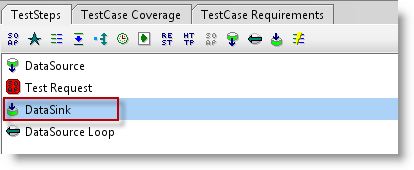
Start by adding the DataSink after the Request:
and set up its properties as follows:

Nothing unusual here; the To, From and ExpectedRate properties are taken directly from the datasource, the ActualRate is extracted from the response message and the Status is fetched via a little script.
If you now run the TestCase you get something like the following:
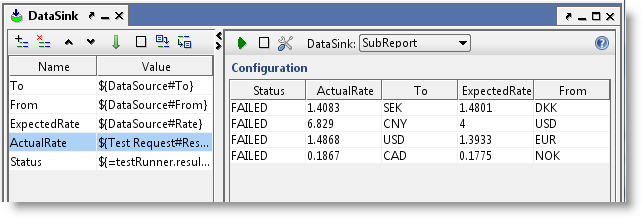
(status is FAILED since we haven't updated the Excel file to contain up-to-date expected values)
2. Creating a Printable Report
The data collected can just as well be incorporated in a printable report by adding a corresponding SubReport to render the data and including it in the corresponding main report. We'll create a simple tabular design for the above data; start by opening the Reporting tab in the Project window and add a custom SubReport:
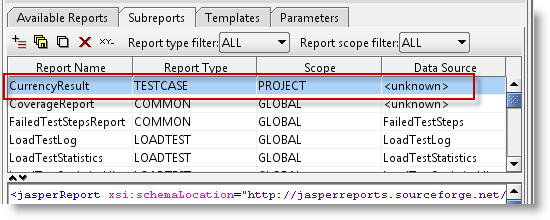
and set the content of "CurrencyResult" subreport to:
<jasperReport xsi:schemaLocation="http://jasperreports.sourceforge.net/jasperreports http://jasperreports.sourceforge.net/xsd/jasperreport.xsd" name="report name" language="groovy" pageWidth="535" pageHeight="842" columnWidth="535" leftMargin="0" rightMargin="0" topMargin="0" bottomMargin="0" xmlns="http://jasperreports.sourceforge.net/jasperreports" xmlns:xsi="http://www.w3.org/2001/XMLSchema-instance">
	<template>"../../styles.jrtx"</template>
	<field name="To" class="java.lang.String"/>
	<field name="From" class="java.lang.String"/>
	<field name="ExpectedRate" class="java.lang.String"/>
	<field name="ActualRate" class="java.lang.String"/>
	<field name="Status" class="java.lang.String"/>
	<columnHeader>
		<band height="59">
			<staticText>
				<reportElement style="ColumnHeader" x="0" y="35" width="122" height="20"/>
				<textElement textAlignment="Left" verticalAlignment="Middle"/>
				<text>To</text>
			</staticText>
			<staticText>
				<reportElement style="ColumnHeader" x="133" y="35" width="40" height="20"/>
				<textElement textAlignment="Left" verticalAlignment="Middle"/>
				<text>From</text>
			</staticText>
			<staticText>
				<reportElement style="ColumnHeader" x="183" y="35" width="74" height="20"/>
				<textElement textAlignment="Left" verticalAlignment="Middle"/>
				<text>Expected</text>
			</staticText>
			<staticText>
				<reportElement style="ColumnHeader" x="265" y="35" width="200" height="20"/>
				<textElement textAlignment="Left" verticalAlignment="Middle"/>
				<text>Actual</text>
			</staticText>
			<staticText>
				<reportElement style="ColumnHeader" x="465" y="35" width="70" height="20"/>
				<textElement textAlignment="Left" verticalAlignment="Middle"/>
				<text>Status</text>
			</staticText>
			<staticText>
				<reportElement style="SmallHeader" x="0" y="0" width="535" height="34"/>
				<textElement textAlignment="Left" verticalAlignment="Middle"/>
				<text>Currency result</text>
			</staticText>
		</band>
	</columnHeader>
	<detail>
		<band height="21">
			<textField>
				<reportElement x="0" y="1" width="122" height="20"/>
				<textElement textAlignment="Left" verticalAlignment="Top"/>
				<textFieldExpression class="java.lang.String">$F{To}</textFieldExpression>
			</textField>
			<textField>
				<reportElement x="133" y="1" width="50" height="20"/>
				<textElement textAlignment="Left" verticalAlignment="Top"/>
				<textFieldExpression class="java.lang.String">$F{From}</textFieldExpression>
			</textField>
			<textField isBlankWhenNull="true">
				<reportElement x="183" y="1" width="74" height="20"/>
				<textElement textAlignment="Left" verticalAlignment="Top"/>
				<textFieldExpression class="java.lang.String">$F{ExpectedRate}</textFieldExpression>
			</textField>
			<textField isStretchWithOverflow="true">
				<reportElement x="265" y="1" width="200" height="20"/>
				<textElement textAlignment="Left" verticalAlignment="Top"/>
				<textFieldExpression class="java.lang.String">$F{ActualRate}</textFieldExpression>
			</textField>
			<textField isStretchWithOverflow="true">
				<reportElement x="465" y="1" width="70" height="20"/>
				<textElement textAlignment="Left" verticalAlignment="Top"/>
				<textFieldExpression class="java.lang.String">$F{Status}</textFieldExpression>
			</textField>
		</band>
	</detail>
</jasperReport>
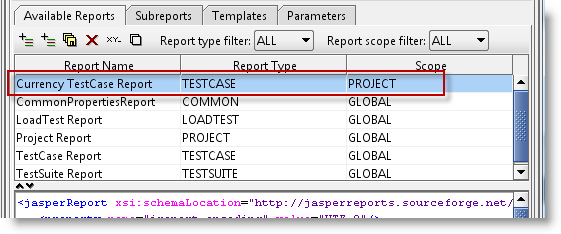
This creates a tabular layout containing fields named after the properties in the DataSink step. Now switch to the Available Reports tab and clone the existing TestCase report (name it "Currency TestCase Report"):
In the "Currency TestCase Report" replace the 'subreport' XML element that contains $P{TestCaseRequirements} reference. Replace it with the following:
<subreport isUsingCache="false">
	<reportElement positionType="Float" isPrintRepeatedValues="false" x="0" y="31" width="535" height="30" isRemoveLineWhenBlank="true">
		<printWhenExpression>$P{ErrorDetails}</printWhenExpression>
	</reportElement>
	<subreportParameter name="IncludeOverview">
		<subreportParameterExpression>$P{IncludeOverview}</subreportParameterExpression>
	</subreportParameter>
	<subreportParameter name="IncludeResults">
		<subreportParameterExpression>$P{IncludeResults}</subreportParameterExpression>
	</subreportParameter>
	<subreportParameter name="FlowLayout">
		<subreportParameterExpression>$P{FlowLayout}</subreportParameterExpression>
	</subreportParameter>
	<subreportParameter name="ErrorDetails">
		<subreportParameterExpression>$P{ErrorDetails}</subreportParameterExpression>
	</subreportParameter>
	<dataSourceExpression>$P{DataSink}</dataSourceExpression>
	<subreportExpression class="java.lang.String">"subreport:CurrencyResult"</subreportExpression>
</subreport>
This includes the CurrencyResult subreport we created and fills it from the DataSink data (name of the dataSourceExpression parameter is the same as the DataSink testStep).
Now when we create a Test Case report:
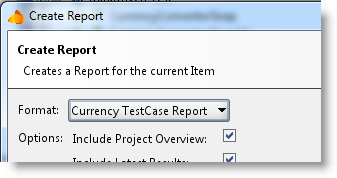
we get:
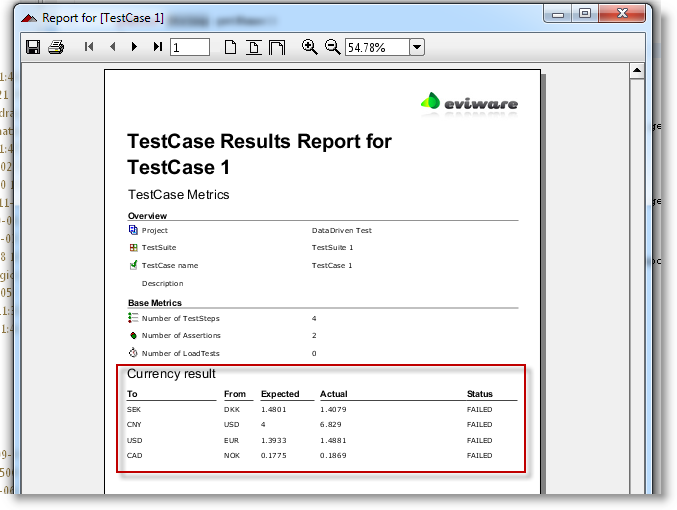
Very cool indeed! Finally some words on how this works under a LoadTest.
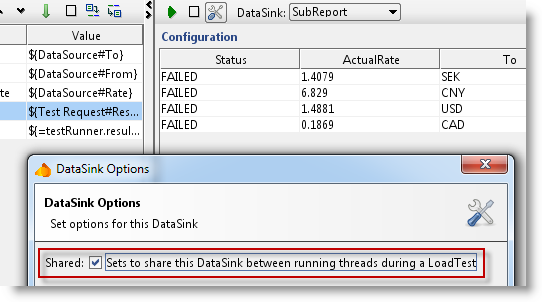
3. DataSinks and LoadTests
When running a LoadTest containing a shared DataSink (set in the DataSink options dialog), the DataSink will be available to LoadTest reports just as for TestCase reports above. Let's do this as well; start by setting the DataSink to be shared:
And to spice it up you'll add a ThreadIndex property to the DataSink (which might help in understanding the report):
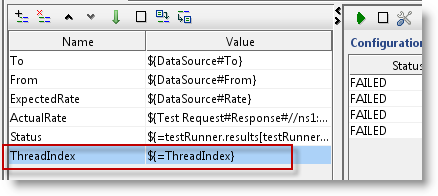
Ok.. after we've added the ThreadIndex to the CurrencyResult subreport and created a custom version of the LoadTest Report which includes the CurrencyResult (as we did for the TestCase Report above), we can now run a simple LoadTest:
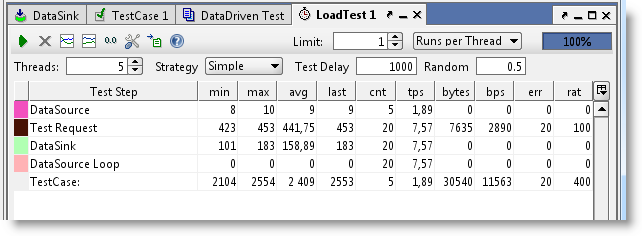
(here with just 5 runs; one run per thread with 5 threads)
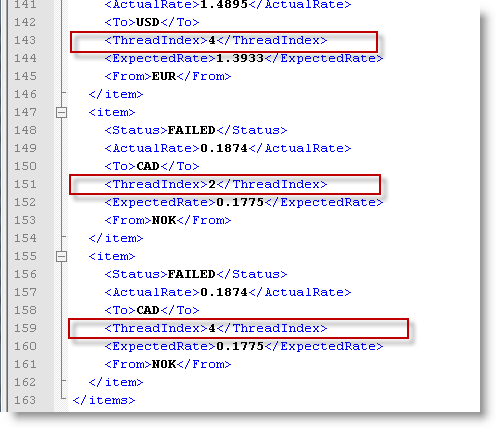
Exporting the DataSink via the Create Report button now gives the following XML:
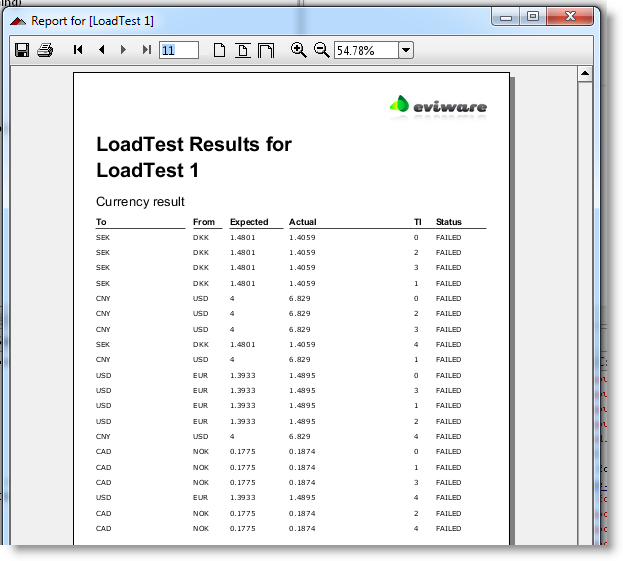
And finally creating the customized printable report gives us:
That's it for DataSink SubReports, as you see the reporting in soapUI is very flexible. You can modify and extend reports as your business requires.
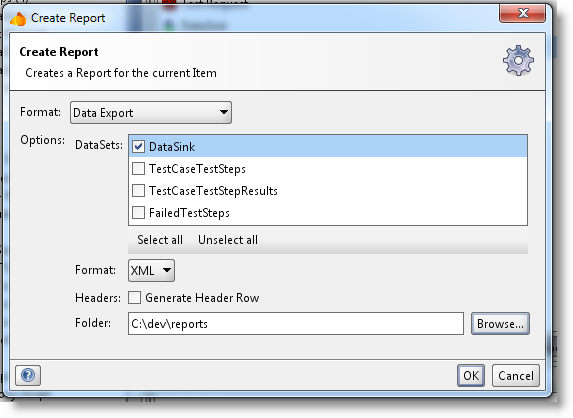
4. Exporting Data
Once you've run the containing TestCase, press the Create Report button and select the Data Export option. You will now see the data collected by the DataSink available as an exportable DataSet;
and the exported XML files looks as follows:

Easy enough!