This page describes how to authenticate SOAP requests in SoapUI SOAP projects.
To learn about authentication standards, please see Authentication Best Practices.
To try advanced authentication features, download and install the trial version of ReadyAPI.
Manage Authorizations
To manage authorizations in the request:
-
Open the XML editor for the needed request.
-
Open the Auth panel.
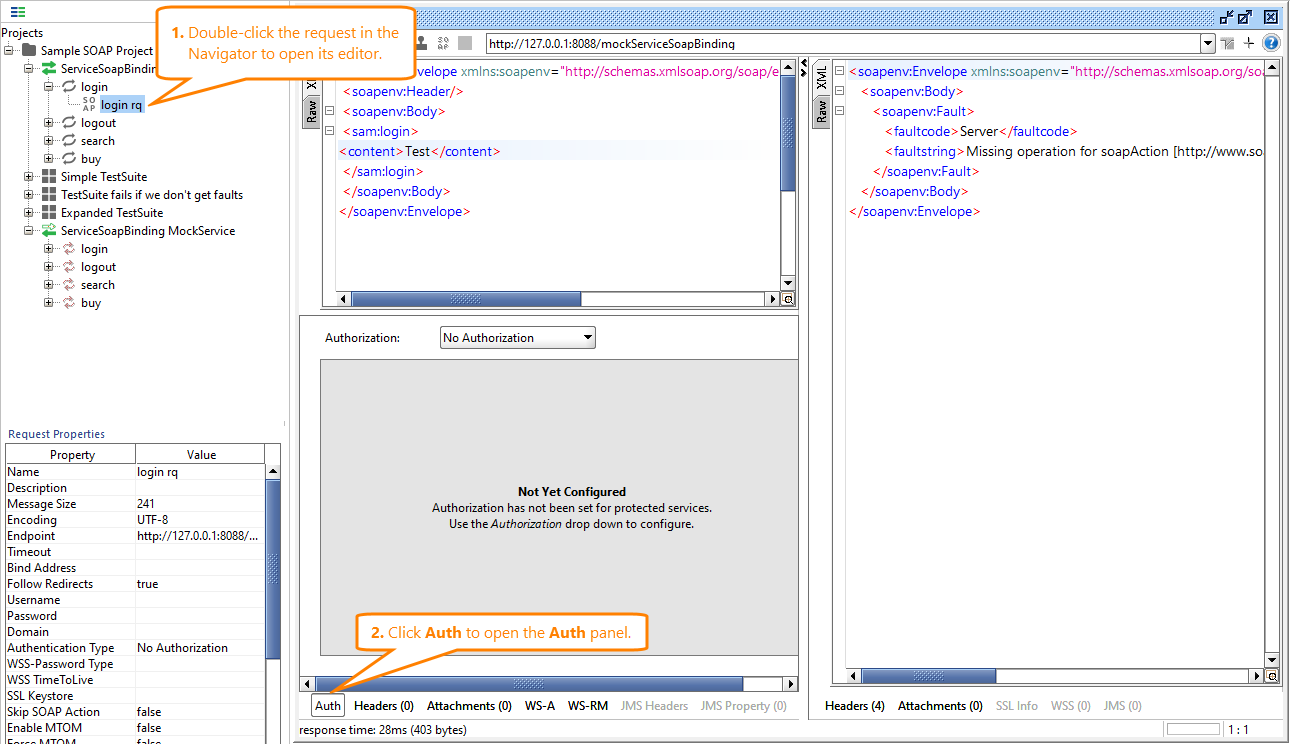
In the Auth panel, you configure authentication parameters for your request.
Add Authorization
To add a new authorization:
-
In the Authorization drop-down list, select Add New Authorization.
-
In the subsequent Add Authorization dialog, select an authorization type.
There are following authorization types supported:
- Basic
- NTLM
- SPNEGO/Kerberos
-
Click OK.
After that, the authorization options will appear on the Auth tab.
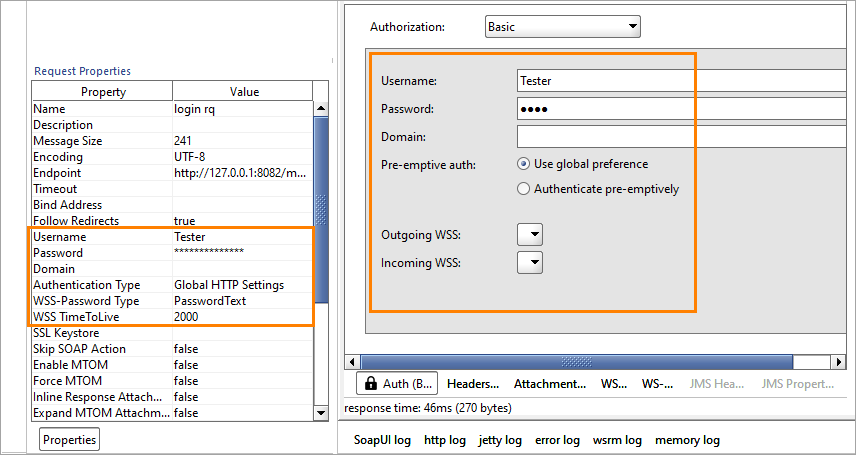
To configure your authorization, use the options that are available on the Auth tab and the corresponding request properties.
| Auth Tab Option |
Request Property |
Description |
| Username |
Username |
The username to use for the standard Basic authorization.
Note: Make sure to configure the preemptive authentication if your server expects credentials without asking for authentication. |
| Password |
Password |
The password to use for the standard Basic authorization.
Note: Make sure to configure the preemptive authentication if your server expects credentials without asking for authentication. |
| Domain |
Domain |
A domain to use for NTLM authentication routines.
Note: Make sure to disable the preemptive authentication before accessing the service via NTLM. For NTLM 2, provide your username as DOMAIN\USERNAME or \USERNAME. |
| Pre-emptive auth |
- |
Allows to enable the preemptive authentication for this specific request or command the request to use global SoapUI preferences.
For more information on the preemptive authentication, see below. |
| Outgoing WSS |
- |
Specifies the project-level outgoing WS-Security configuration to use in this request. |
| Incoming WSS |
- |
Specifies the project-level incoming WS-Security configuration to use for incoming responses. |
| - |
WSS-Password Type |
Specifies the type of the password to use (digest or plain text). |
| - |
WSS TimeToLive |
The TTL value for the added credentials. |
Preemptive Authentication
In general, preemptive authentication means that the server expects that the authorization credentials will be sent without providing the Unauthorized response. This reduces the load on network and the server itself.
You can configure your requests to use or omit the preemptive authentication. To do that:
-
Go to File > Preferences.
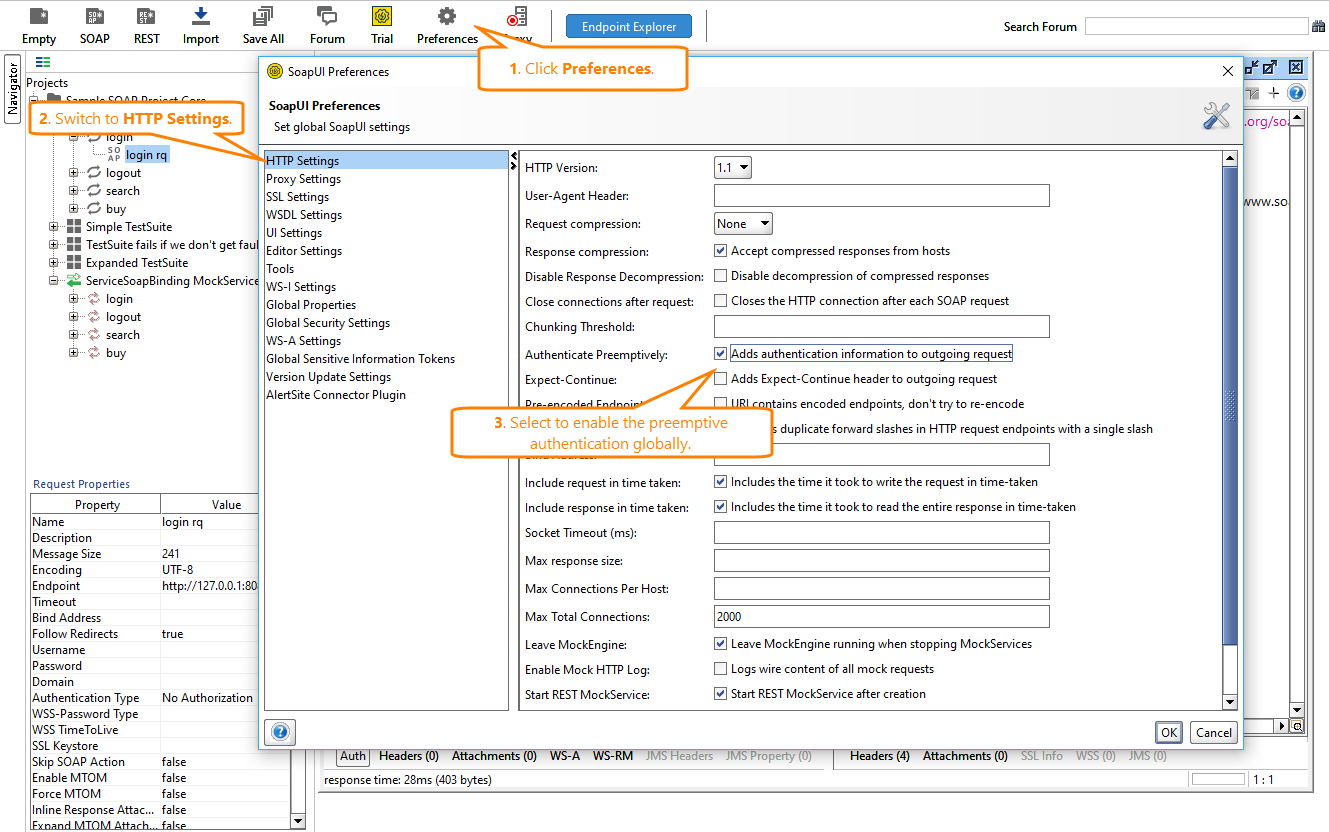
-
Switch to the HTTP Settings tab.
-
To enable preemptive authentication, select the Authenticate preemptively check box.
To disable preemptive authentication, clear the Authenticate preemptively check box.
SoupUI Open Source
- Support for SOAP and REST API Testing.
- Easy multi-environment switching.
- Detailed test history and test comparison reporting.
SoupUI Pro
- Support for SOAP, REST, and GraphQL API Testing.
- Easy multi-environment switching.
- Detailed test history and test comparison reporting.
Example Request
Let us create a sample SOAP request with authorization. It should contain a simple username, a password, and the WSS-TimeToLive property. For this example, preemptive authentication must be enabled.
After sending the request, take a look at the Raw request:
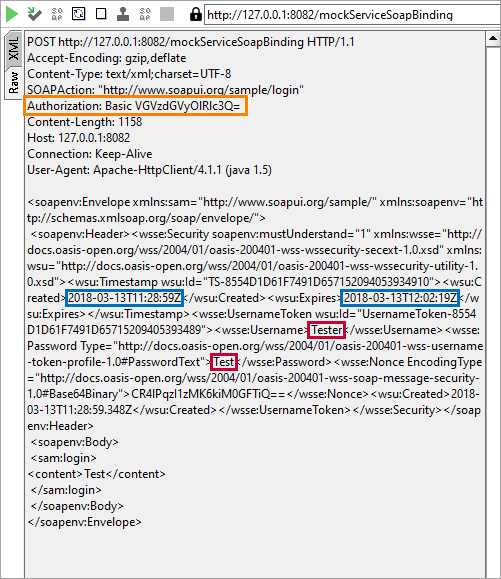
Here, you can see the following:
-
The HTTP Authentication header is at the top, since preemptive authentication is enabled.
-
The Created and Expired elements are present, since the request comes with the TTL value.
-
The Username and Password values are present in the request.
-
In accordance with the UsernamePassword standard, the Nonce element is added.
Tip: To gain more control over the UsernamePassword header, create a WSS configuration at the project level. In this case, you will get access to more customization options, which will allow you to enhance your requests. You can then use this configuration on the Auth panel, instead of adding all necessary parameters and properties manually.