What is a RESTful API?
REST stands for Representational State Transfer. It is a software architecture style that relies on a stateless communications protocol, most commonly, HTTP. REST structures data in XML, YAML, or any other format that is machine-readable, but usually JSON is most widely used. REST follows the object-oriented programming paradigm of noun-verb. REST is very data-driven, compared to SOAP, which is strongly function-driven. You may see people refer to them as RESTful APIs or RESTful web services. They mean the same thing and can be interchangeable.
There is no standard for the description format of REST services. You can import your REST service in SoapUI by using WADL files. Besides, ReadyAPI supports the OpenAPI, Swagger and RAML formats.
Your basic REST HTTP requests are: POST, GET, PUT, and DELETE. SoapUI supports HEAD, OPTIONS, TRACE, PATCH, PROPFIND, LOCK, UNLOCK, COPY and PURGE requests as well. Let’s look at an example from the Swagger Pet Store API:
- Sending a GET request to /pet/{petId} would retrieve pets with a specified ID from the database.
- Sending a POST request to /pet/{petId}/uploadImage would add a new image of the pet.
- Sending a PUT request to /pet/{petId} would update the attributes of an existing pet, identified by a specified id.
- Sending a DELETE request to /pet/{petId} would delete a specified pet.
So in a nutshell here is what each of these request types map to:
|
GET
|
Read or retrieve data
|
|
POST
|
Add new data
|
|
PUT
|
Update data that already exists
|
|
DELETE
|
Remove data
|
To learn more about REST requests and how to do them in SoapUI, please visit our Working with REST Requests page. You can also learn more about REST APIs on our REST vs SOAP page. Here, you will find pros and cons of each web service as well as example code.
Getting Started with REST APIs
In general, REST testing is sending different requests to a REST API and verifying responses from it. SoapUI supports extensive testing of RESTful web services and their resources, representations, and so on.
This step-by-step tutorial will help you learn how to send requests to a REST API and verify its responses with assertions in SoapUI. Follow along below with a quick demo using the Google Maps API to get you going. In just a few minutes, you'll know how to create your first functional test of a RESTful web service — and it only takes a few clicks! Once you get the hang of it, start testing your own APIs!
To get started with this tutorial download SoapUI now!
If you’d like a more detailed guide to testing RESTful APIs, download our E-book: REST 101: The Beginner's Guide to Using and Testing RESTful APIs
REST Testing Video Tutorial
REST Testing Tutorial
Create REST Request
Start by creating a new REST project with a single request:
-
Сlick  on the main toolbar or select File > New Rest Project.
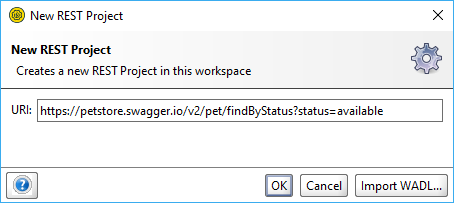
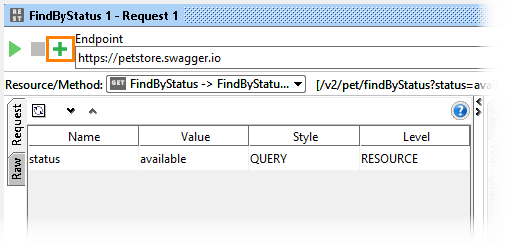
In the dialog box, enter the following URL and click OK:
https://petstore.swagger.io/v2/pet/findByStatus?status=available
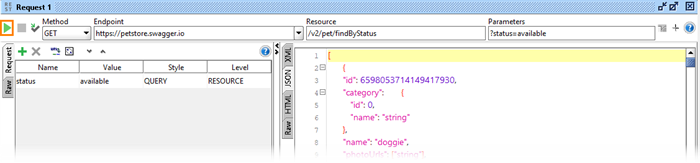
SoapUI creates the project complete with a Service, Resource, Method and the actual Request and opens the Request editor.
-
Click  on the Request toolbar and you will see the XML output returned by the service:
-
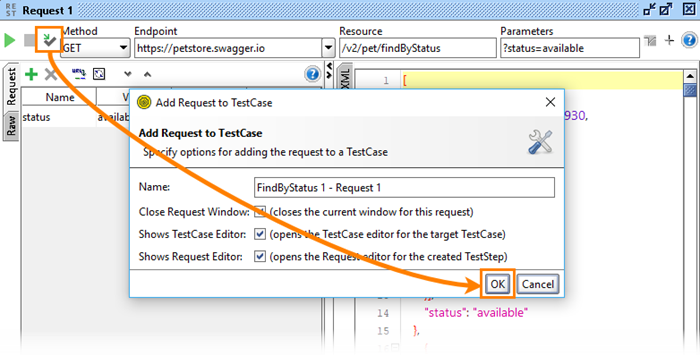
The request seems fine, so let's create an actual functional test for this resource. Click  . Specify a name for the test suite, test case and for the REST Request test step:
-
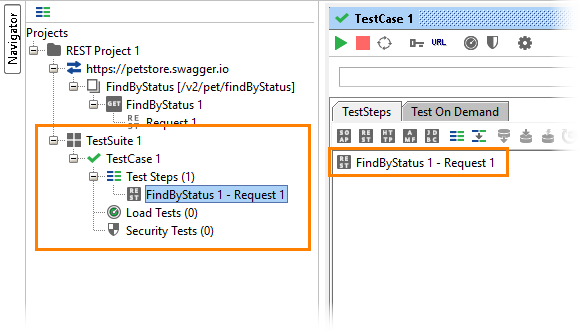
SoapUI creates a test case with a corresponding REST Request test step:
SoupUI Open Source
- Create basic test scenarios with assertions.
- Quickly build code-less assertions (no need to use Groovy scripting).
- Create advanced assertions using logic such as "contains", "matches" and more.
SoupUI Pro
- Create basic test scenarios with assertions.
- Quickly build code-less assertions (no need to use Groovy scripting).
- Create advanced assertions using logic such as "contains", "matches" and more.
Adding Assertion
Ok! Time to add an assertion to validate the content of the response. In our case we are just going to check that we get 1 place back from the service. In ReadyAPI, you can create an assertion in a couple of clicks (see below to learn more). In SoapUI OS, perform the following steps:
-
Open the REST Request test step and click to send the request.
-
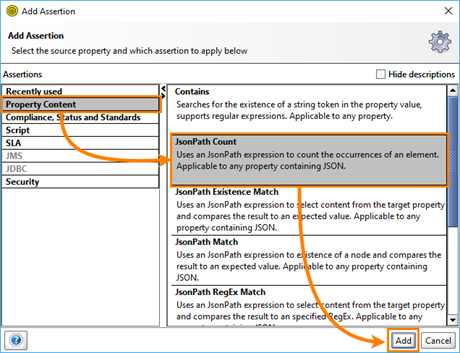
Click  to add assertion:
-
Select Property Content > JSONPath Count and click Add:
-
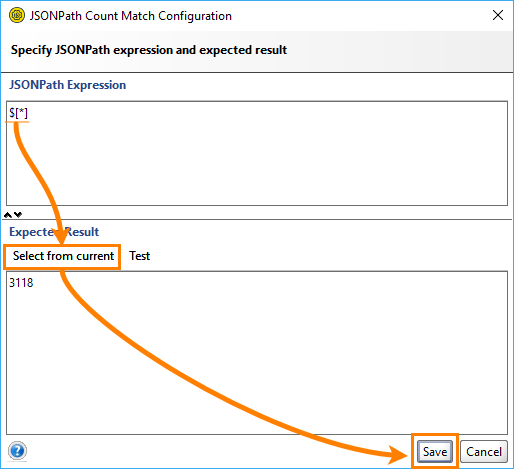
In the dialog box, specify the following JSONPath expression:
$[*]
-
Click Select from current to obtain the value from the current response:
-
Click Save to create the assertion.
-
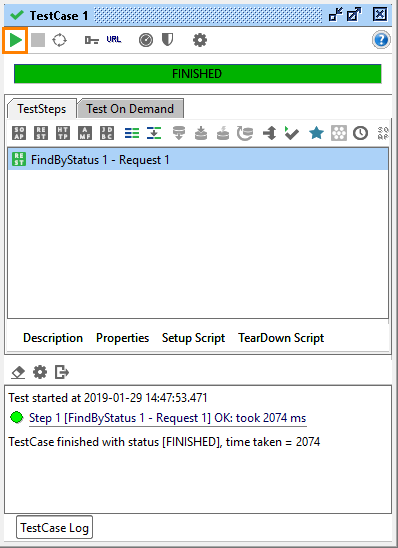
Run the test case and check that the assertion passes:
Adding Assertions in ReadyAPI
This section explains how you can add assertions in ReadyAPI. To try the product, download ReadyAPI Trial.
-
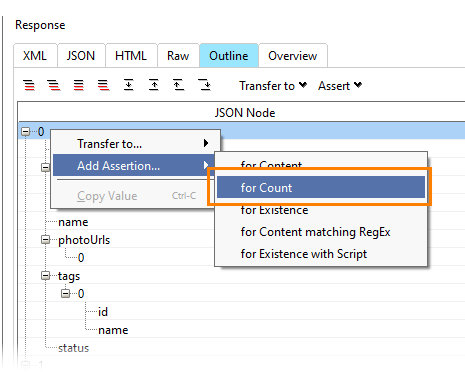
After you get a response, open the Outline tab. Right-click the node you want to verify and select Add Assertion > for Count:
-
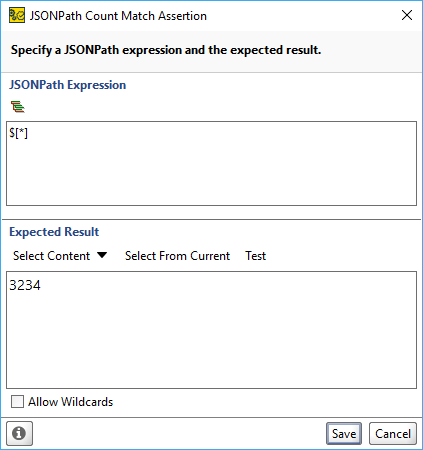
The appropriate assertion will be added and configured automatically. Check the generated JSONPath statement at the top and its expected result below and click Save:
Creating Reports in ReadyAPI
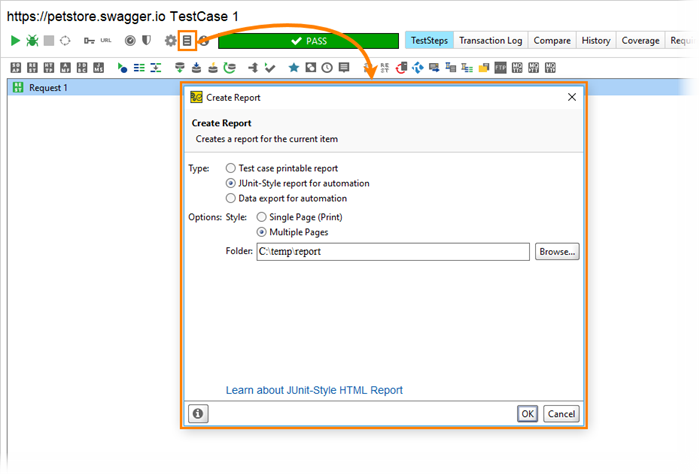
Finally, if you are running ReadyAPI, you can create a simple HTML report:
-
Open your test case and click .
-
After test finishes, click  .
.
-
In the subsequent dialog select JUnit-Style HTML Report and specify a folder where you want to save the report. Click OK.
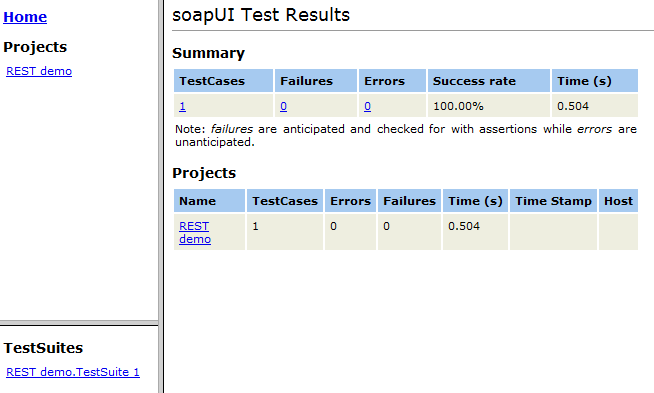
SoapUI will generate the report and open it in the default browser:
Voila! Your first functional test of a REST service with SoapUI, just a couple of clicks away.
No one knows APIs better than SmartBear. Find out what our Pro version of SoapUI can do to improve your testing.
Next Steps
REST Testing Tutorial
SOAP vs. REST 101: Understand the Differences
REST Resources and Methods
Working With REST Requests
Intro to API Mocking