NOTE: This page contains information on standalone ReadyAPI that has been replaced with ReadyAPI.
To try the new functionality, feel free to download a ReadyAPI trial.
Quite often you might want to save data collected in your tests to some external storage, perhaps for custom reporting or for reusing the data in a test further down the test execution. ReadyAPI includes a TestStep specifically for this purpose, the DataSink, which allows you to save an arbitrary number of property values to a number of supported formats, including Excel, JDBC and plain text files. This document will give you an overview of how to use the DataSink in your tests and also show a number of hands on examples.
1. The DataSink TestStep
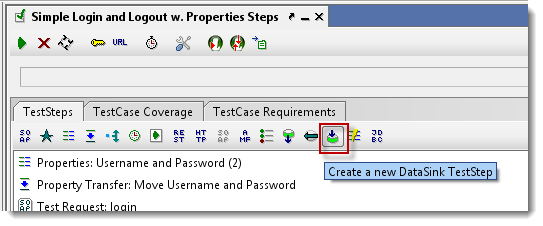
Add a new DataSink to a TestCase with the corresponding TestStep button or popup menu option:
This will create the DataSink TestStep and open its configuration window:
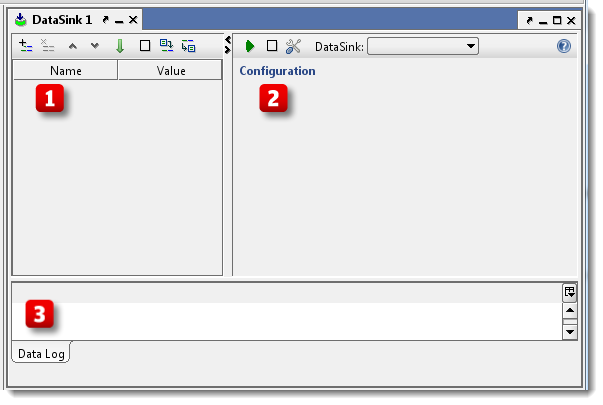
The window is divided into three main parts:
- A table of properties that will be written to specified storage each time the DataSink TestStep is executed
- A configuration area that allows you to configure the selected DataSink Storage
- A Data Log that shows each row of data that has been written to the DataSink storage while the window has been open
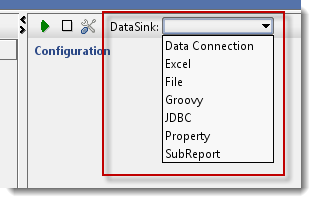
Next is to select which type of DataSink storage to use from the DataSink drop-down on the top left toolbar:
Once selected, the corresponding configuration panel is shown below the drop-down, for example if we select the Excel DataSink we get the following
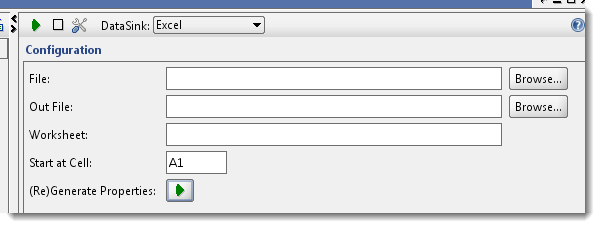
Here we can set the name of the excel file to create (in the Out File field), and optionally specify in which worksheet and at what cell to start writing the data.
After selecting DataSink Storage you will need to add properties for each “column” that is to be written to the storage. For example if we want to write the result of our CurrencyConverter service, we might add the following:
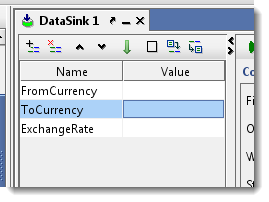
Ie the two input currencies and the calculated rate. Finally we need to ensure that there are some values in these properties when the DataSink testStep is executed. This can be done in several ways:
- Via property transfers to each of these properties from the request and its response
- Via property expansion directly in the value fields, referring to the desired properties
- Via a script Teststep before the DataSink that manually writes the desired values to the DataSink
- Any combination of the above
Now when the DataSink properties have been filled with the desired value(s), their content will be written to the configured DataSink each time the DataSink TestStep executes.
2. Testing a DataSink
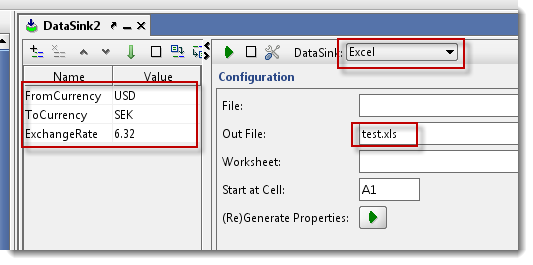
The toolbar at the top of the DataSink allows you to “run” the DataSink for the current values of the DataSink properties, which will save them to the corresponding DataSink Storage. For example if we set the “Out” field in the Excel DataSink above and enter some test values in the DataSink Properties table:
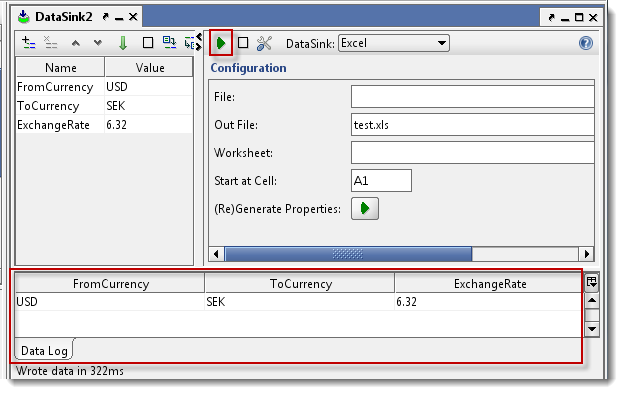
We can now press the Run button at the top, which will write these values to the configured excel file, which can also be seen in the DataSink log at the bottom of the window:
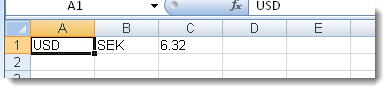
Finally open the Excel file to confirm that this is the case:
3. Available DataSink Storages
Here comes a short overview of the available DataSink Storages, check out the reference for more detailed information on their options.
- Data Connection – writes the properties to a database using a Database Connection created at the project level. The SQL Update statement should be in the format of a Prepared Statement and contain a ? for each property to be inserted. For example if we were to save our above results to a table named tb_conversionrate, the SQL statement might be
INSERT tb_conversionrate VALUES( ?, ?, ? )
where the columns in the table would have to be in the same order as the defined properties.
- Excel – writes the property value to cells in a specified or empty Excel sheet, a new row is started each time the DataSink is run during a single execution of the containing TestCase (see the example in the DataSink Tutorial).
- File – Write property values to a CSV file using the specified separator, trimming and encoding.
- Groovy – invoke a custom groovy script each time the DataSink TestStep is executed. The script has access to the DataSink properties and their value and can persist them in any way desired (email, twitter, etc), se example below
- JDBC – Same as the Data Connection Storage but allows configuration of the JDBC connection directly in the configuration panel instead of using a connection defined at the project level
- Property – writes values to property in another TestStep, this is useful for creating blocks of XML from the stored values (see example below).
- SubReport – Stores values in an internal data structure that is exposed to the reporting engine for creating a custom report, see The Report DataSink for an example.
4. Property DataSink Usage Example – Creating blocks of XML
It is not uncommon to want to create a block of XML that will be used as input to a subsequent request, for example we might have a DataSource loop that performs requests and aggregates parts of the each requests result into a single block of XML that is used to send a final request after the loop. The TestCase would have the following setup
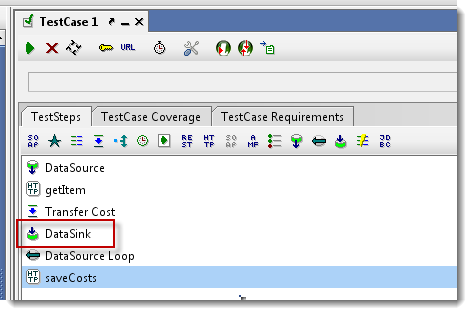
Here the getItem call is a REST call that receives items for ID values stored in the DataSource. The “Transfer Cost” property transfer saves the cost of each item to the Cost DataSink, which is configured as follows:
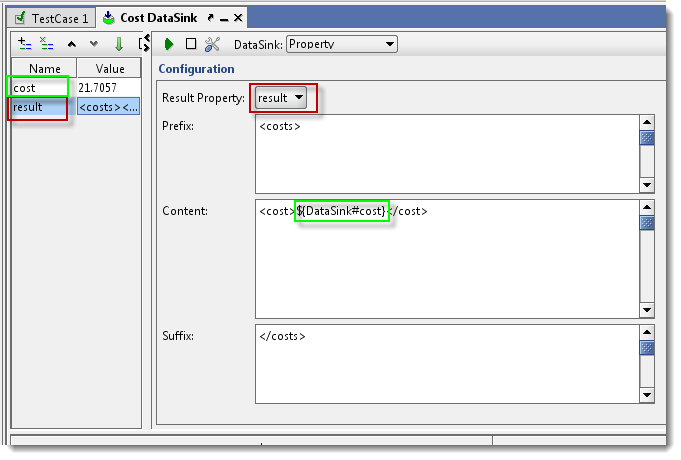
Here the DataSink uses the Property Storage and has the following configuration:
- A cost property - contains the cost of the current item (via the Property Transfer)
- A result property - contains the aggregated XML result (as specified in the drop-down at the top of the configuration panel)
- Content - XML that is added to the result property each time the DataSink is executed, this uses the value of the cost property via standard property expansion
- Prefix and Suffix - XML elements that are used to surround the generated XML.
The “saveCosts” HTTP request after the loop does a POST of the aggregated XML property:
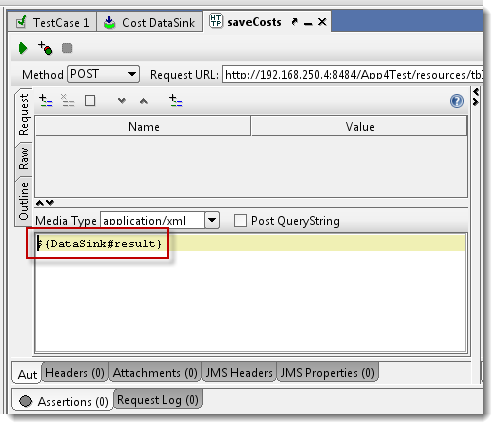
Here you can see that the result property in the DataSink is being inserted directly into the body of the POST via standard property expansion, and after running the TestCase we can look in the Raw request view to see the final aggregated XML being sent:
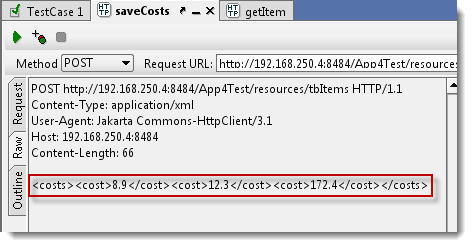
Here you can see the aggregated costs of the retrieved items being posted to the target service for further processing.
5. DataSinks and Load Testing
When running a LoadTest in soapUI containing a DataSink, each executed TestCase will by default have its own copy of the DataSink storage. This will have different effects depending on which storage you are using:
- For JDBC and DB Connection DataSinks they will all write to the same database in parallel, so that should not be a problem
- For the File and Excel DataSinks, all TestCase executions will write to the same file, which will most likely result in concurrency or IO errors. This can be overcome by either using a shared DataSink (see below) or by making sure that each execution has a unique filename, for example by adding the ThreadIndex context variable to the filename via property-expansion:
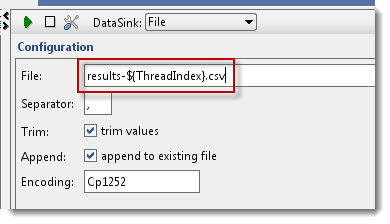
(the ThreadIndex variable will have unique values for each thread, and the append option ensures that repeated executions by the same thread will not overwrite the previous results)
- For the Groovy DataSink your script needs to handle threading as desired.
- The Property DataSink will create the result as described in the example above, which is inside the TestCase and thus not at any level that can cause problems.
As hinted above, there can be situations where you might want to share the DataSink between all running threads during a LoadTest. For example you might want all threads to write to the same Excel file during the entire execution of the LoadTest.
For this you need to configure your DataSink to be shared; open the DataSink options dialog to enable this functionality:
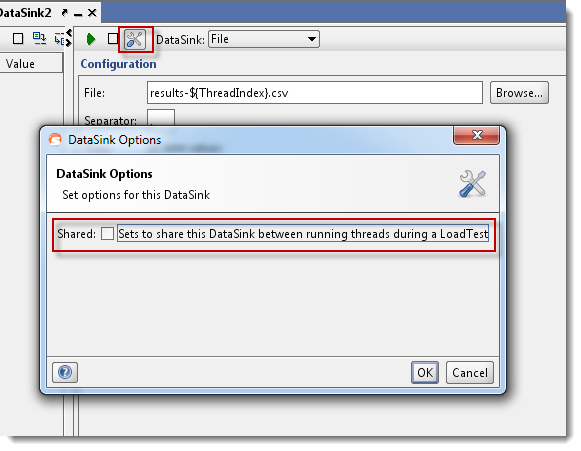
Now when running a LoadTest containing a shared DataSink, all TestCases will use the same DataSink Storage instance and you can safely gather data from all threads into a single storage.