This tutorial walks you through how to perform a REST test in SoapUI Open Source. For additonal testing features, such as data-driven testing and CI/CD automation, check out the latest release of ReadyAPI here.
REST Sample Project
Getting started with a new application is always a challenge, no matter how complex it is. In order to get started, SoapUI comes with a sample file that can be used as reference and inspiration.
Note: If you chose not to install tutorials when installing the product, you do not have the sample file. Use the SoapUI installer to update the existing installation and get access to the sample file.
The REST sample illustrates some of the basic concepts of testing REST services in SoapUI. Try out the project, run the included mock service and tests to familiarize yourself with the SoapUI interface, and then move on to the Your First ReadyAPIject tutorial.
Importing the Project
Let's start by opening the project.
-
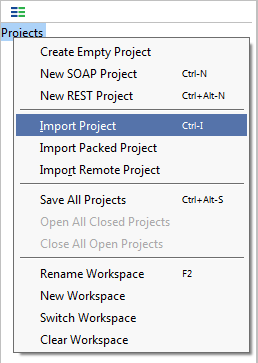
Click  on the main toolbar or right-click the root node in the Navigator panel and select Import Project:
-
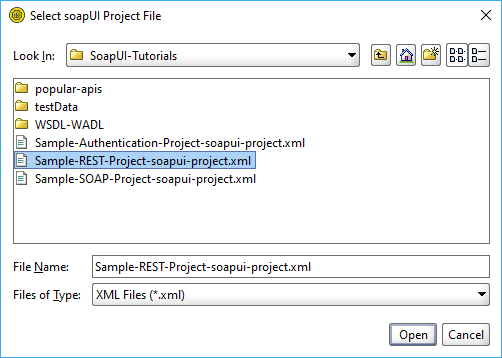
In the Select ReadyAPIject File dialog, select the Sample-REST-Project-soapui-project.xml file from the <Home directory>/SoapUI-Tutorials folder.
-
The sample project will be shown in the SoapUI Navigator.
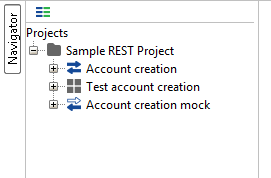
The structure of a ReadyAPIject is like this:
-
Project
-
Interface
-
Test suites
-
Mock services

SoapUI Open Source
- Support for SOAP and REST API Testing.
- Easy multi-environment switching.
- Detailed test history and test comparison reporting.

SoapUI Pro
- Support for SOAP, REST, and GraphQL API Testing.
- Easy multi-environment switching.
- Detailed test history and test comparison reporting.
Run mock service
Endpoints of sample requests refer to a mock service. Run the mock service before sending a request to it. Otherwise, the test will fail. To learn more about mock services, see Web Service Mocking below.
To run the sample mock service, do the following:
-
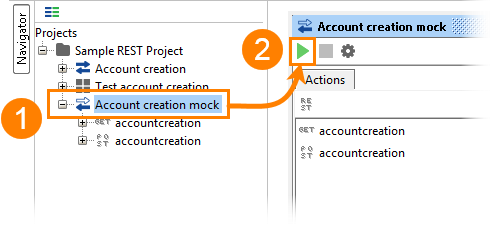
Double-click the Account creation mock node in the Navigator panel.
-
In the mock editor, click 
Functional Testing of REST Web Services
Let's look at how REST tests work in SoapUI.
-
Expand the Test account creation test suite and the accountcreation test case:
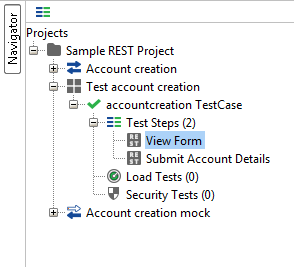
As you can see, the test case consists of two REST Request test steps. Each test step sends a request to the testing service and gets a response.
-
Double-click the Submit Account Details test step. This request contains two parameters. When you set values for them, the parameters are added to the request URL:
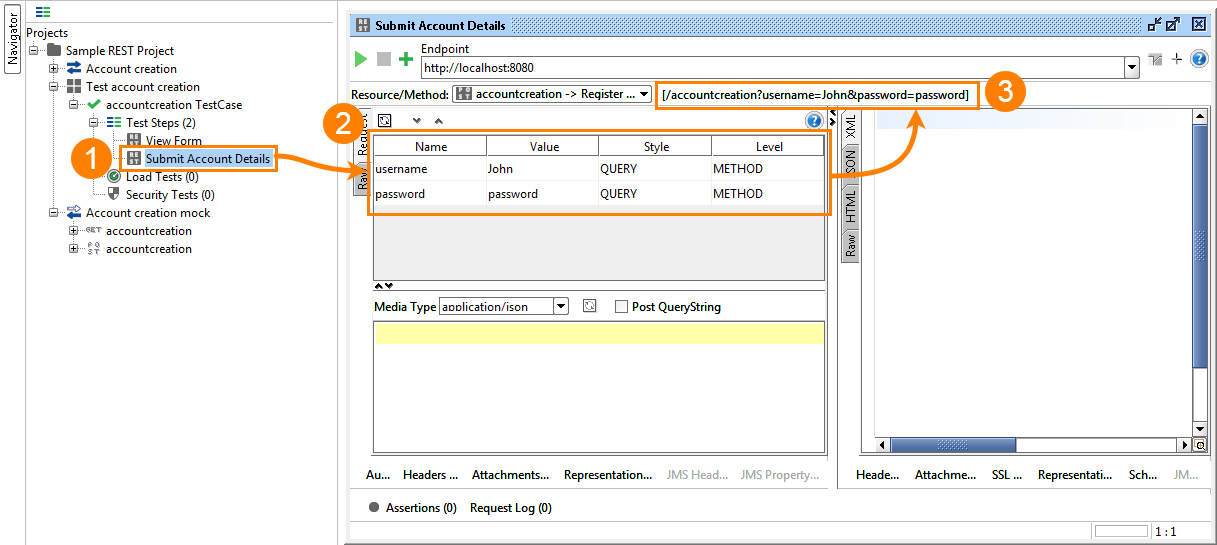
To learn more, see Understanding REST Parameters.
-
Click  to send the request. You will see the response in the Response panel on the right:
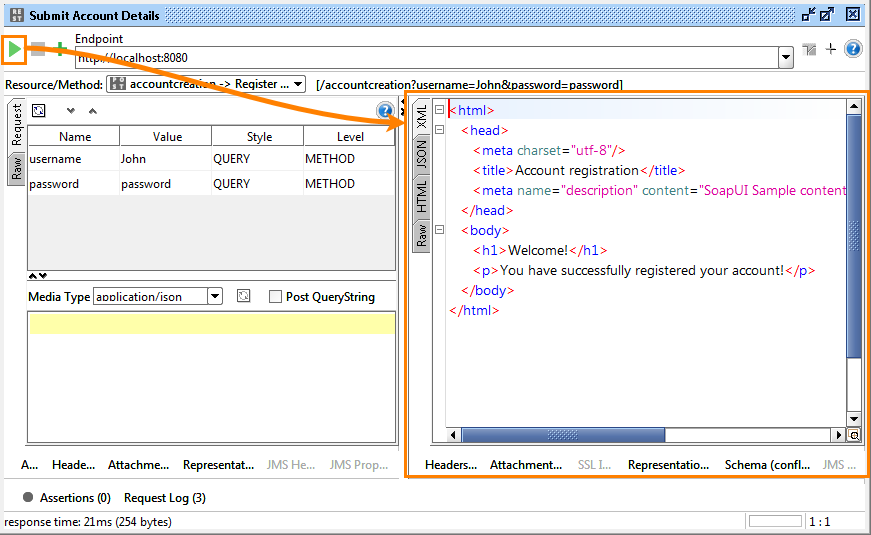
Note: Make sure you run the mock service to get a response.
-
To validate the response in SoapUI, you use assertions. Click  on the test step toolbar, select the Property Content > Contains assertion and click Add.
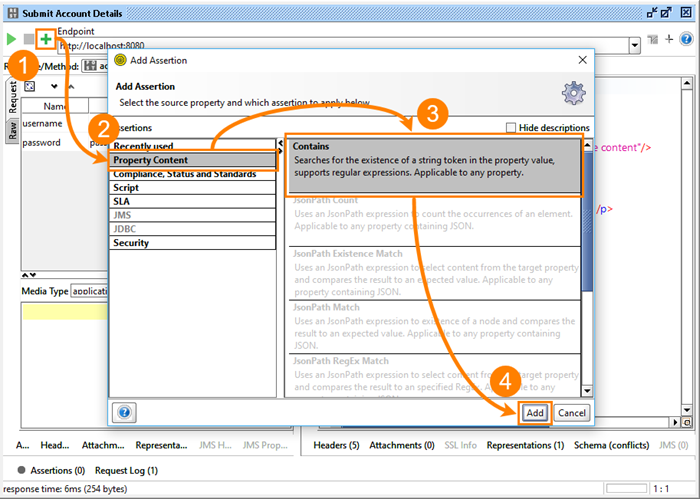
-
Enter the content that the response message must contain:
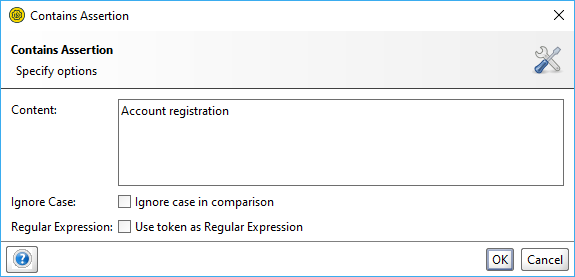
To learn more about assertions, see Getting Started With Assertions
The Test Run
After you add the assertion to the test step, you can run the test case. Double-click the test case in the Navigator panel and click  in the test case editor. The test case progress bar shows the progress:
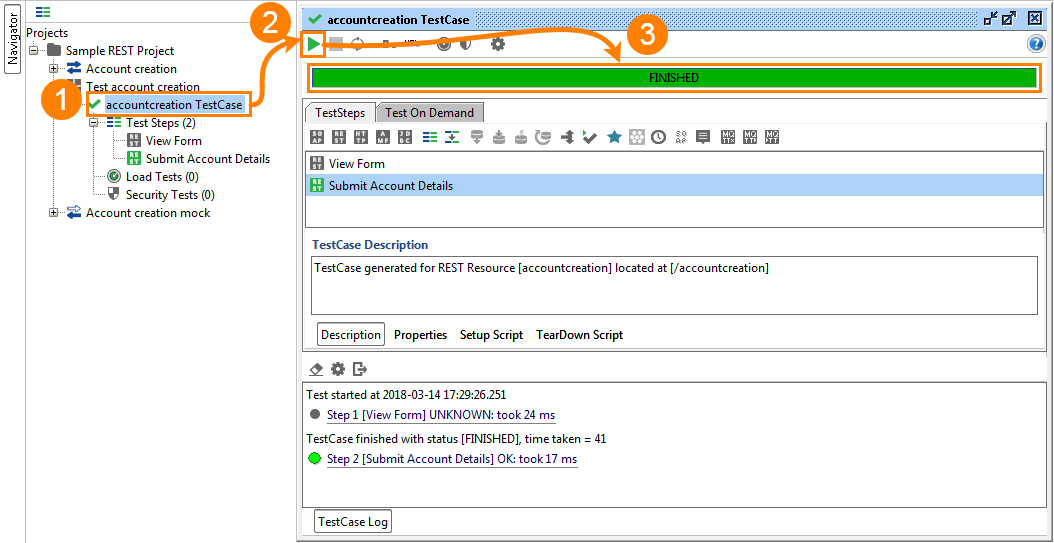
Note: If the test case fails, make sure the mock service is running.
REST Service Mocking
SoapUI allows you to simulate the functionality of a web service before it is implemented. This process is called Mocking. It is useful when you cannot use a web service for some reason.
The sample REST Project contains a mock service, so you can examine how it works.
-
Expand the Account creation mock node and double-click the action that simulates responses to POST requests.
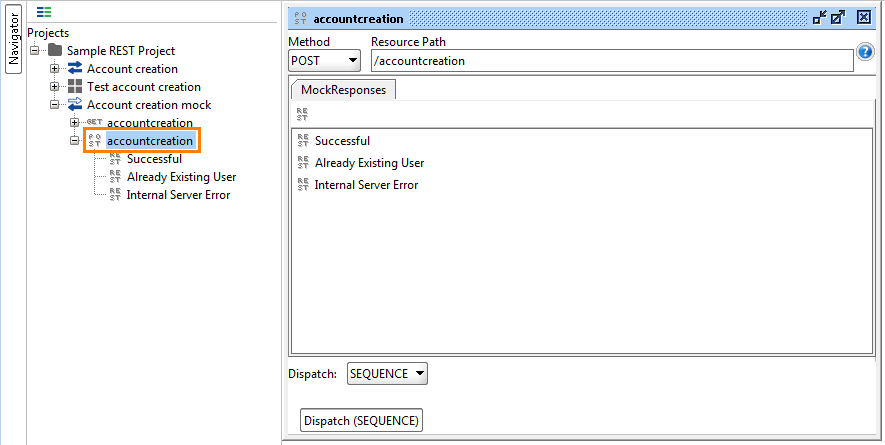
The mock action contains possible responses. The Dispatch setting controls which response should be sent when the mock service receives a request. To learn more, see Mock Action Editor.
-
Open the Successful response. In the Response editor, you can specify the HTTP status code, headers and the response body. To learn more, see Mock Response Editor.
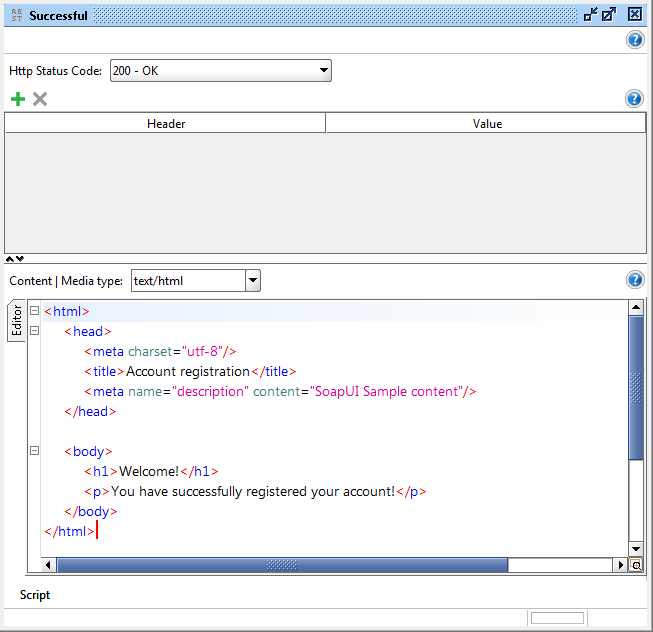
You may also be interested in ServiceV that provides more functionality for creating virtual services. Try ReadyAPI for free.