The REST service mocking feature allows you to simulate a REST service by creating a mock service. You can then run it either directly from SoapUI, or use the mockservicerunner.bat (mockservicerunner.sh in OS X) command-line application.
When Mocking Is Required
You can use REST mock services to perform various tasks:
-
Create a web service prototype. You can generate a complete mock service using just a single request. In this case, you can implement and test clients much faster, since there is no need to create a complex working solution.
-
Develop and test client applications. You can simulate requests you want to test and prepare a number of various responses for them. These responses can contain scripts, custom HTTP headers, attachments, and other content. You can cycle or randomize the responses, or prepare specific responses for certain requests.
-
Test every aspect of your future service. With SoapUI, you can perform functional and load testing against a mock service before even creating an actual live service.
Note: Please keep in mind that SoapUI mock services are not designed to be implemented as actual live services. Even if a mock service works correctly, this does not mean the actual service built atop of that mock will work as required. Also, it does not provide any actual functionality except for sending the predefined responses.
Take Mocking to the Next Level | Create Mocks by Recording HTTP(S) Traffic
Share and Distribute Mocks
If you need to share your mock service with other members of your team or even with partners and customers, you can easily save the mock you have created to a WAR file. You can then deploy this WAR mock service in any Java server environment – it will run even without SoapUI.
Create Scripts
You can enhance your mocks via scripts. Scripts allow you to simulate almost any behavior, including dynamic results, random errors, responses containing variables, and so on.
Sample REST Mock Service
In general, a mock service simulates a live service by exposing a certain number of mock actions. Mock actions, in turn, contain a quantity of mock responses.
Let us take a look at the sample mock service:
-
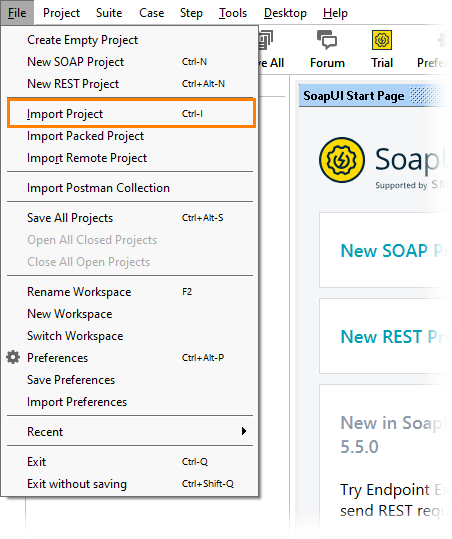
Select File > Import Project.
-
Open the Sample-REST-Project-soapui-project.xml project file located in your system’s user directory, in the SoapUI-Tutorials folder.
-
Once the project you have opened appears in the Navigator, double-click the Account Creation mock mock service to open its editor.
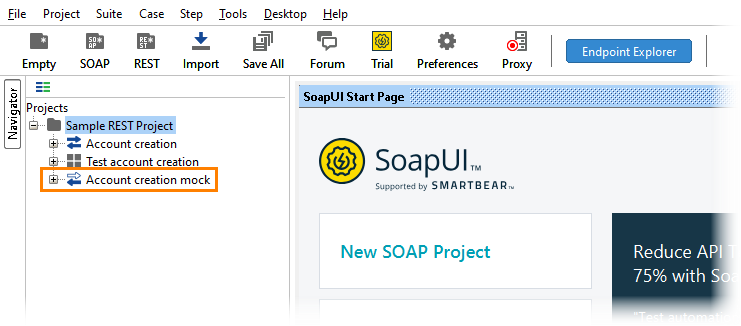
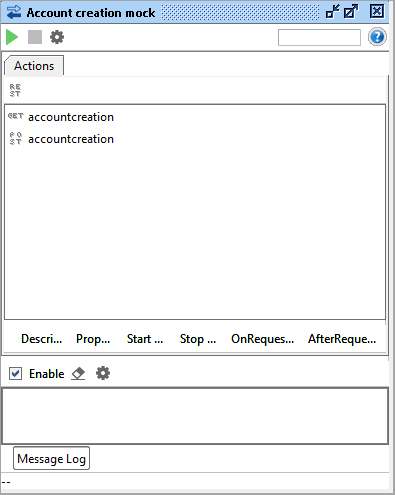
As you can see, this mock service contains two mock actions – GET and POST.
-
Double-click the POST action to see the mock responses it contains.
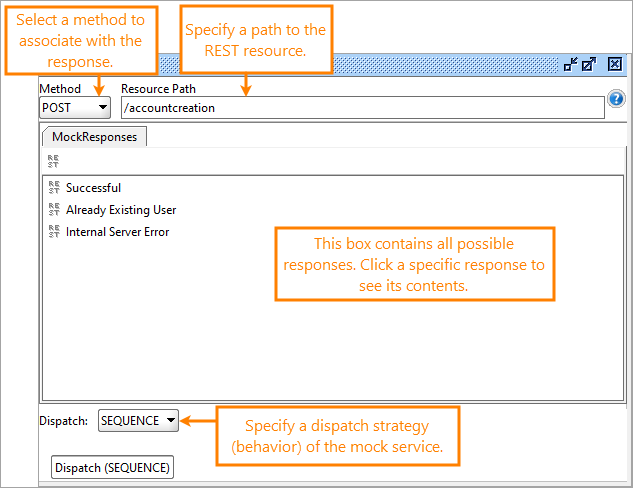
In this window, you can see the associated method in the Method drop-down list, a path to the resource in the Resource Path edit box, and a number of responses.
Tip: In the Dispatch drop-down list, you specify the behavior of the mock service: SEQUENCE if you want the responses to be sent only once in the listed order, or SCRIPT if you prefer to use a specific script. The edit box for the script is available once you select SCRIPT in the drop-down list.
-
Double-click a response to view it.
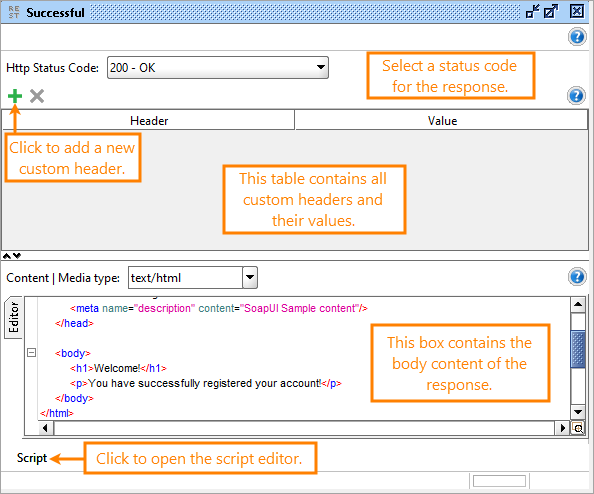
In the response editor, you can configure the response:
-
Select a status code in the Http Status Code drop-down list.
-
Configure custom headers.
-
Specify the content type in the Content | Media Type drop-down list.
-
Create and modify the body content in the editor.
-
Add a custom script to be invoked with the response.