There are several panels to choose from when working with both SOAP Request and Response messages. Let's have a look at both.
Request Messages
-
XML – a standard text view of the underlying XML message, right-click in the editor to get a popup-menu with applicable actions:
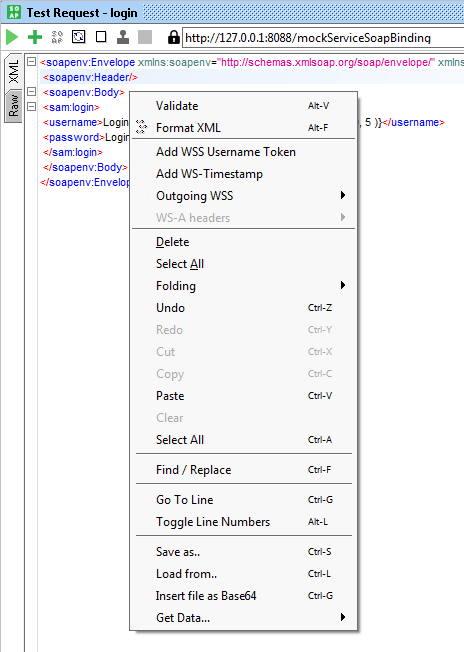
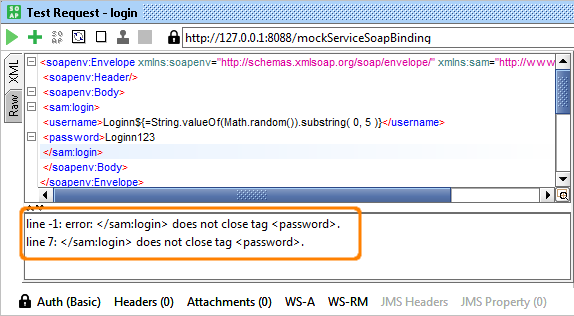
Select Validate to validate the current message against the underlying schema and display a list of validation errors at the bottom if found:
-
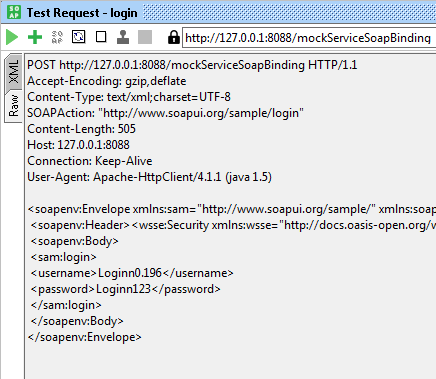
Raw – displays the actual bytes of the last sent message including HTTP headers, MIME attachments, and so on:
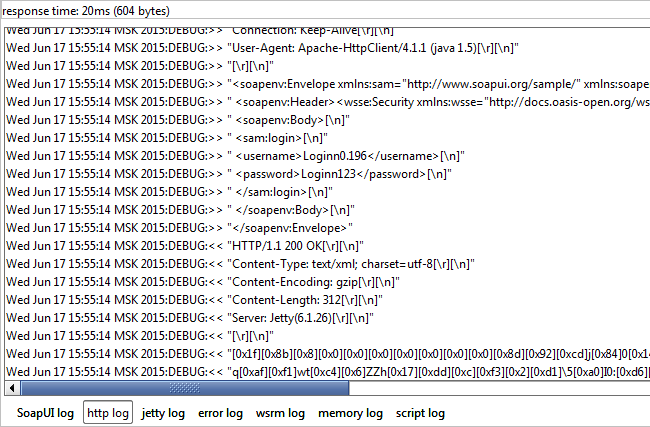
Use this panel to inspect the results of property expansions, filters and so on. The contents here should be the same as in the HTTP log at the bottom of the main SoapUI window:

SoapUI Open Source
- Support for SOAP and REST API Testing.
- Easy multi-environment switching.
- Detailed test history and test comparison reporting.

SoapUI Pro
- Support for SOAP, REST, and GraphQL API Testing.
- Easy multi-environment switching.
- Detailed test history and test comparison reporting.
-
Outline Editor – shows a tree view of the underlying XML message:
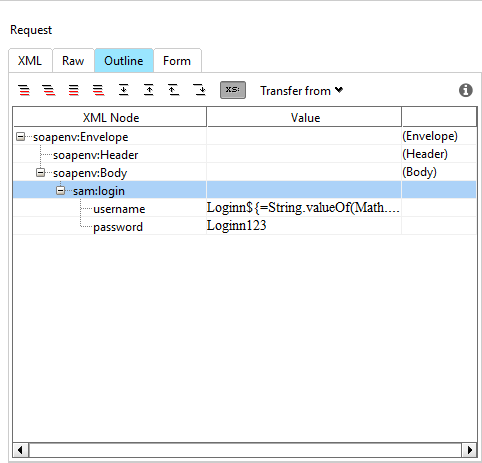
The column to the right shows the schema type of the corresponding value.
Here you can edit values of existing elements/attributes but cannot add or remove existing nodes in the tree.
-
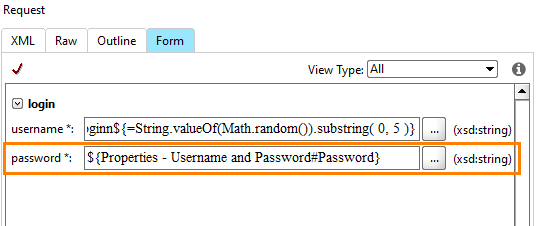
Form – renders a user-friendly input form for the underlying request, making it substantially easier to enter content than in the XML editor:
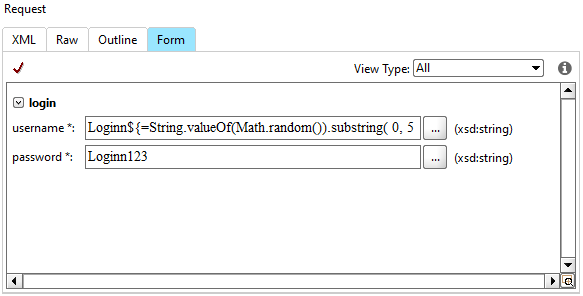
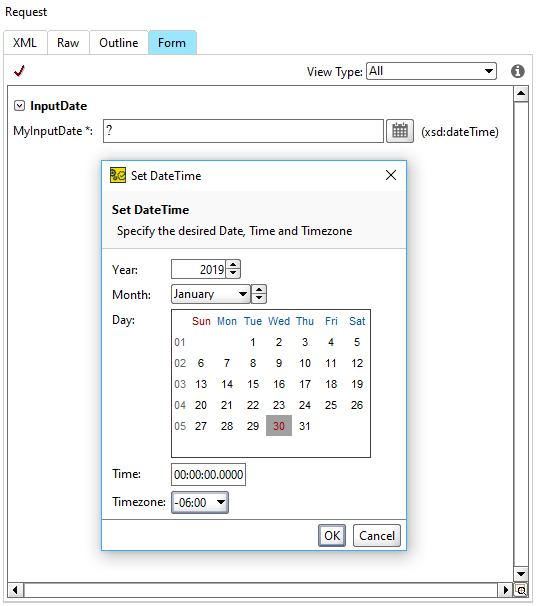
The View Type option allows you to remove non-required elements or elements that do not contain any data. It may be useful when performing manual testing if only certain fields are used. Depending on the field type, ReadyAPI renders different editors, including special editors for dates, times, arrays, lists and so on. For example, below is a screenshot of the date editor:
Note: Although the editor has support for reasonably complex XML Schemas, it does not support all possible XML Schema constructs.
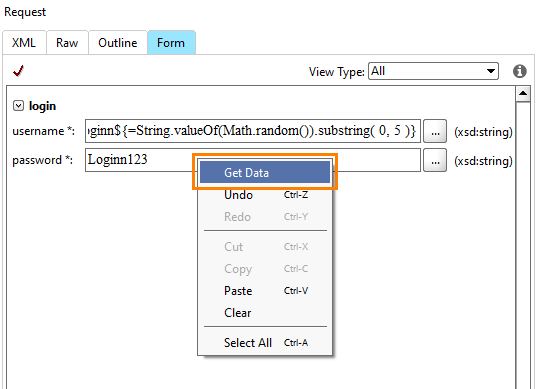
Inserting Data
All editable fields have a context menu with standard editor actions and the Get Data action that will automatically insert a property expansion for the selected property. For example, if you want to use the Password property in the password field, you can right-click in the corresponding form editor field and select Get Data:
Then select the desired property in the subsequent Get Data dialog:
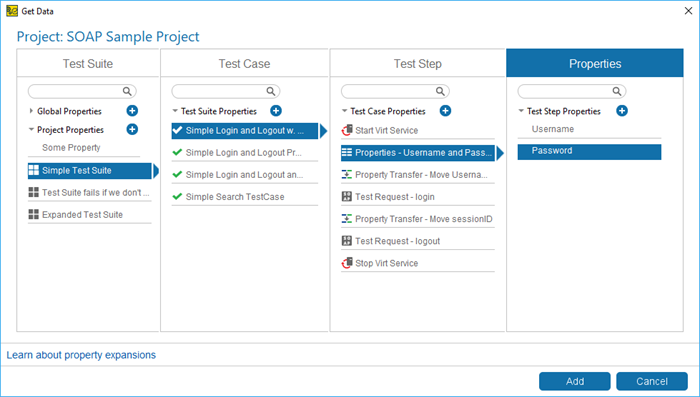
Here we select the Password property defined in the Properties test step. After you click Add, you will see the following:
Response Messages
The Response message has the following panels:
-
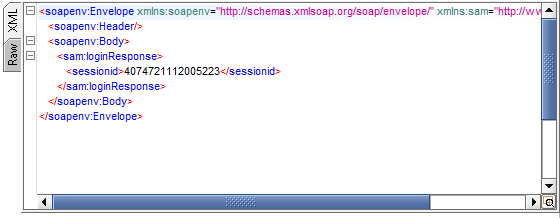
XML – shows the XML content of the response message:
-
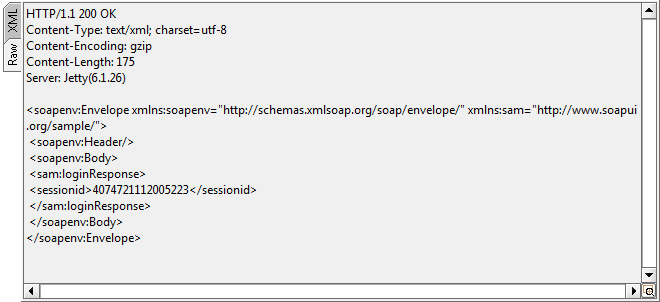
Raw – shows the raw bytes of the response message:
-
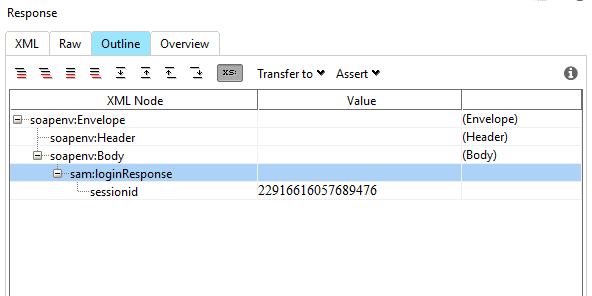
Outline Editor – shows a read-only tree view of the response message:
-
Overview Editor – shows user-friendly rendering of the response:
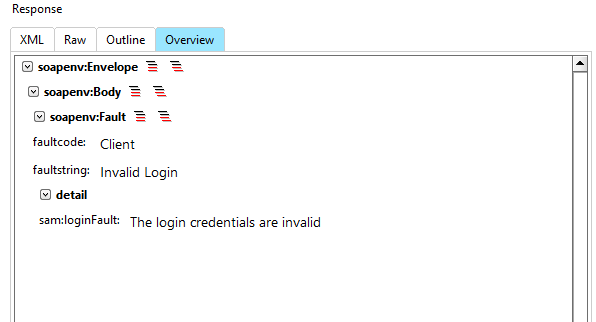
The URLs in the response message are clickable. They will be opened in the default browser.
Next Steps