Your First SOAP Test
This guide describes how to create your first SOAP and REST projects in SoapUI.
1. Your First SOAP Project
Tip: The sample WSDL service that appears in this video has been removed. Please use one of the following WSDL URLs instead:
- http://www.dataaccess.com/webservicesserver/numberconversion.wso?WSDL
- http://webservices.oorsprong.org/websamples.countryinfo/CountryInfoService.wso?WSDL
ReadyAPIjects are the central point in all SoapUI testing. Once you create the project, you can expand it with functional tests, load tests, mock services, and much more. This tutorial describes the two main steps of creating a SOAP project:
1.1. Create a SOAP Project
-
In the Navigator, which is in the left part of the SoapUI window, right-click Projects and select New SOAP Project.
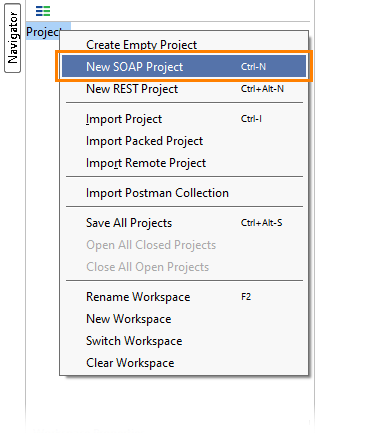
The New SOAP Project dialog will appear.
Note: To create a new SOAP project, you can also press
CTRL+N(in Windows) orCMD+N(in OS X). -
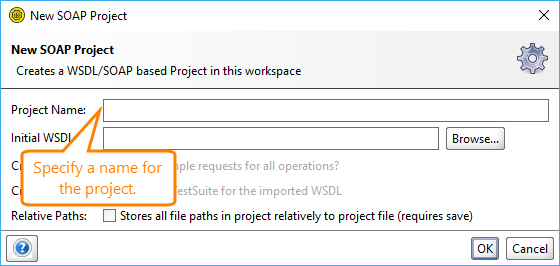
In the New SOAP Project dialog, specify a name for your new project in the Project Name edit box.
-
Click OK.
The new project will appear in the Navigator.
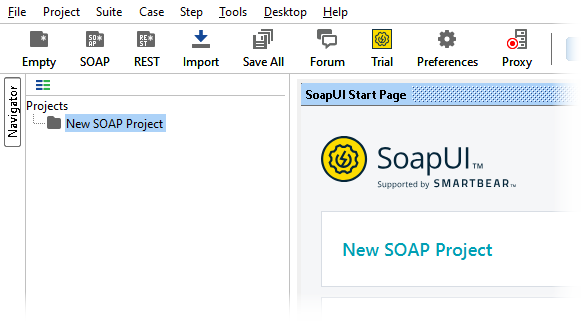
Congratulations, you have just created your first SOAP Project!
Tip: You may also want to try importing an existing project. See Web Service sample project for more details.
1.2. Add a WSDL File
In SoapUI, the SOAP projects mostly use WSDL services as a primary resource. It is not necessary to add a WSDL file, but if you do this, the testing process will become easier since the WSDL file usually contains all necessary information about the web service you want to test.
Let us add a WSDL to the newly created project:
-
Right-click the name of the new project in the Navigator and select Add WSDL.
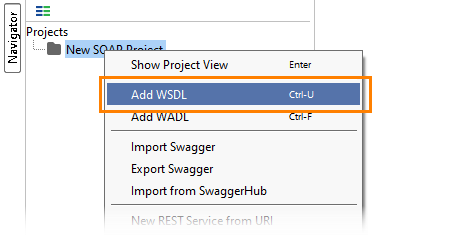
The Add WSDL dialog will appear.
-
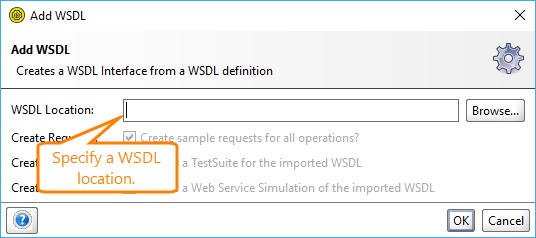
In the WSDL Location edit box of the dialog, specify the path to the WSDL file or service:
-
Click OK.
-
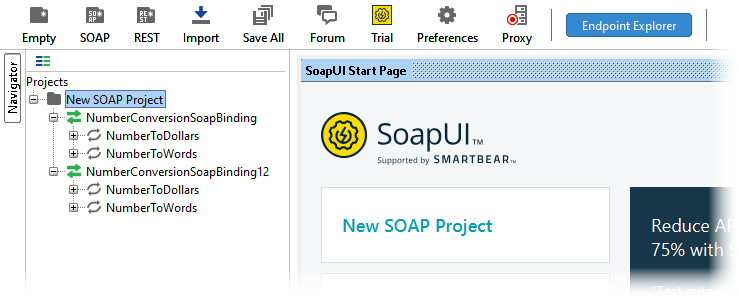
The web service operations associated with the project should appear in the Navigator. This means you have successfully added WSDL to your project.
-
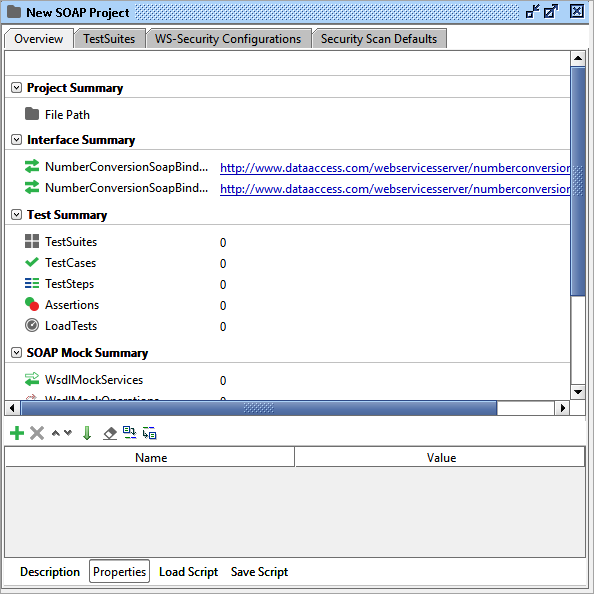
Double-click the project name in the Navigator. The project editor appears with an overview of your project, including security configurations and basic requirements.
Tip: In ReadyAPI, the project overview contains even more useful information, such as a list of available JDBC connections, test run history and statistics, and so on. You can check these tools out by by downloading the ReadyAPI trial.
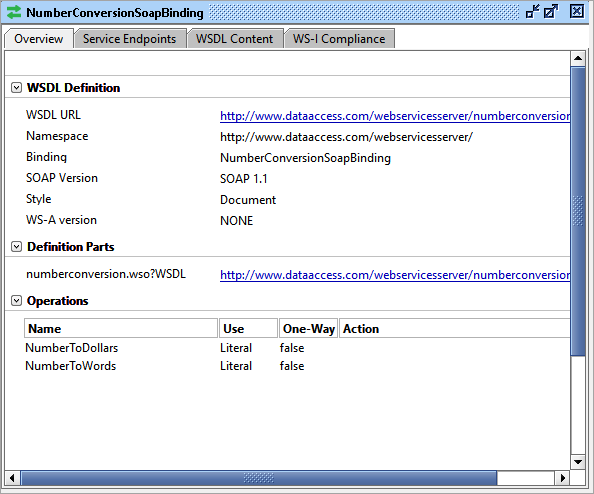
Double-click the interface name to get an interface overview. In the resulting window window, you will see information about the WSDL file.
2. Your First REST Project

How to Test RESTful APIs & Web Services | Getting Started | SoapUI
The REST testing bases around sending different requests to a RESTful API and verifying responses from it. This tutorial describes the basic ways of creating REST projects in SoapUI:
- Create REST project from URI
- Create REST project from WADL definition
2.1. Create REST Project From URI
-
In the Navigator, right-click Projects and select New REST Project.
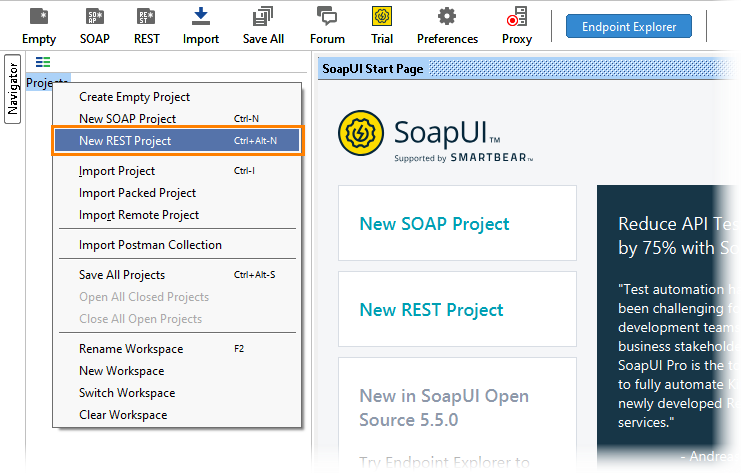
The New REST Project dialog will appear.
Note: To create a new REST project, you can also press
CTRL+ALT+N(in Windows) orCMD+ALT+N(in OS X). -
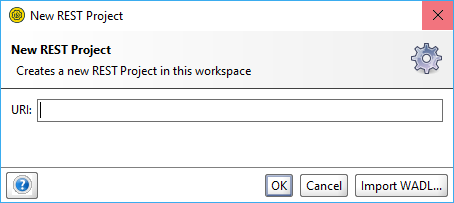
In the dialog, specify the URI path to your REST API in the URI edit box.
Tip: To see how it works, you can use the sample Petstore web service: http://petstore.swagger.io/v2/swagger.json.
-
Click OK.
The new project will appear in the Navigator, along with the web service operations available for the REST API in question. You can then double-click the name of the project to get a project overview:
Double-click the name of the service to get the service overview:

Note: To gain access to more convenient tools for REST API testing, check out ReadyAPI – our advanced solution for REST and SOAP APIs testing. To try it out, download a free ReadyAPI trial.
Congratulations on creating your first REST project!
2.2. Create REST Project From WADL Definition
-
In the Navigator, right-click Projects and select New REST Project.
After that, the New REST Project dialog will appear.
Note: To create a new REST project, you can also press
CTRL+ALT+N(in Windows) orCMD+ALT+N(in OS X). -
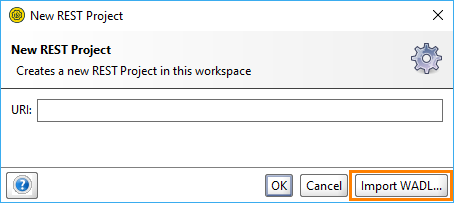
In the dialog, click Import WADL.
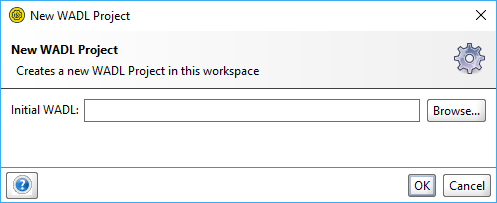
The New WADL Project dialog appears.
-
In the dialog, specify the path to the initial WADL file that describes the available resources and operations.
Tip: You can use the sample WADL file (sample-service.wadl) located in your system’s user directory, in the SoapUI-Tutorials\WSDL-WADL folder.
-
Click OK.
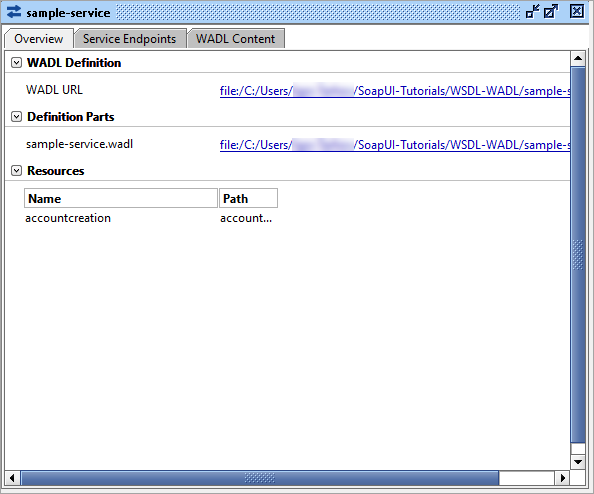
The new project will appear in the Navigator, along with the web service operations available for the REST API in question. As in the example above, you can then double-click the name of the project to get a project overview:
Double-click the name of the service to get the service overview:
Next Steps
Check out SoapUI 101, our comprehensive beginner’s guide to API testing! It’s loaded with step-by-step tutorials for getting with SoapUI and ReadyAPI: Read the Guide
Track Test Performance As You Scale Your API Testing
Compare: All ReadyAPI Features
Support for SOAP and REST API Testing.
Easy multi-environment switching.
Detailed test history and test comparison reporting.
Support for SOAP, REST, and GraphQL API Testing.
Easy multi-environment switching.
Detailed test history and test comparison reporting.